Lifecycle Workflows and Custom Extensions - step-by-step-guide

Welcome to my new blog post!
Lifecycle Workflows are a fantastic way to trigger reactions based on user information, consisting of multiple workflow steps. A classic example involves the two user attributes “employeeHireDate” and “employeeLeaveDateTime”. Based on the timestamps they contain, actions can be triggered either at an exact time or a certain period before or after the timestamp —this can be configured as needed.
Other triggers for workflows can include changes in group memberships or modifications to a user account, such as updates to the “Department” attribute or any other attribute.
In this Article Microsoft describes this topic with a focus in the Identity Governance Dashboard. The interaction of Lifecycle Workflows with the Custom Extension Logic App and the details of the setup of actions in the Designer are not part of this document.
And if you’re new to the subject and not very familiar with Lifecycle Workflows, especially Custom Extensions and Logic Apps, you may quickly run into challenges when trying to set this up in a lab environment. In addition to the Microsoft examples, there are many great examples that describe working with Custom Extensions. However, I’ve noticed that most of them assume prior knowledge of Logic Apps, which not everyone may have. Especially, the parameterization of actions and the interaction with User Identity Informations can be challenging at various points.
That’s why this article provides a step-by-step guide outlining the individual steps needed to add a Custom Extension and highlighting key aspects to watch out for.
For the lifecycle workflow steps, there are predefined tasks that cover the most common functions, such as assigning licenses, modifying group memberships, and more. However, administrators quickly reach the limits of the predefined options—so what then? This is exactly where Custom Extensions comes into the game. They consist of a Logic App, which in turn becomes a task within a workflow.
For our example, let’s say you want to send an email with relevant information to a new hire’s personal email address, welcoming them with some basic information. Since private email addresses are not standard attributes in a Lifecycle Workflow, we use the Graph API within the Logic App to retrieve all relevant details about the user object. Along the way, we’ll explore the actions that make up the Logic App and the potential they offer.
The following step-by-step guide consists of the following tasks:
- Creating the Custom Extension from the Lifecycle Workflow Dashboard with a Managed Identity
- Granting the Managed Identity the necessary permissions to execute the required actions
- Executing a Graph API query to retrieve user object information (e.g., otherMails)
- Sending the email to the address contained in otherMails via a dedicated action
- Returning an “OK” status to the Lifecycle Workflow
After this overview, we will now take a closer look at each step in detail.
The starting point is the Lifecycle Workflows dashboard in the Entra Admin Center.
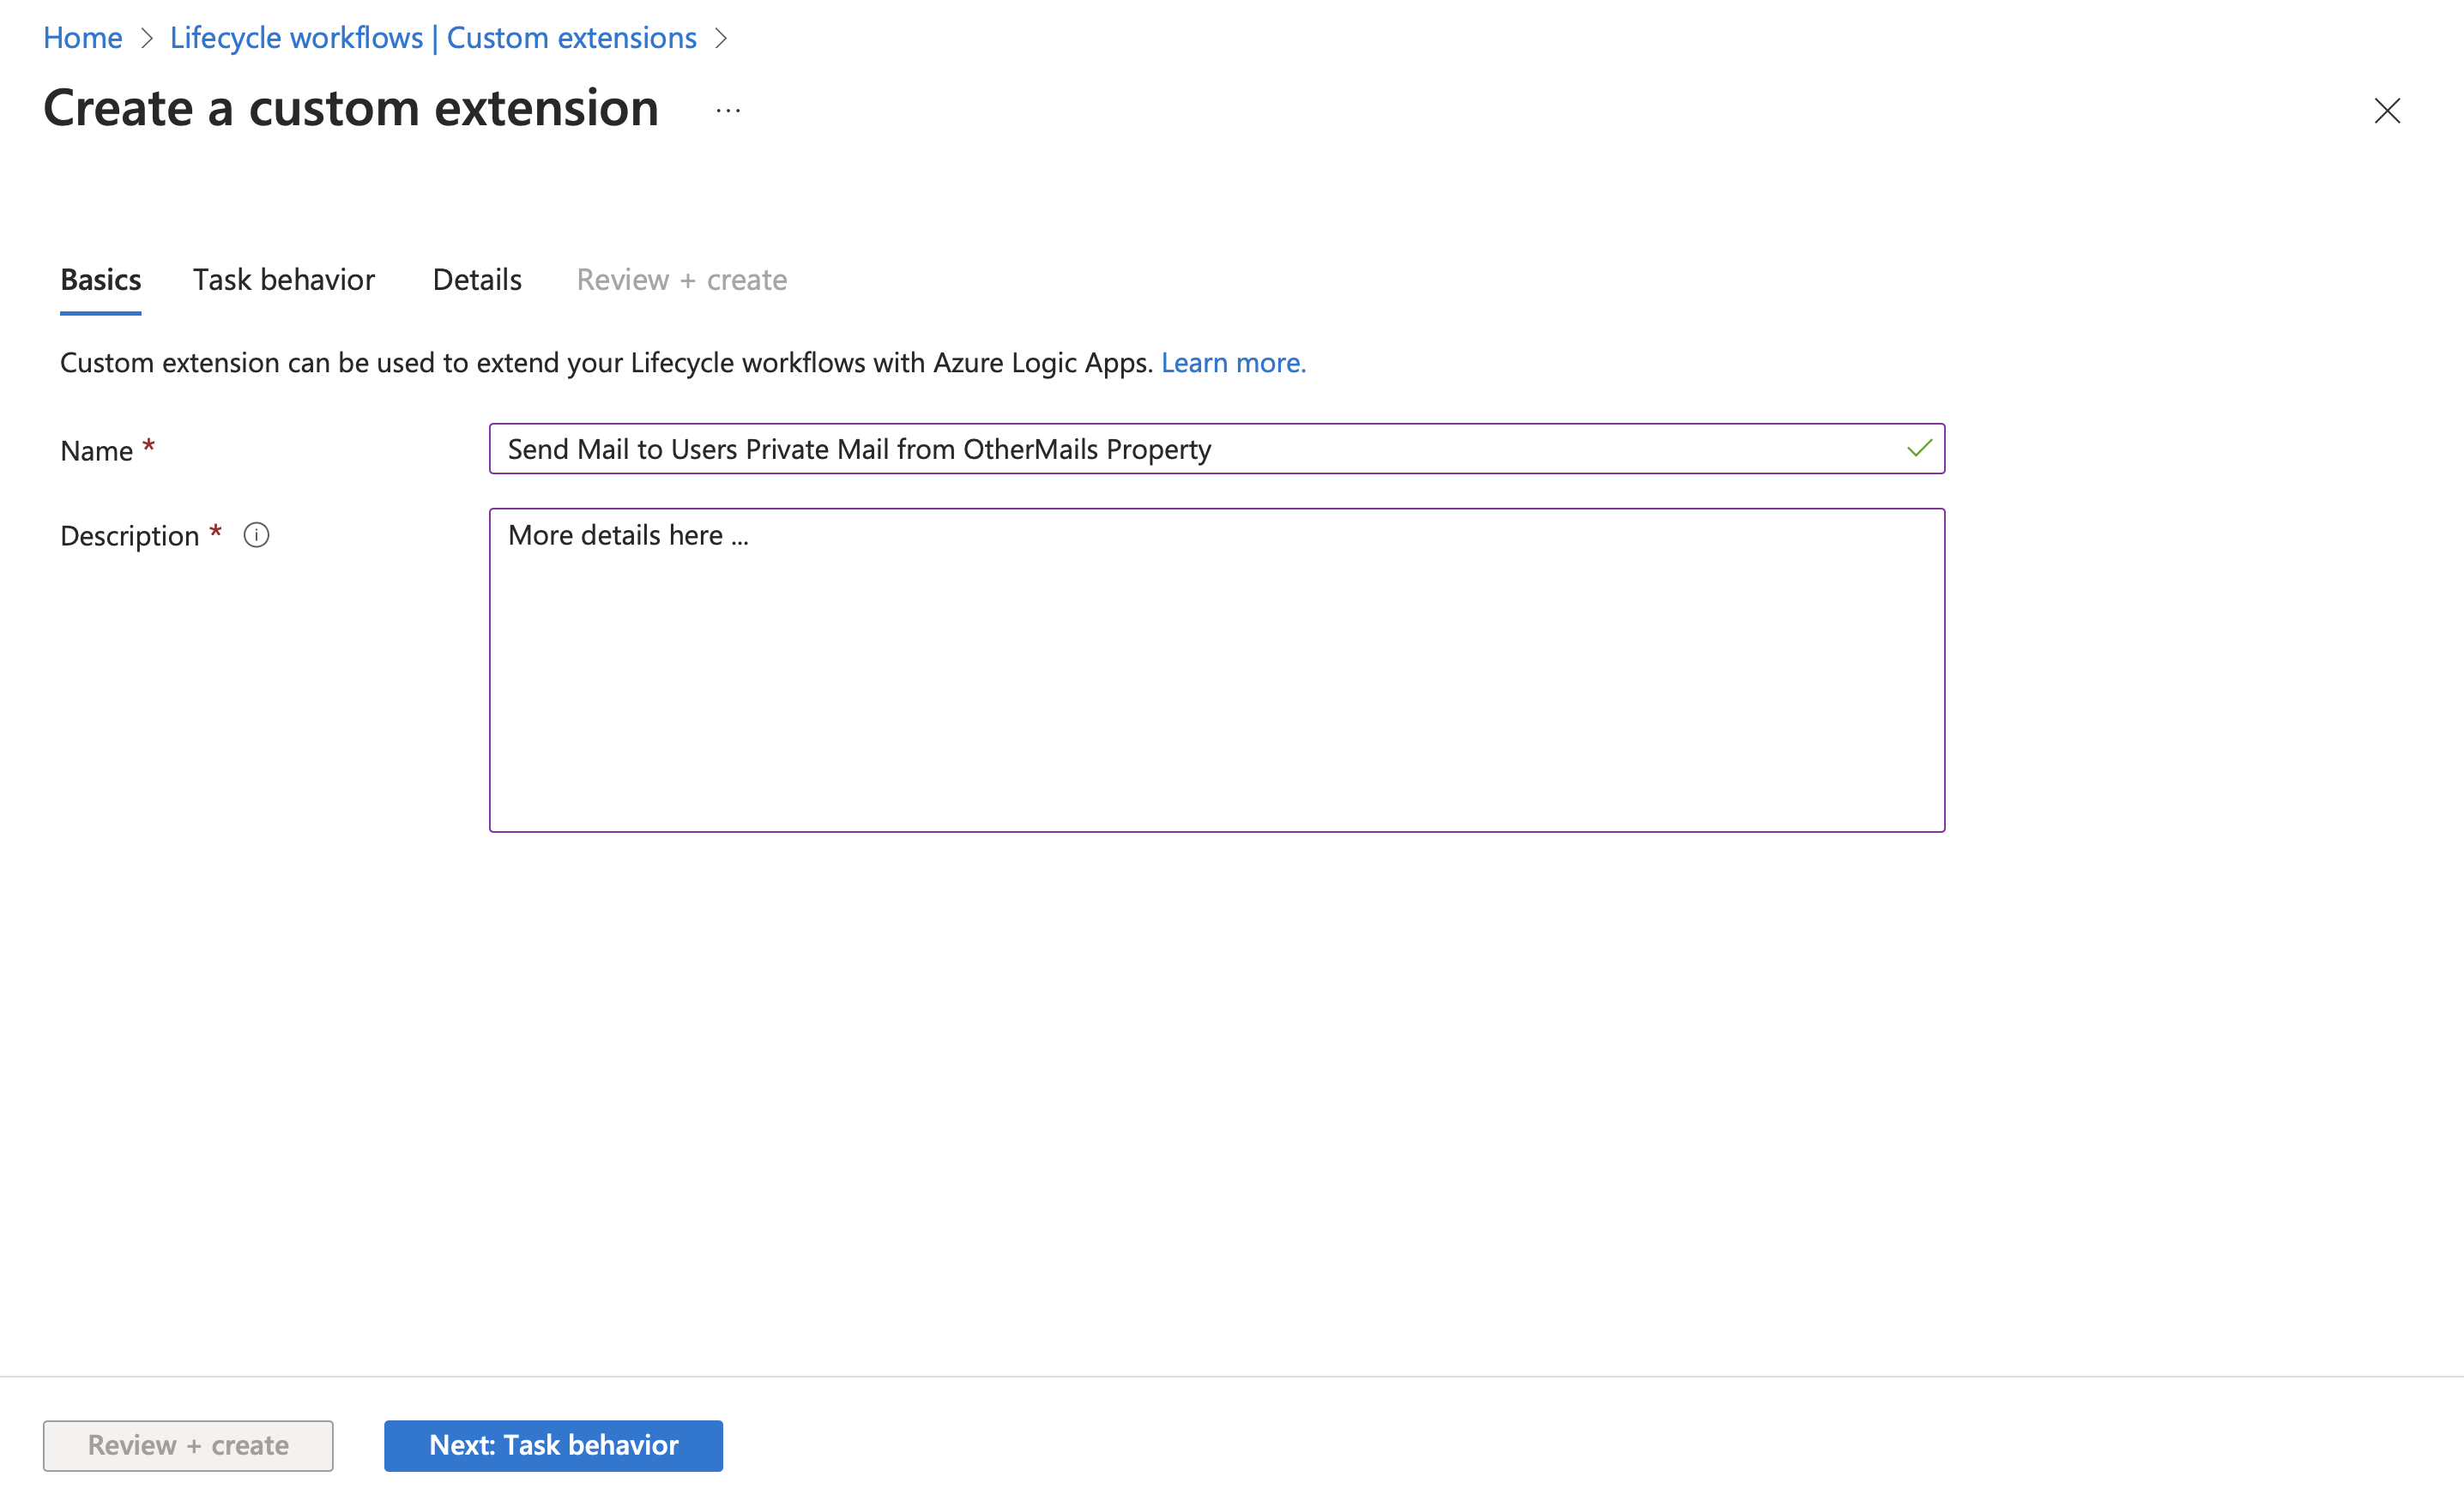 Figure 1: starting point to create a Custom Extension
We use a Managed Identity for authentication.
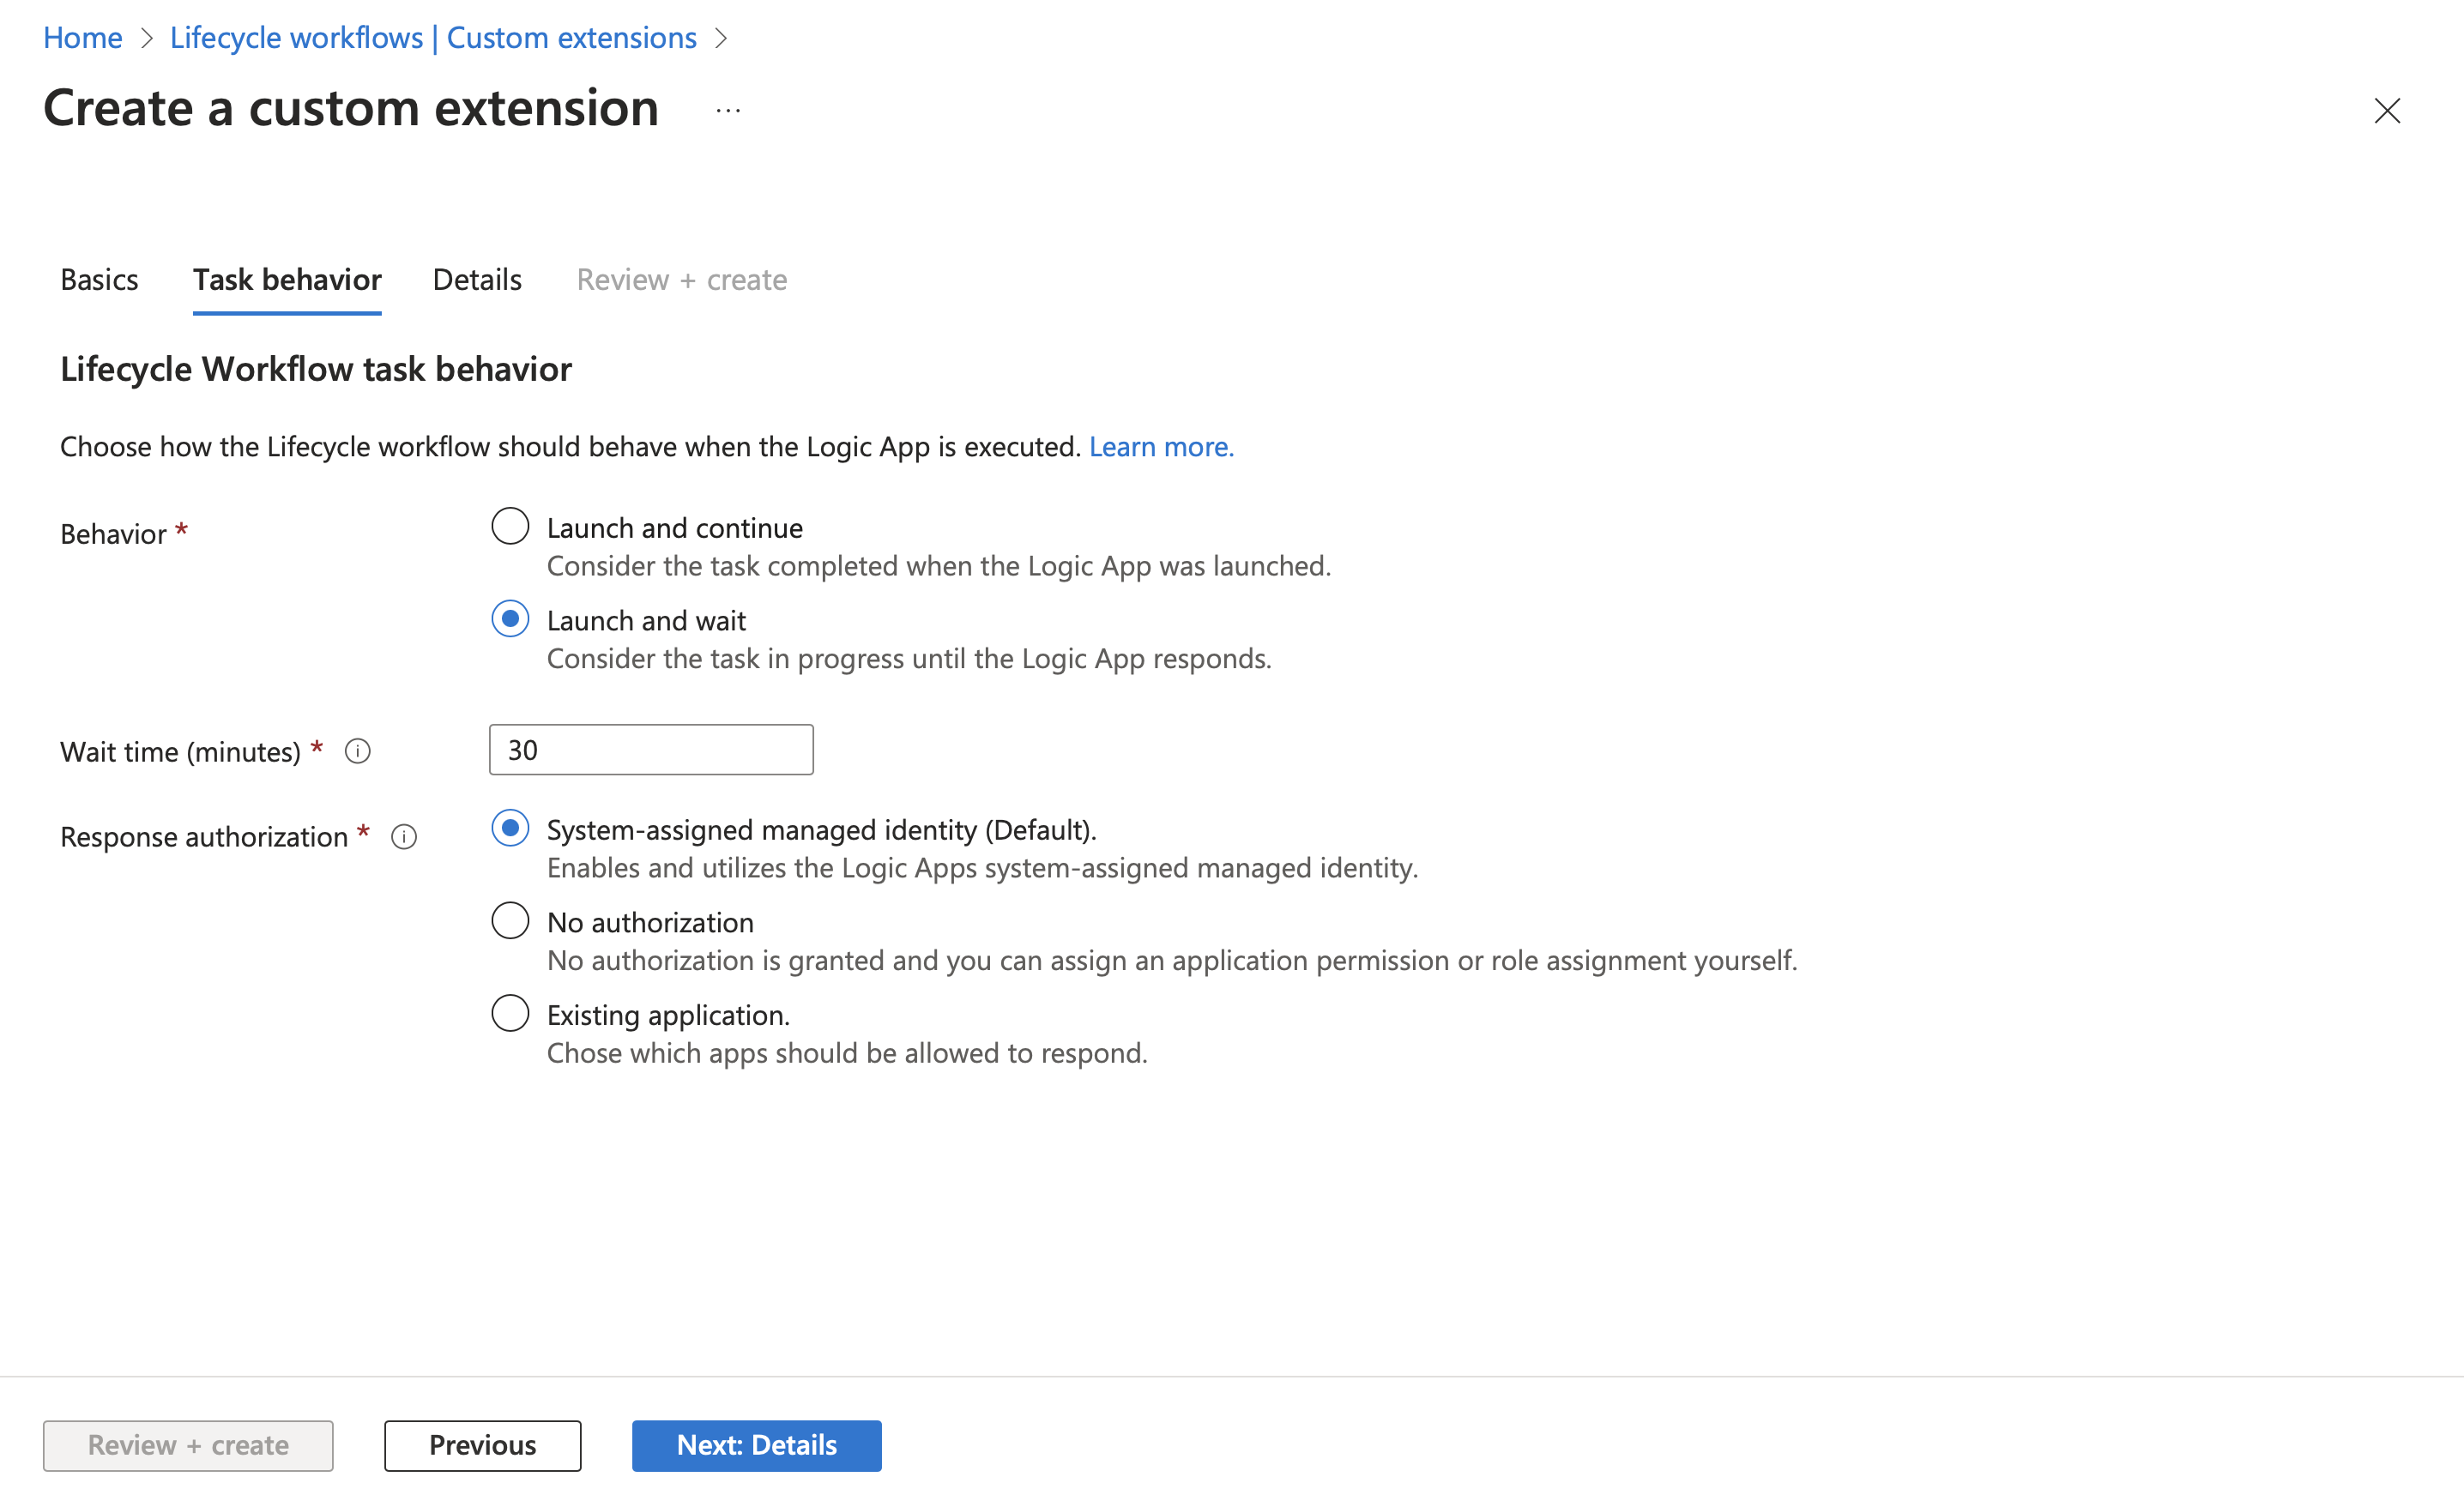 Figure 2: Set Parameter for the Custom Extension
This is the final step in the Lifecycle Workflows dashboard, which directly creates the Logic App in the Azure infrastructure.
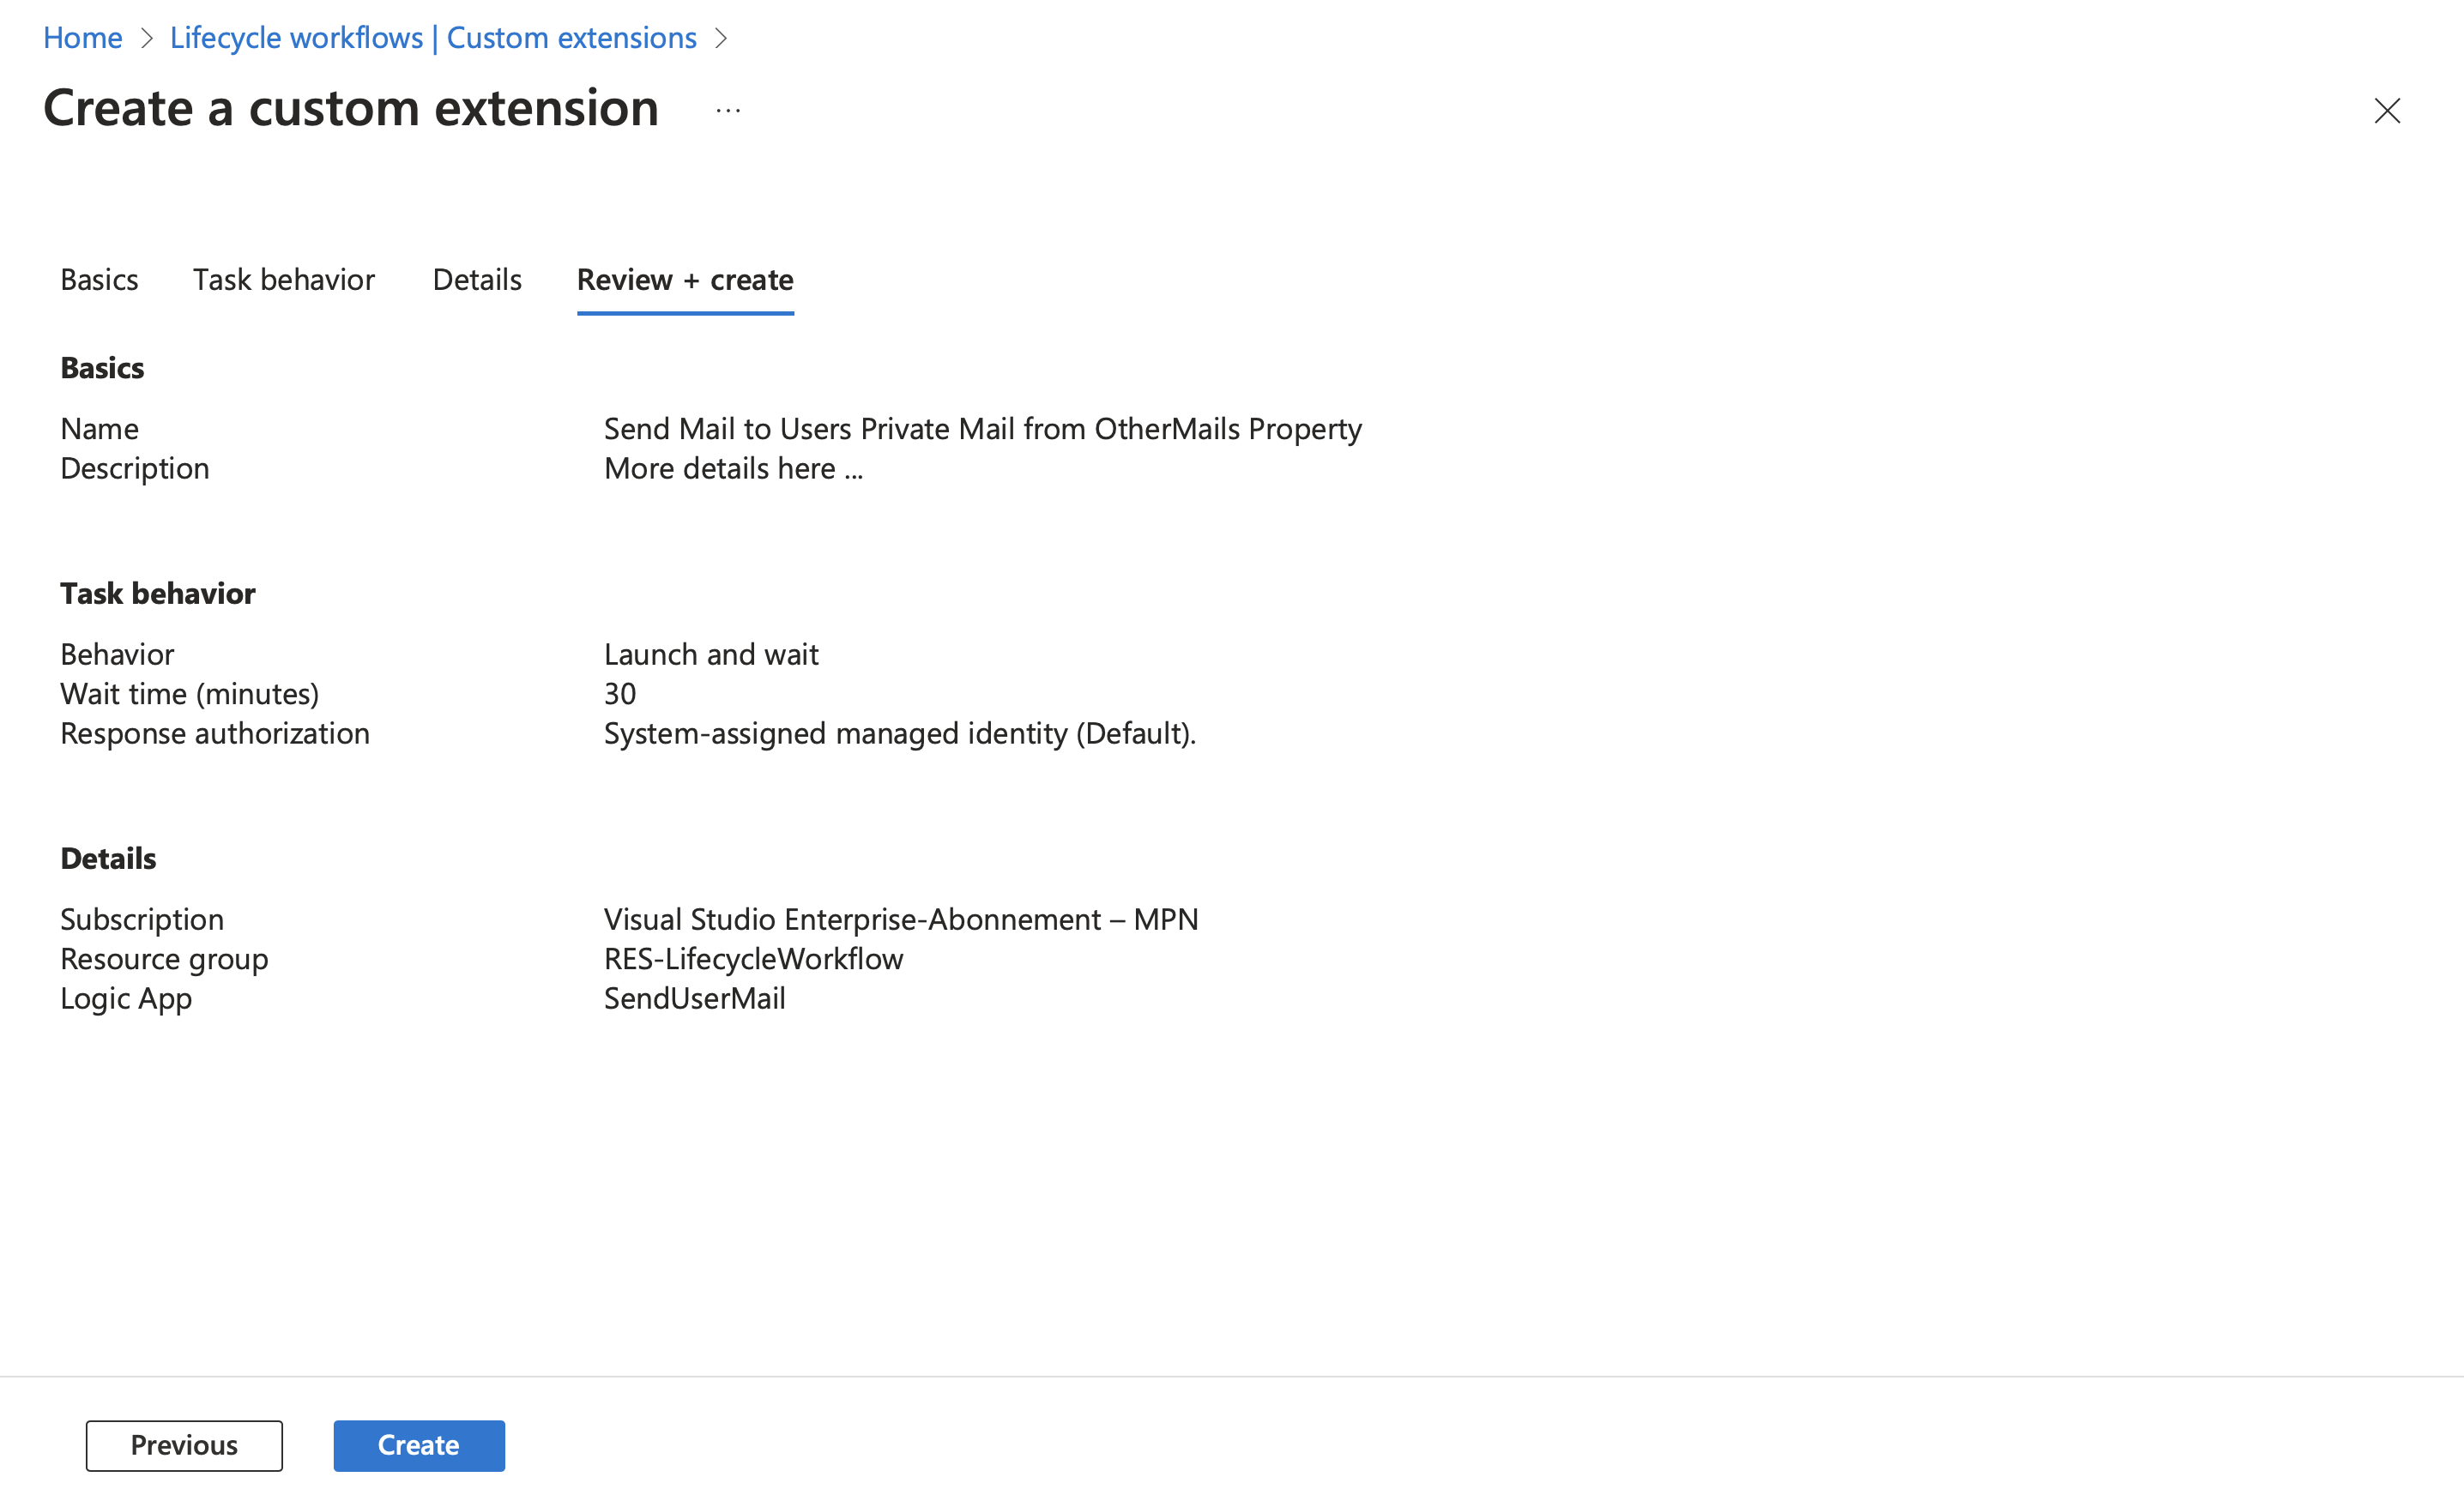 Figure 3: All set and we can go …
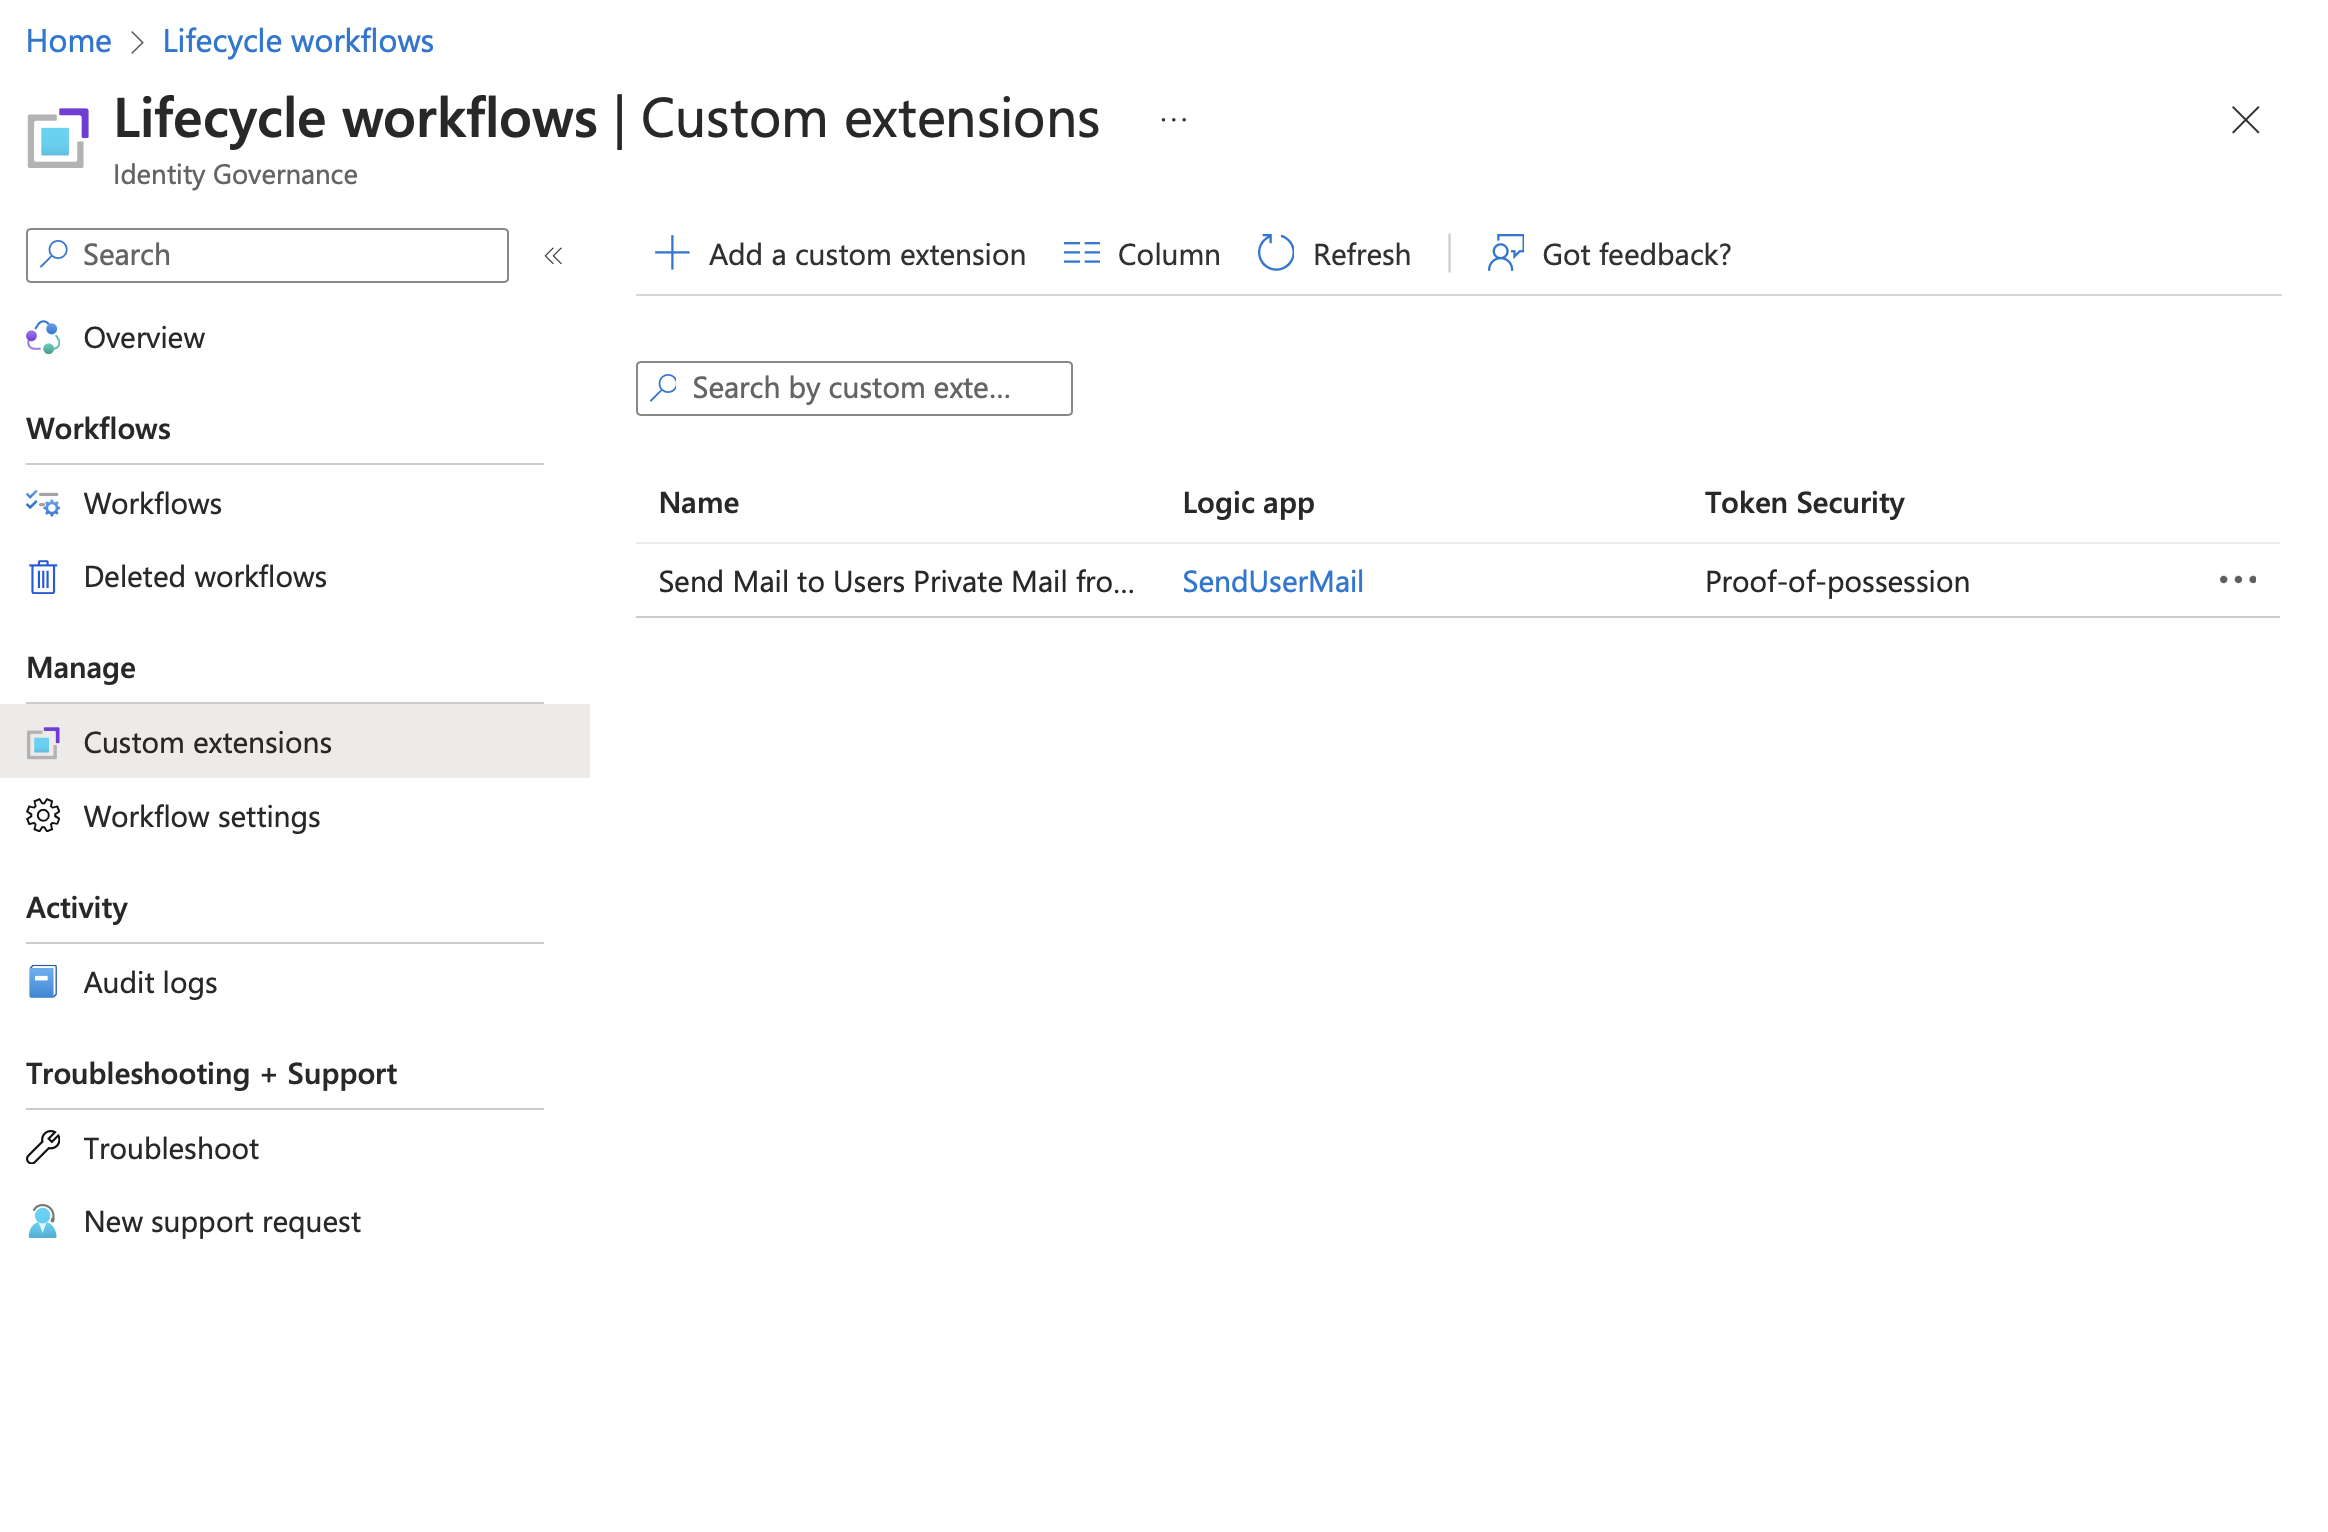 Figure 4: Custom Extension is created… next steps are waiting in the Logic App Configuration
Once the extension has been created along with the Logic App, the next step is to set up the Logic App. In our example, I created the Logic App directly from the Lifecycle Workflow dashboard, so the app is already pre-configured and we can get started right away. However, it is also possible to use an existing Logic App; in this case, some additional steps are required to deploy the app. You can find more information on this in this Microsoft Article.
The managed identity created with the Logic App must be initially authorized.
To do this, we retrieve the ID of the service principal, which you can find in the Logic App dashboard under “Identity.”
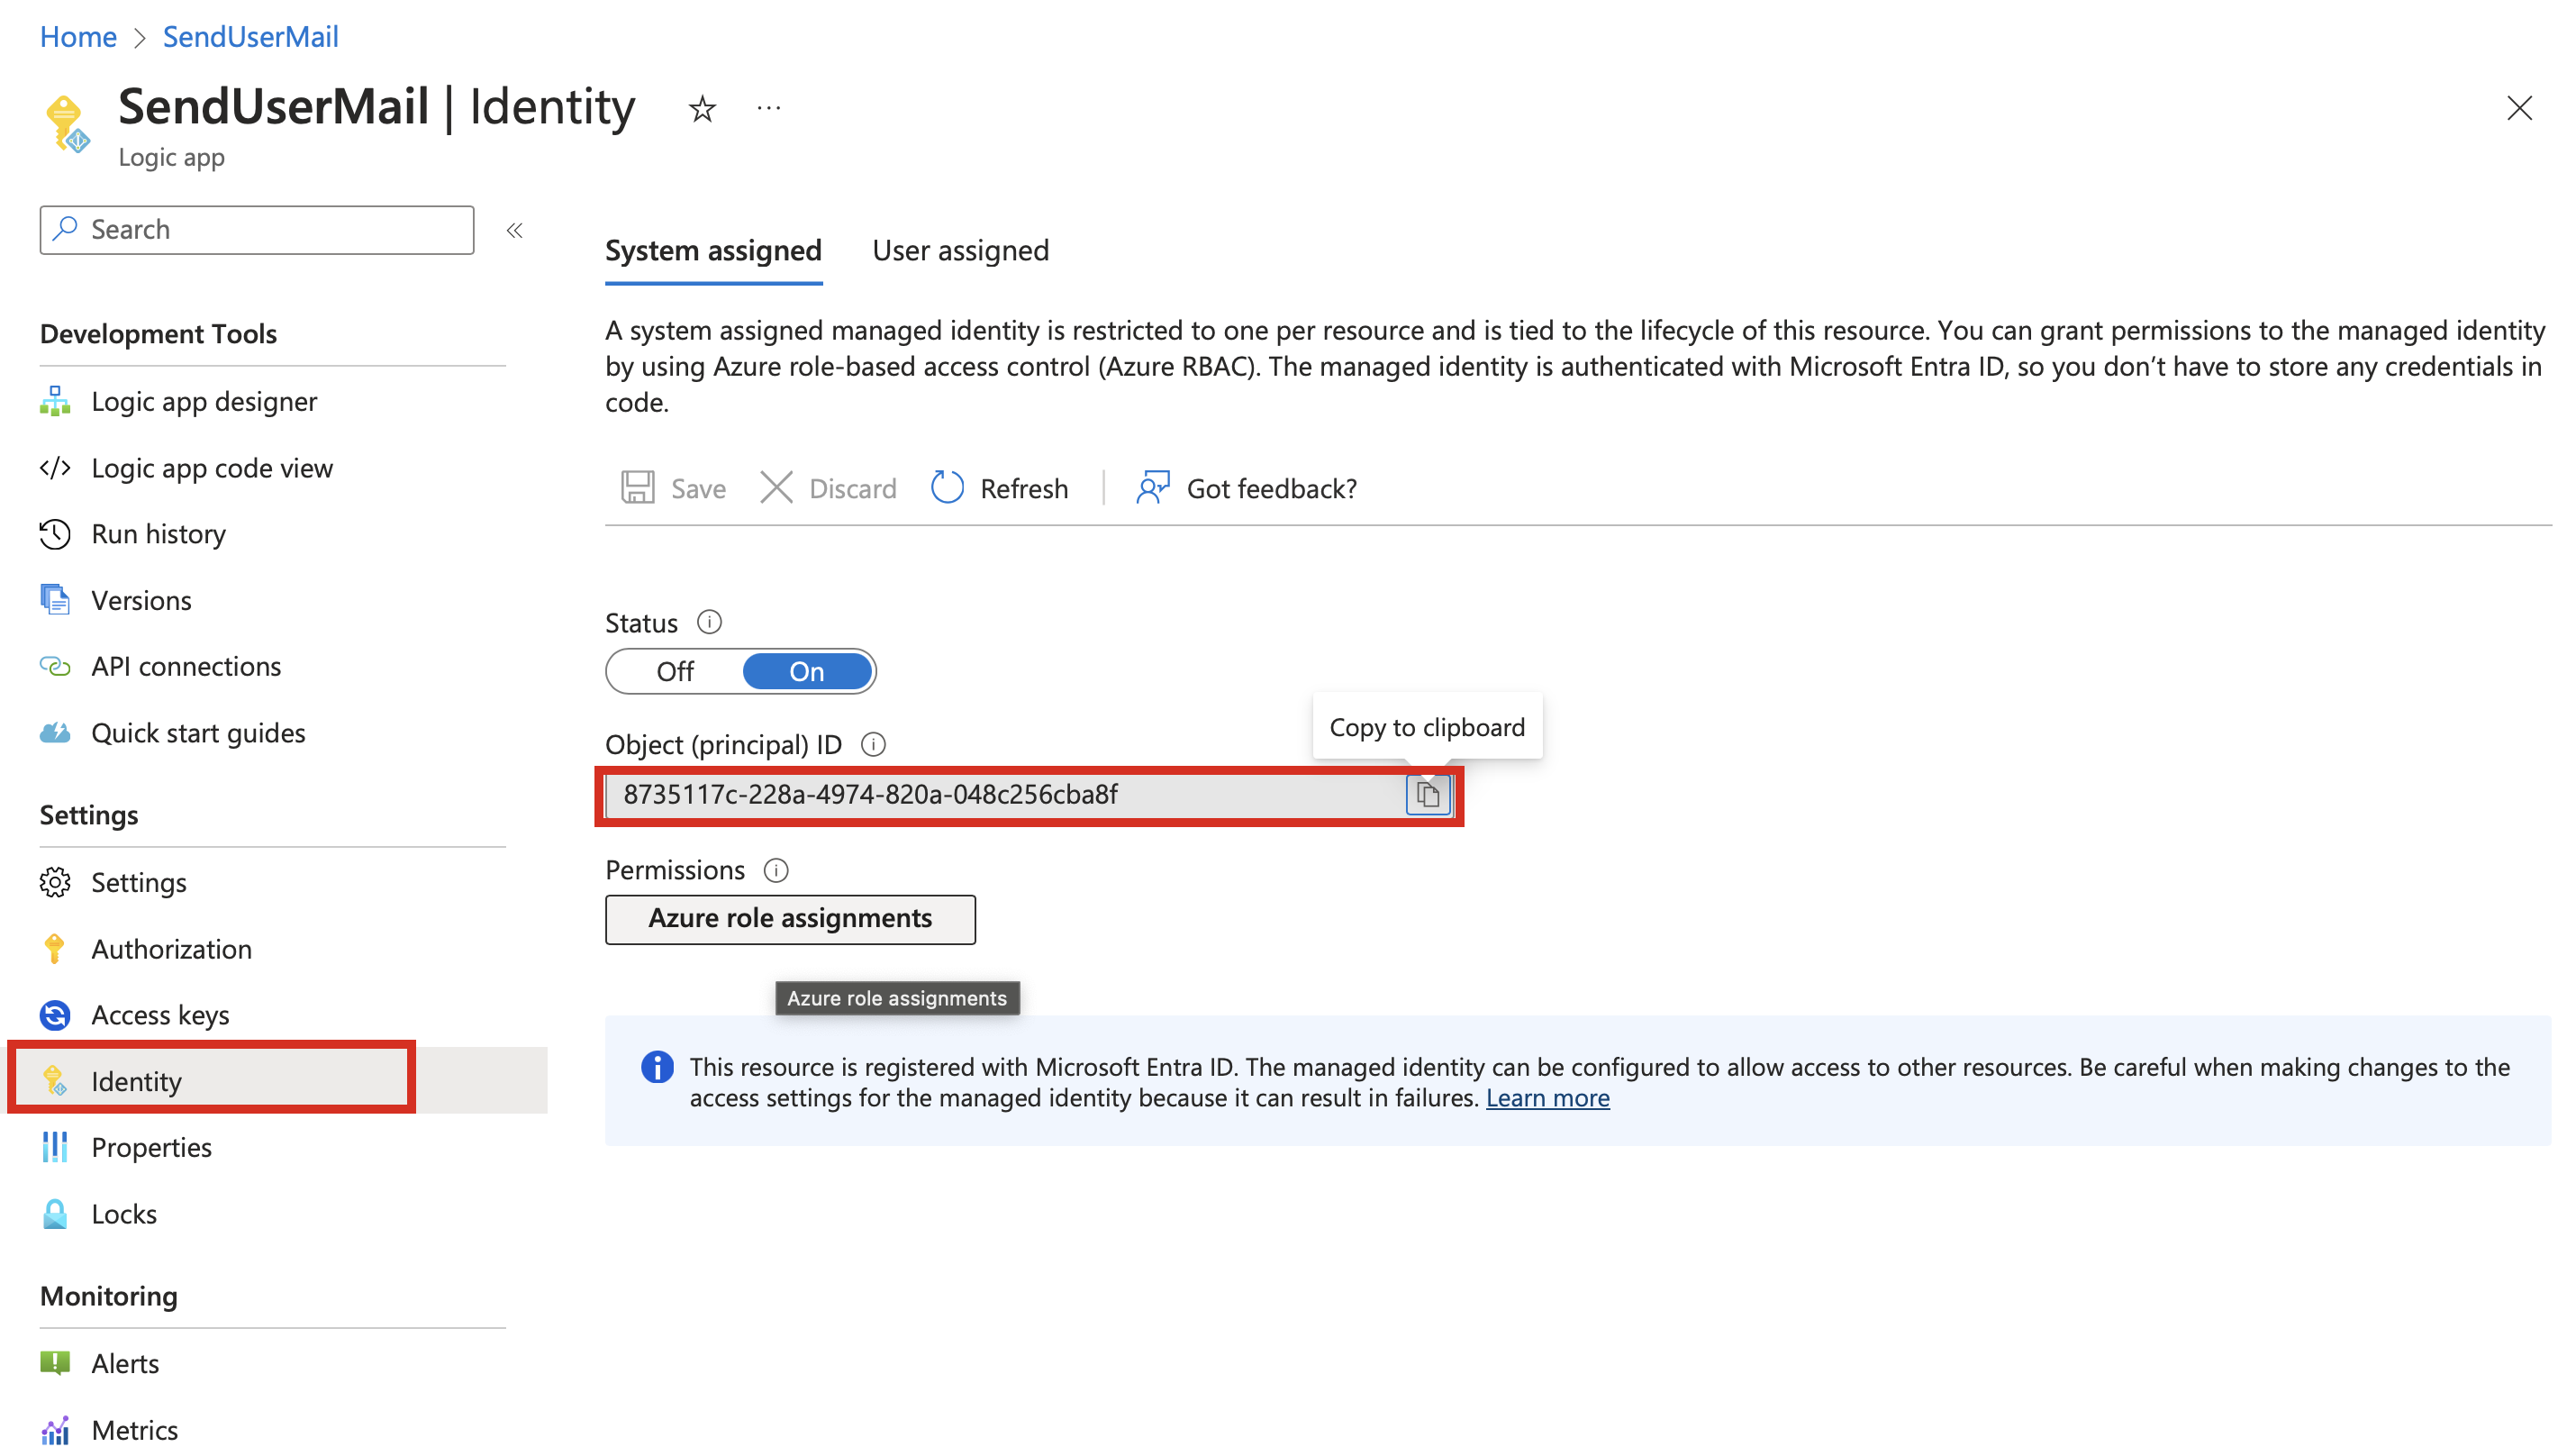 Figure 5: Logic App has it’s own Service Principal
For our example, it is sufficient to assign the Directory Reader Role to the Service Principal.
Depending on the actions performed by the Logic App, additional permissions may be required, as the workflow runs in the context of the service principal.
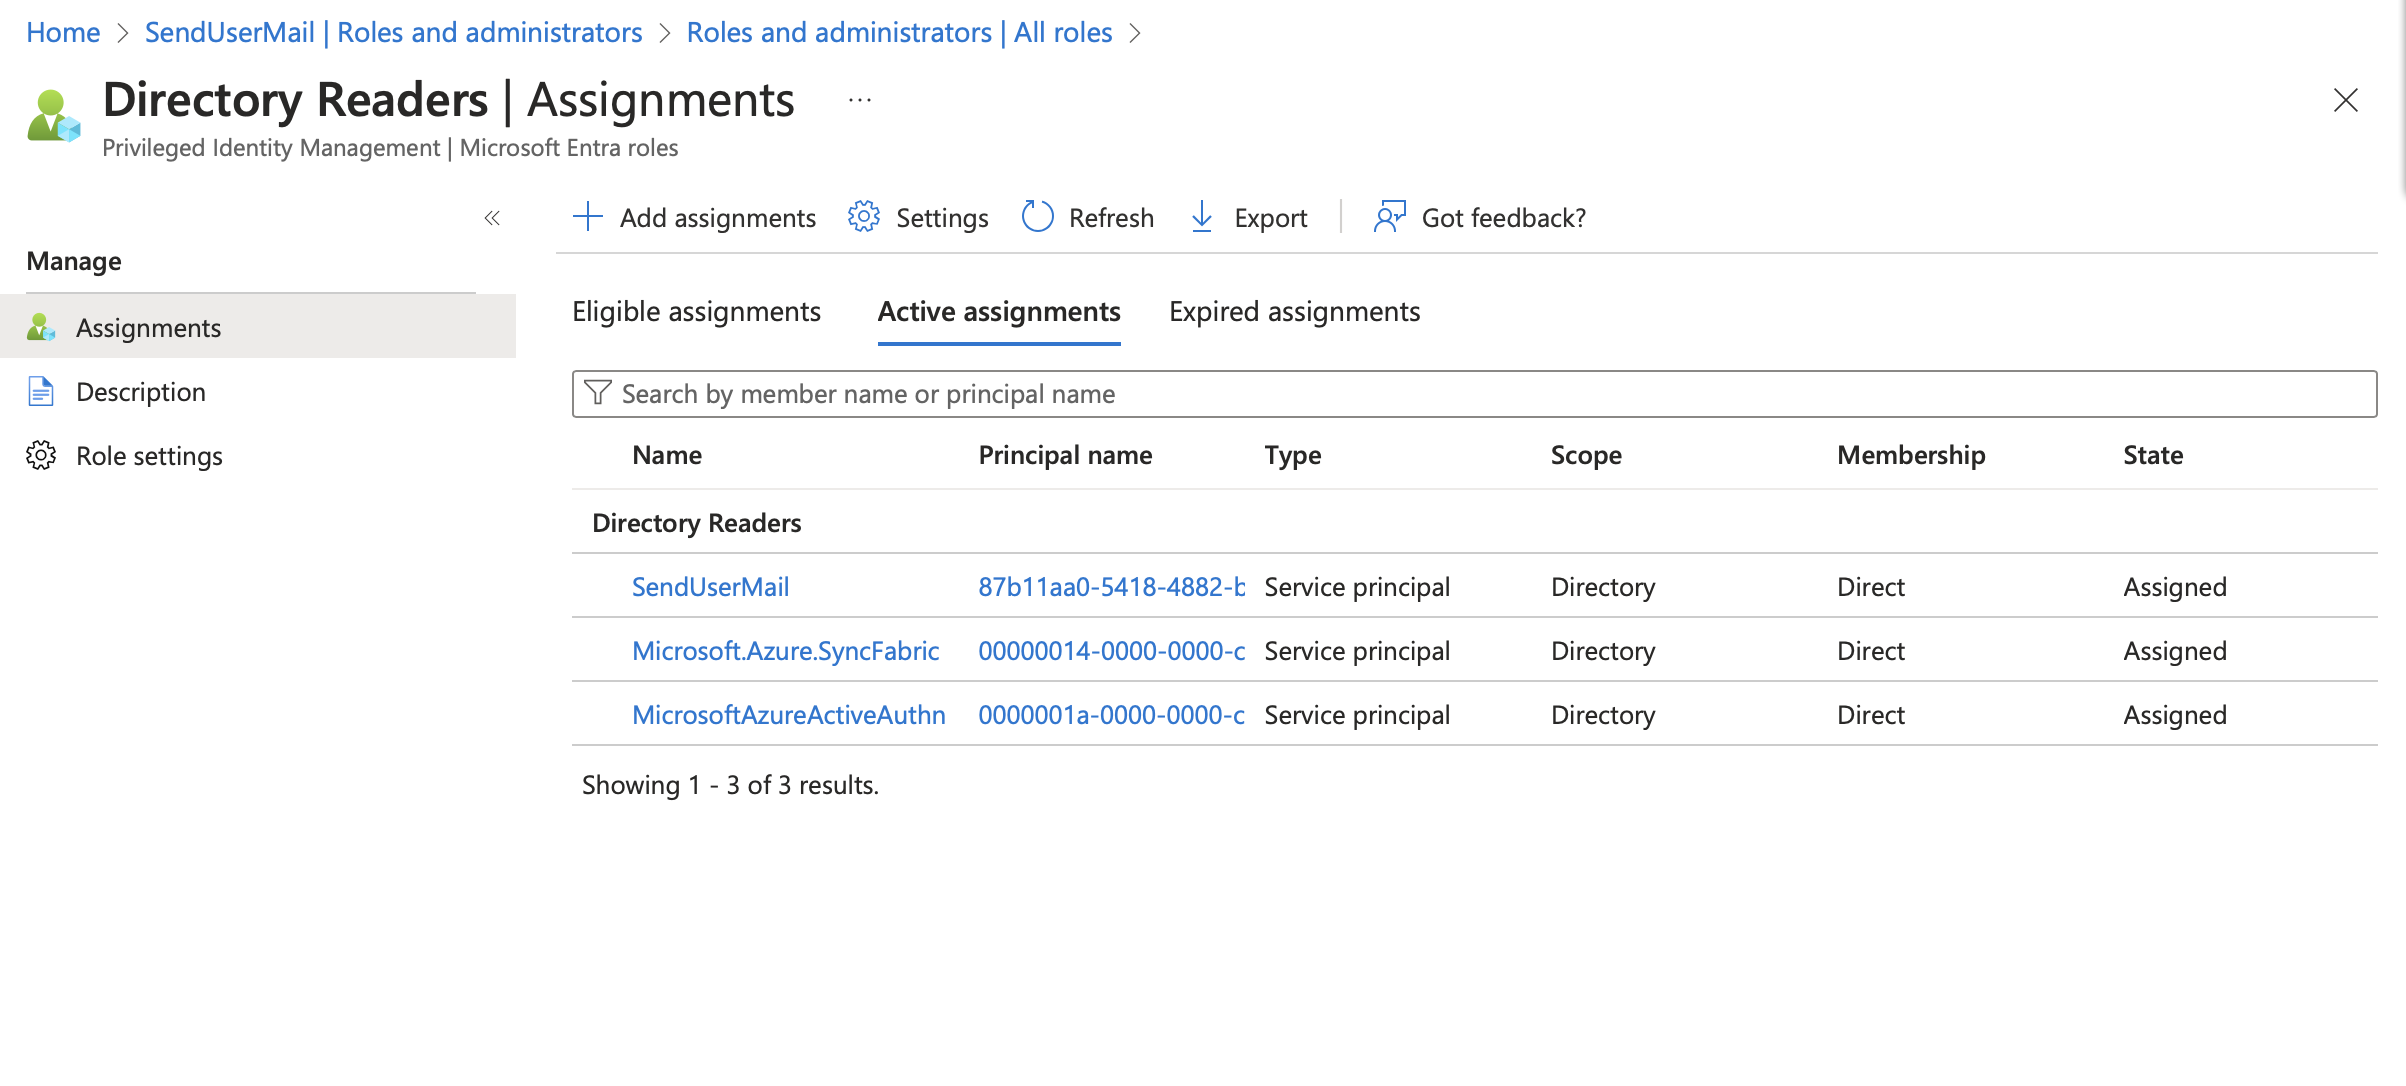 Figure 6: The Service Principal needs permissions according to the actions in the Logic App
The created Logic App already has an HTTP action, in addition to the start trigger that waits for a manual invocation by the workflow.
In the next step, we add an action to define the “Audience” variable. “Add an action…”
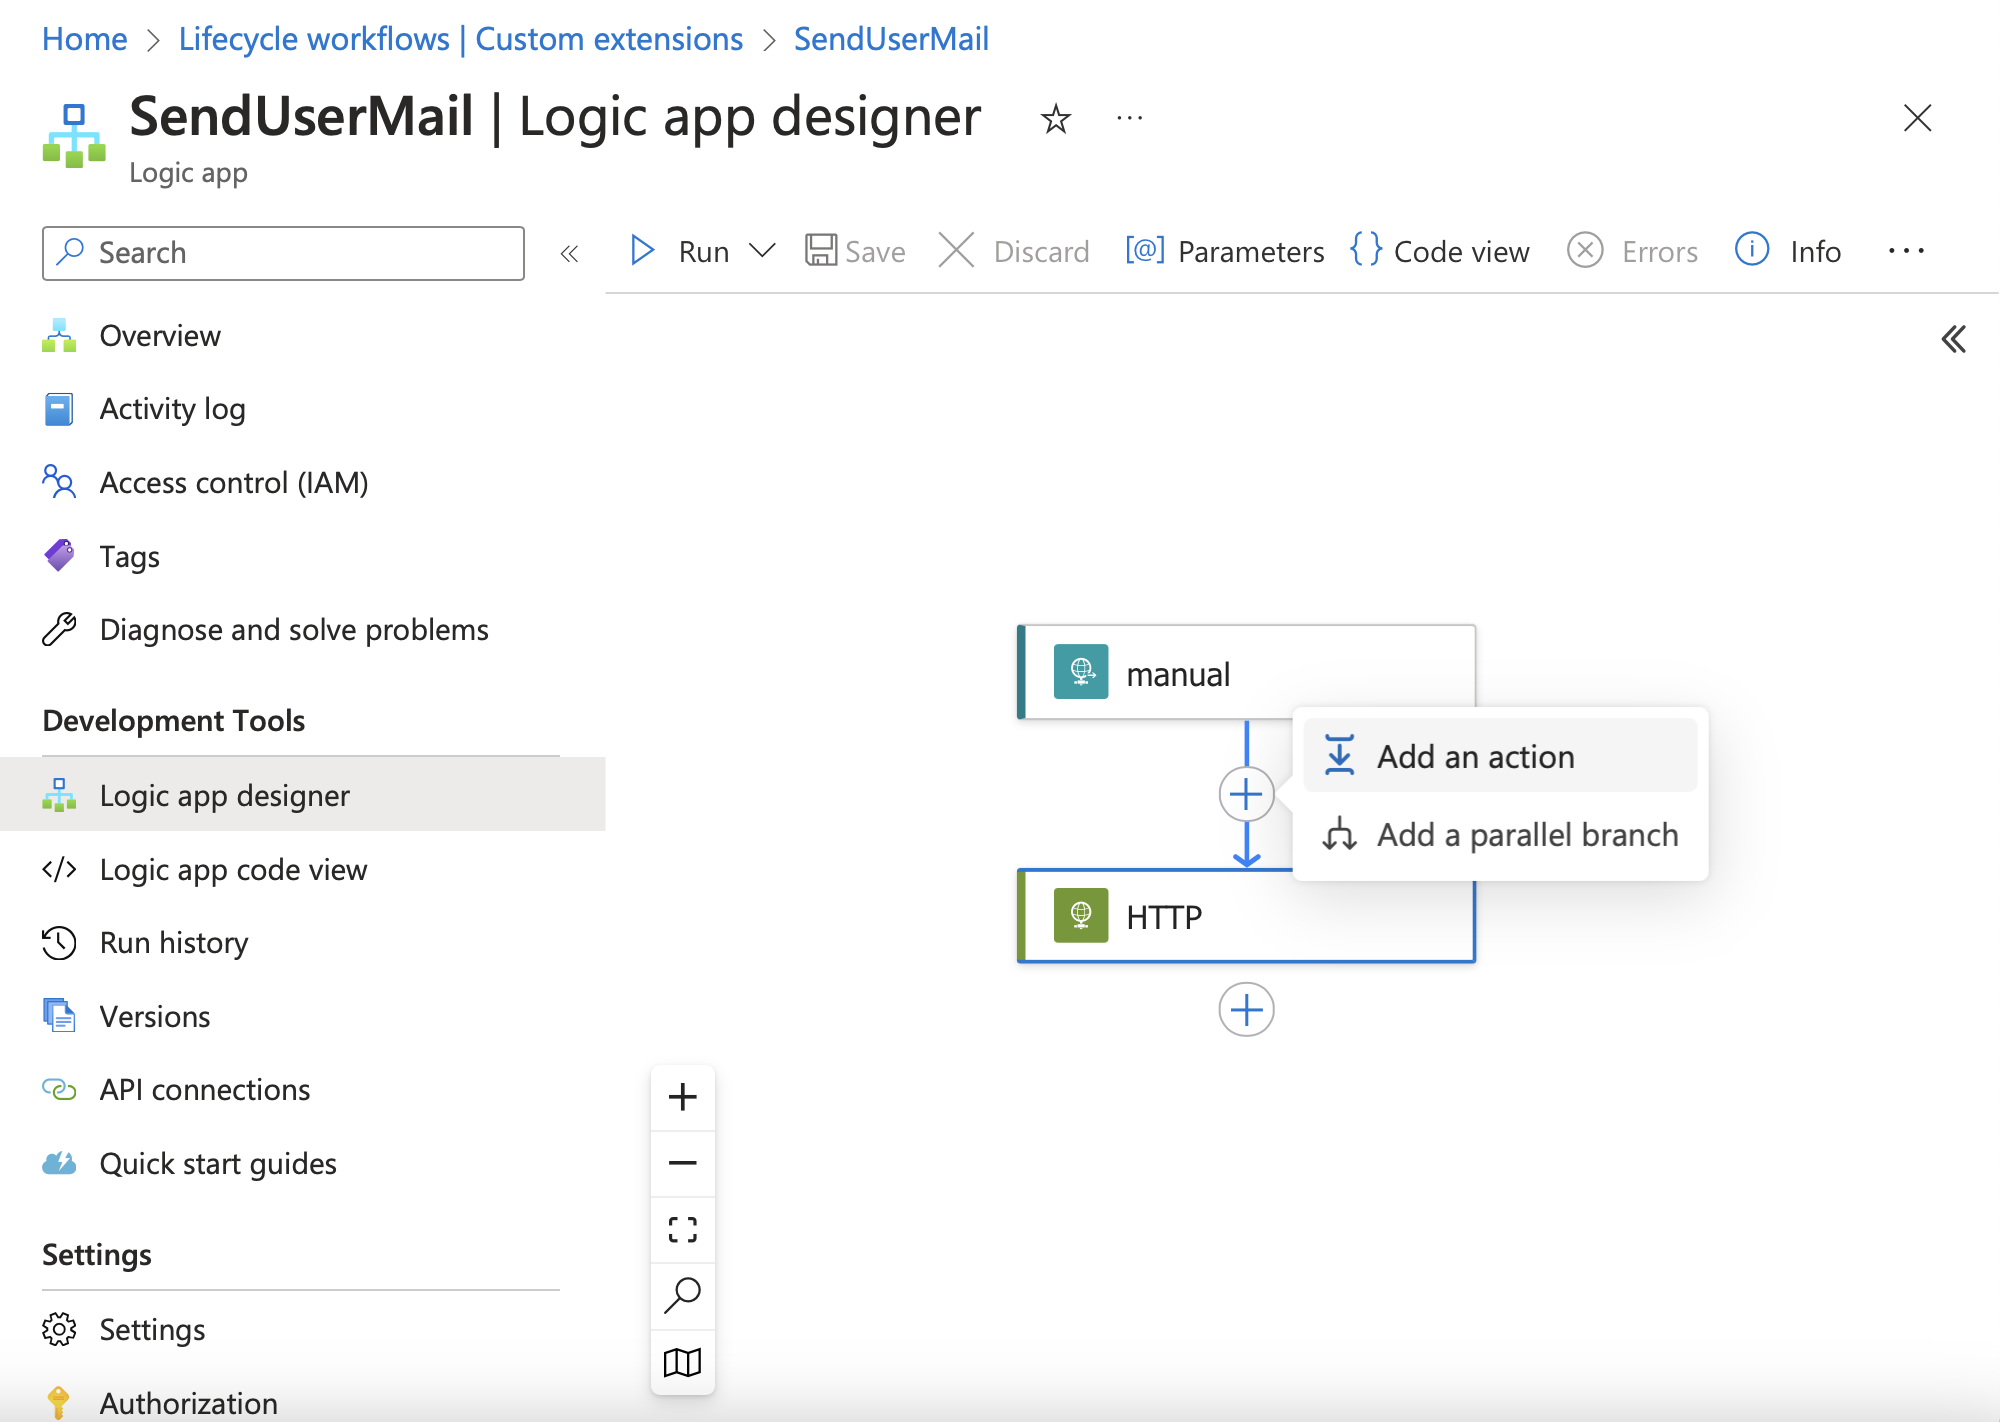 Figure 7: Designer view in a Logic App, an easy way to build a action sequence
… and we continue by adding the corresponding action.
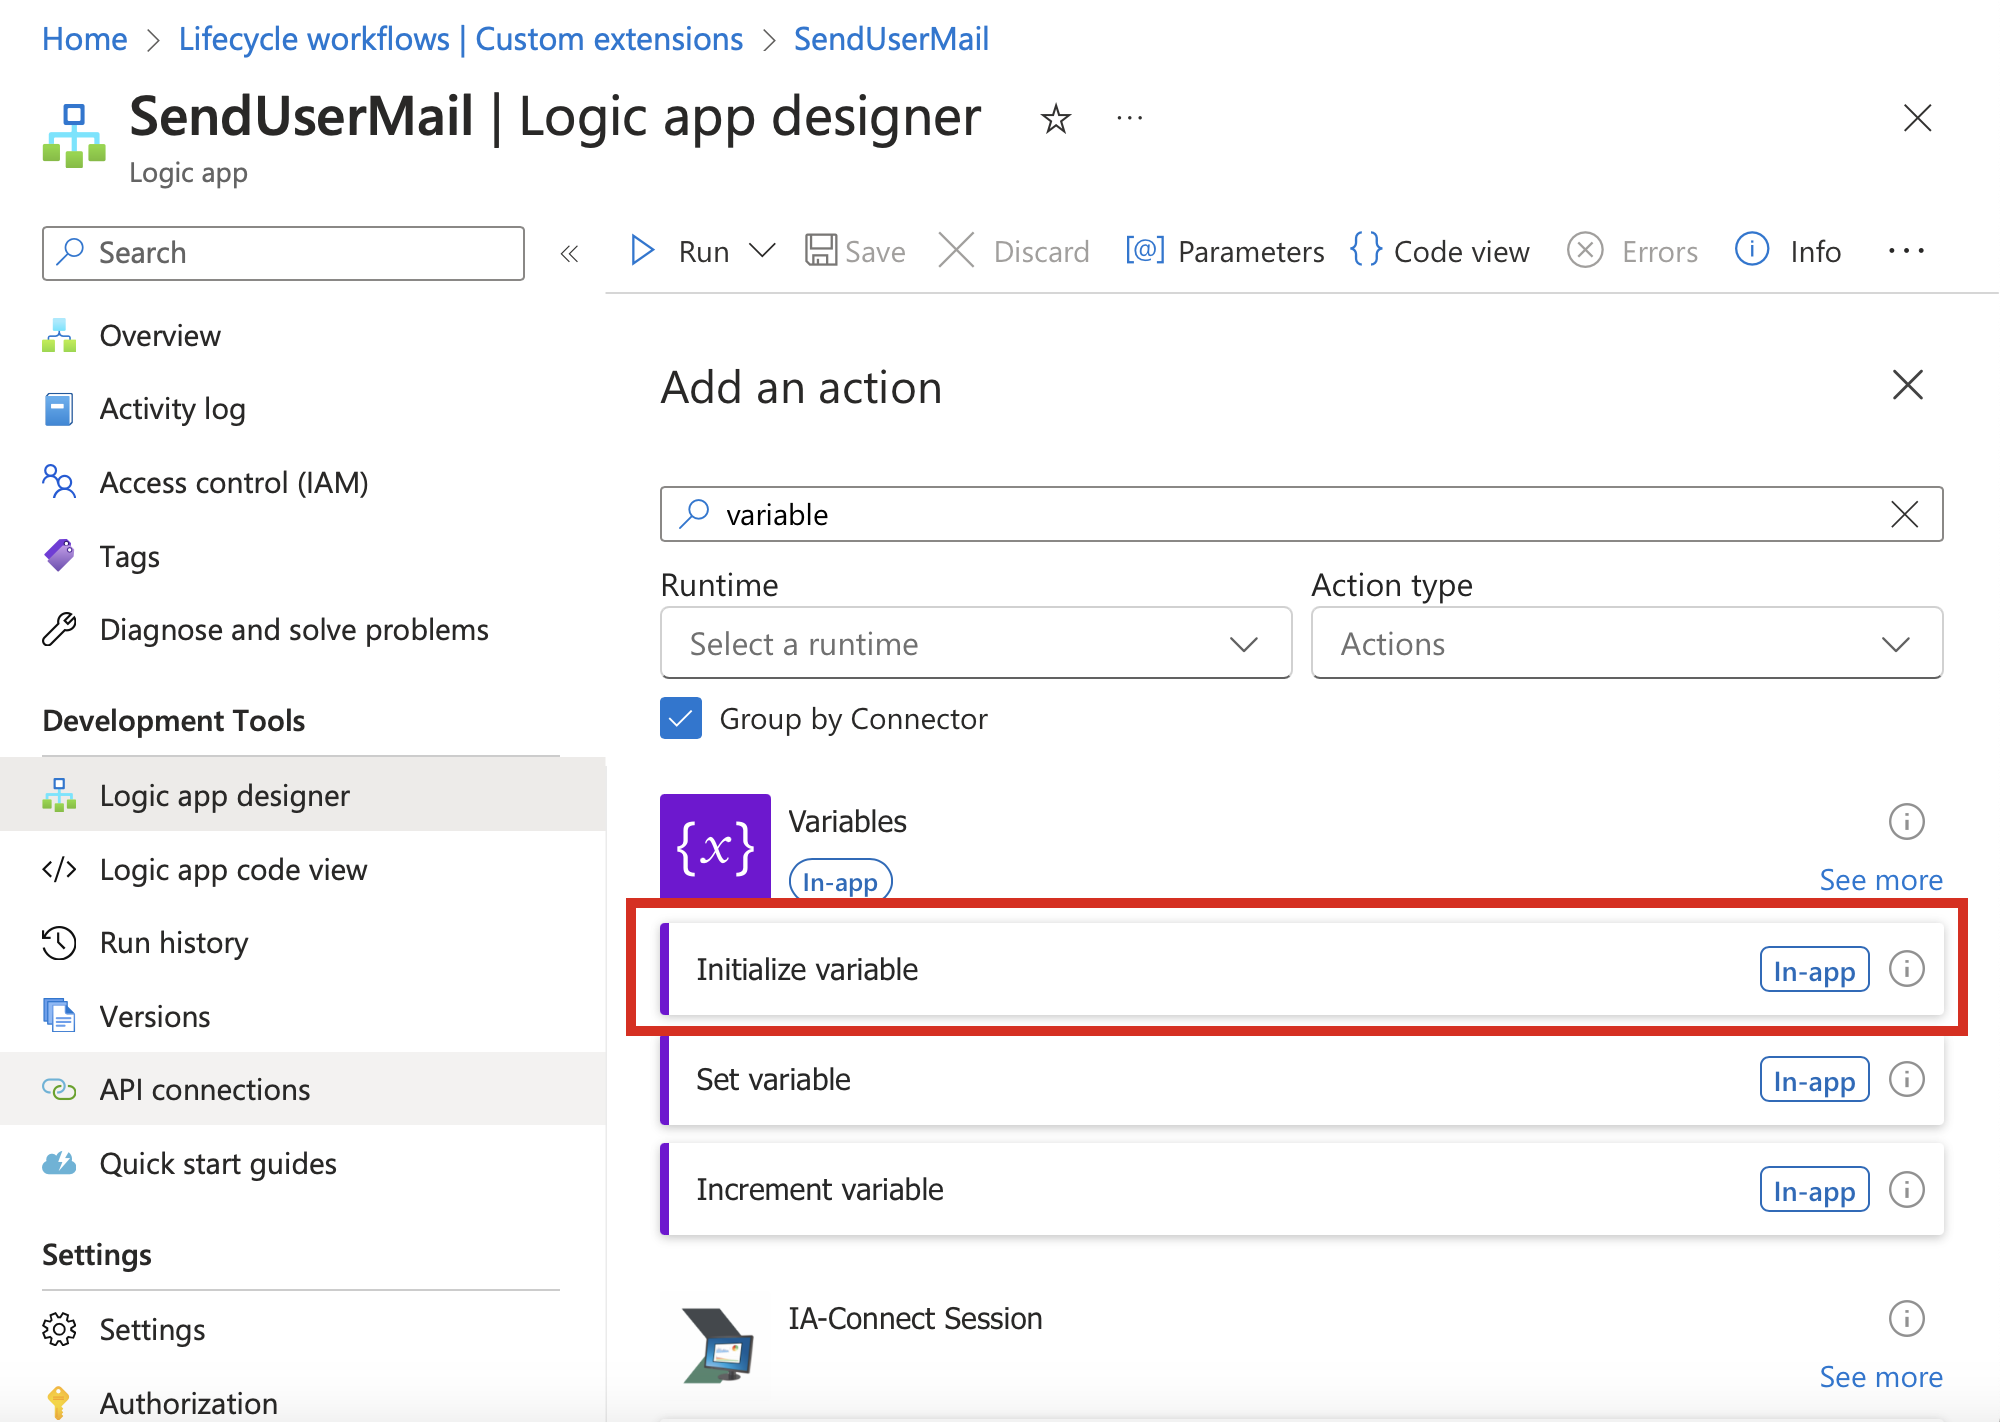 Figure 8: The ‘Variables’ action can be helpful
Our variable is called “Audience”, and we assign it the URL to the Graph API.
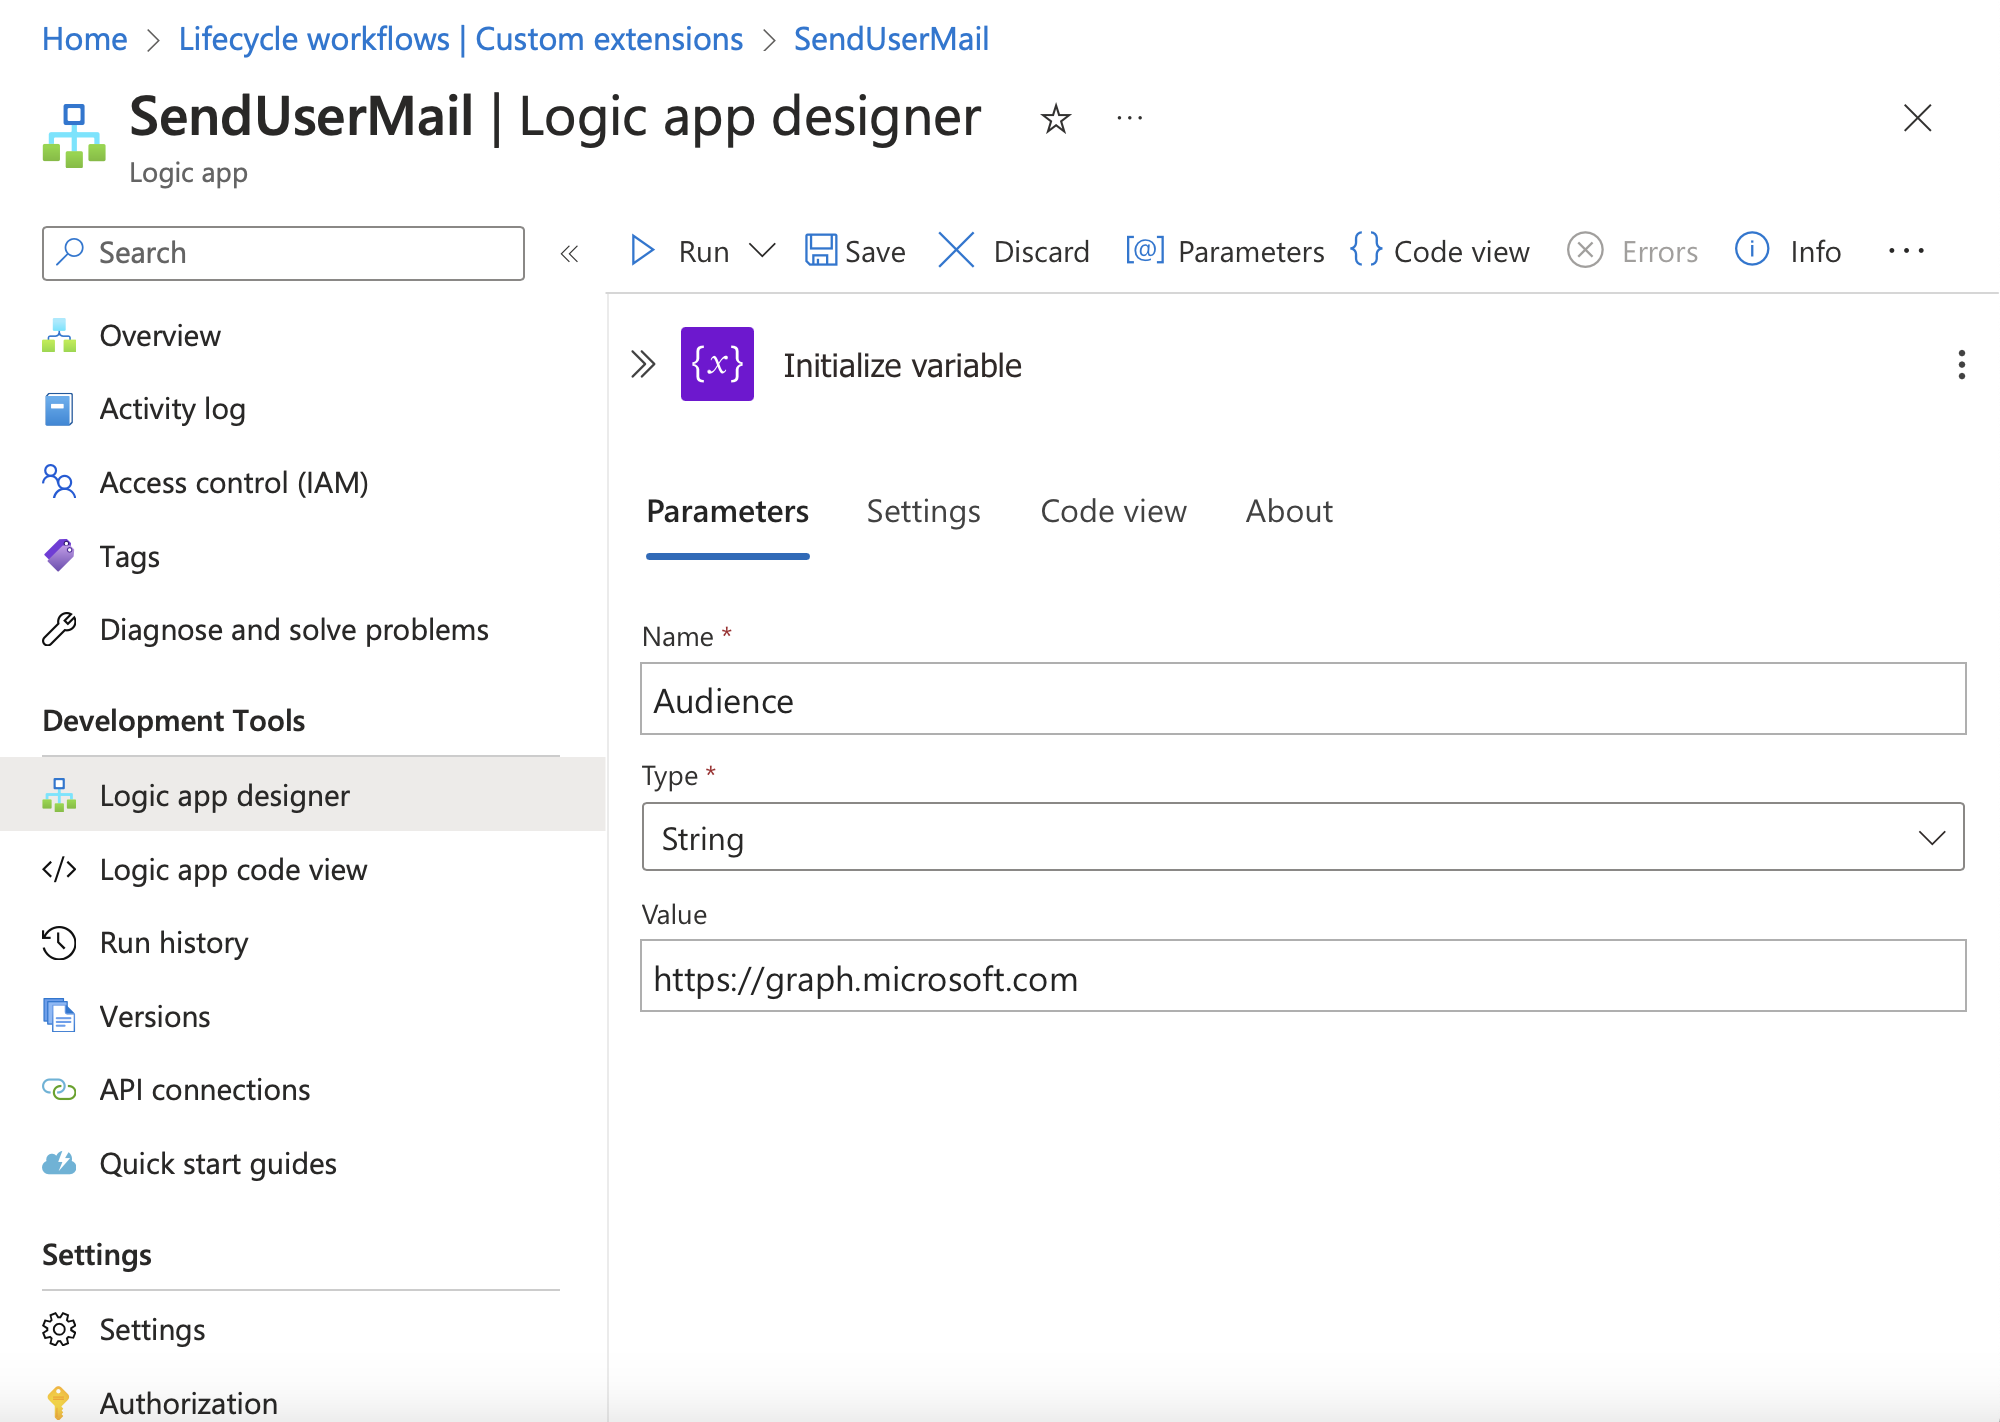 Figure 9: ‘Variables’ action parameter options
After saving, our app temporarily looks like this in the designer:
 Figure 10: Our Logic App is growing …
In the next step, we adjust the HTTP action so that it retrieves all relevant user information via the Graph API and give the action a meaningful name.
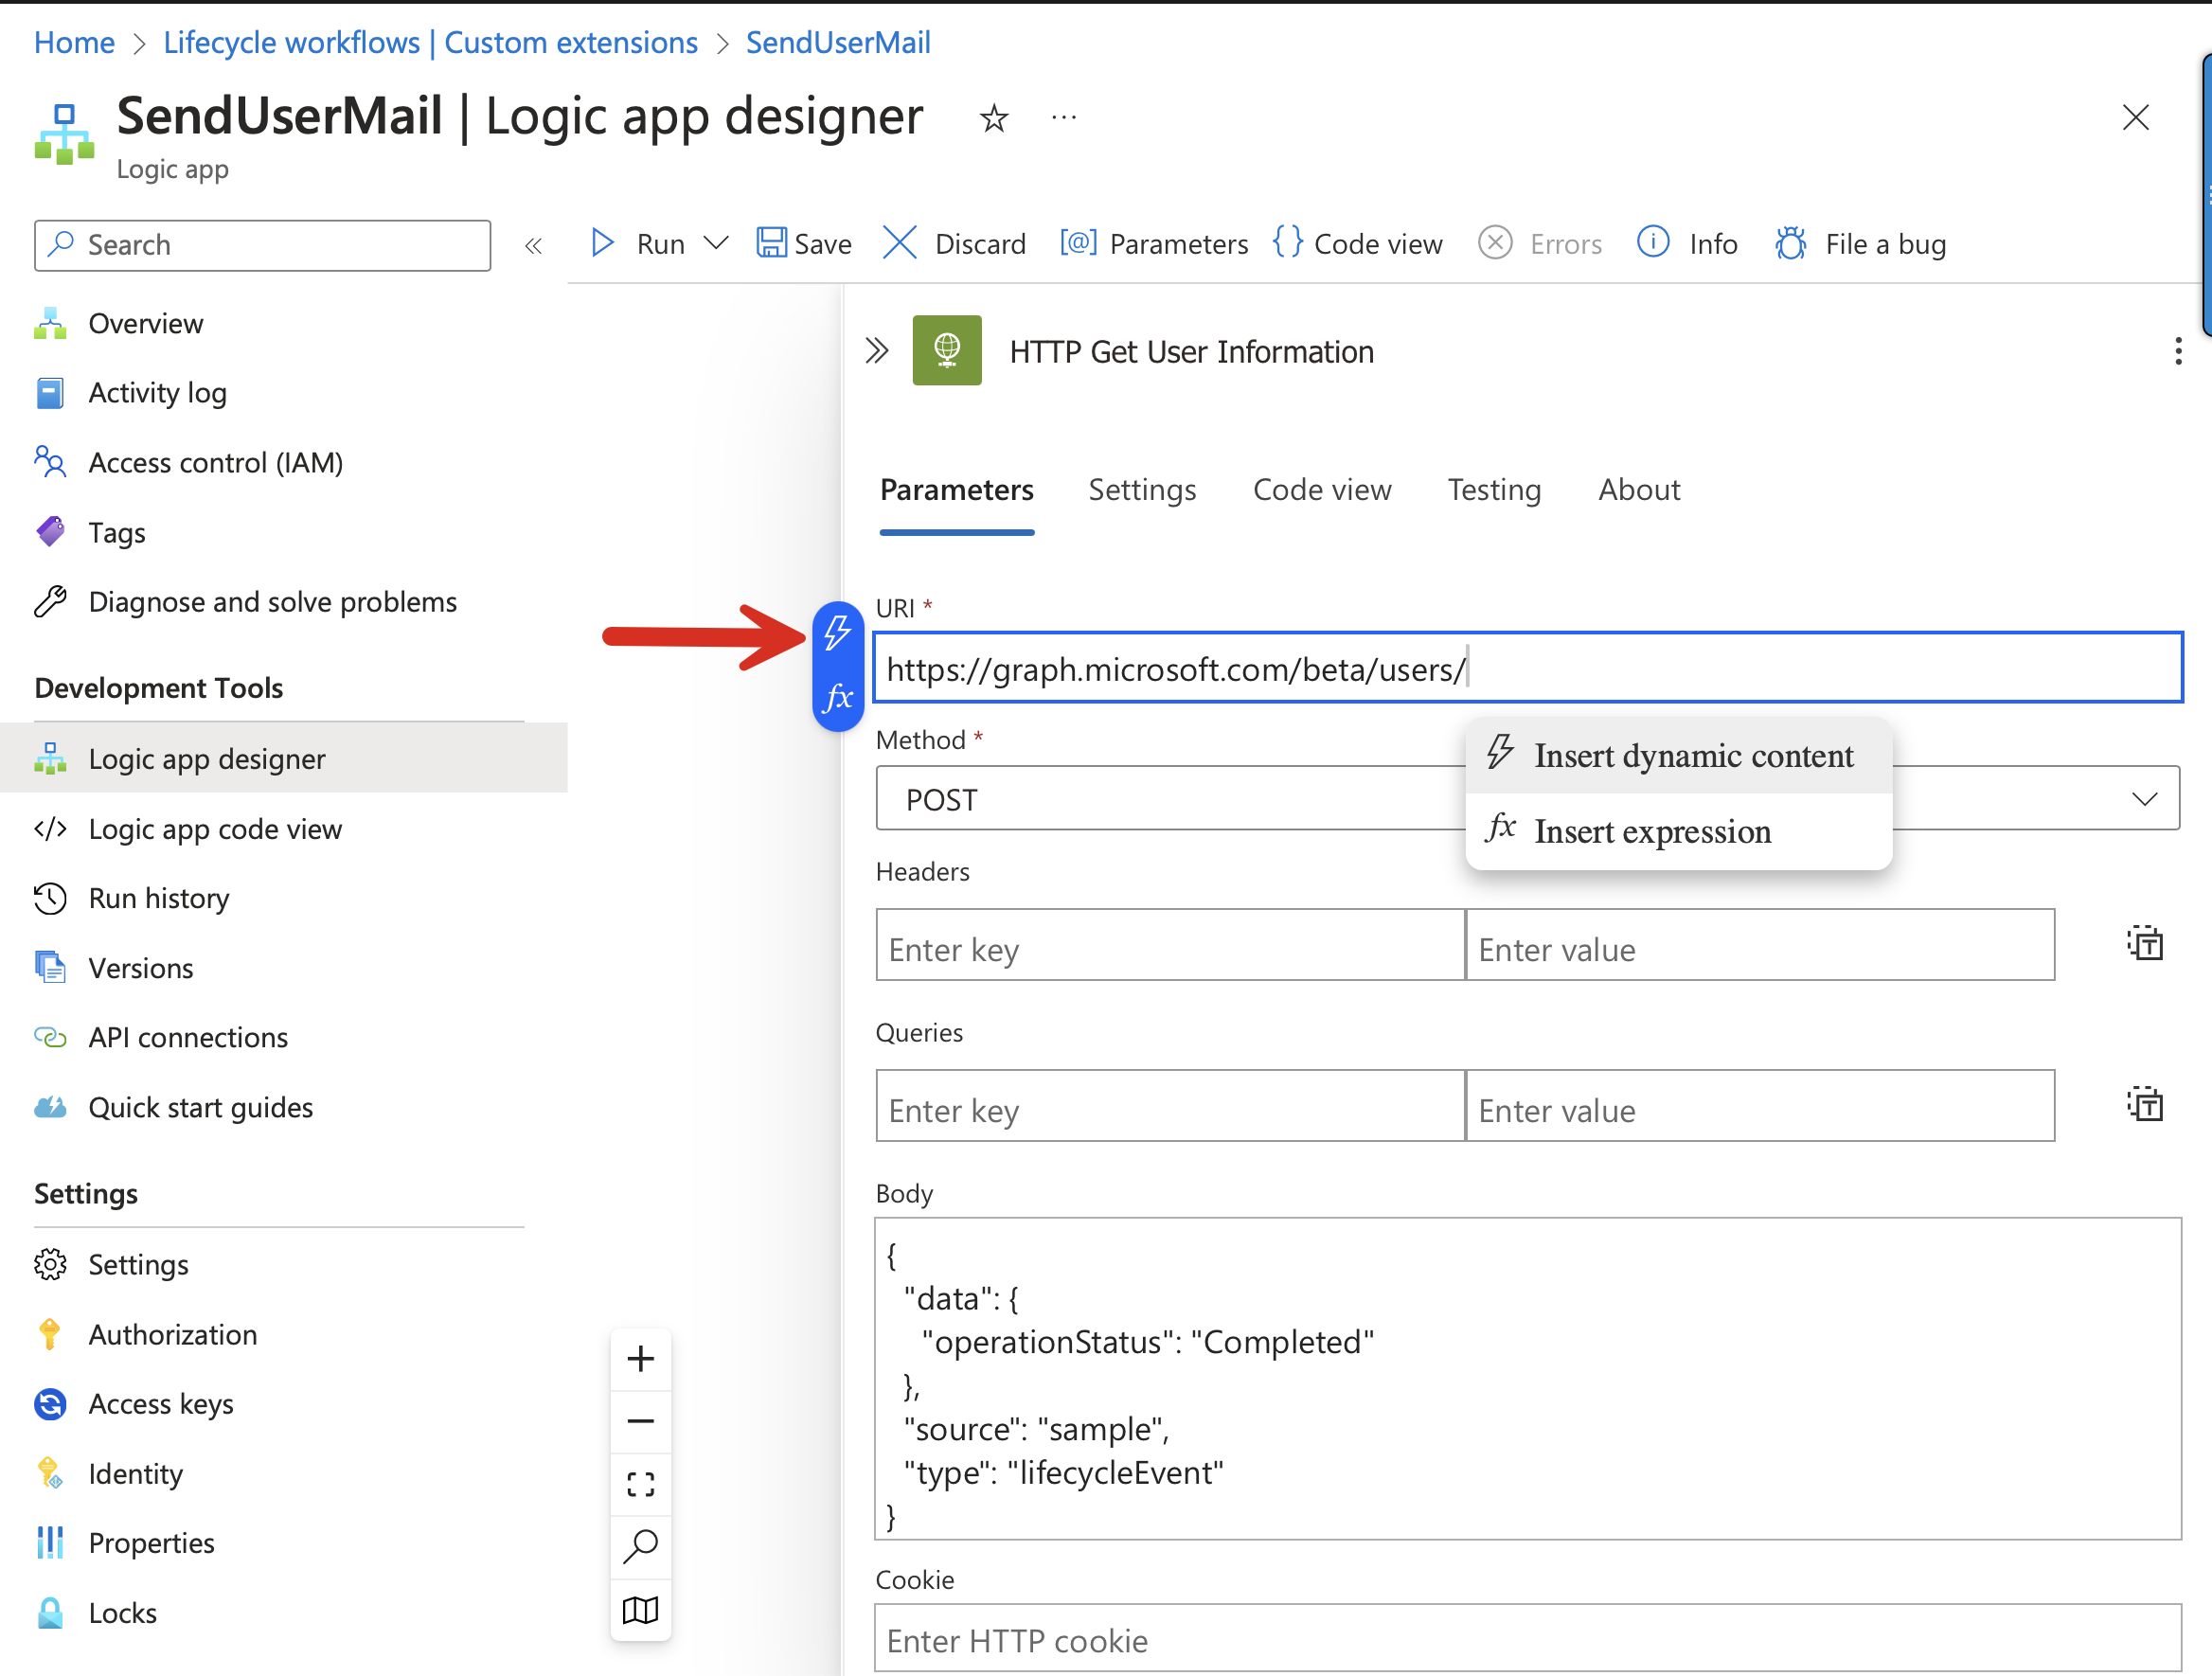 Figure 11: HTTP action! Powerful functionality to set HTTP requests
Using “Insert dynamic content”, we append the URI with the username and, most importantly, select GET as the method.
With that, our HTTP action is complete and should look like this:
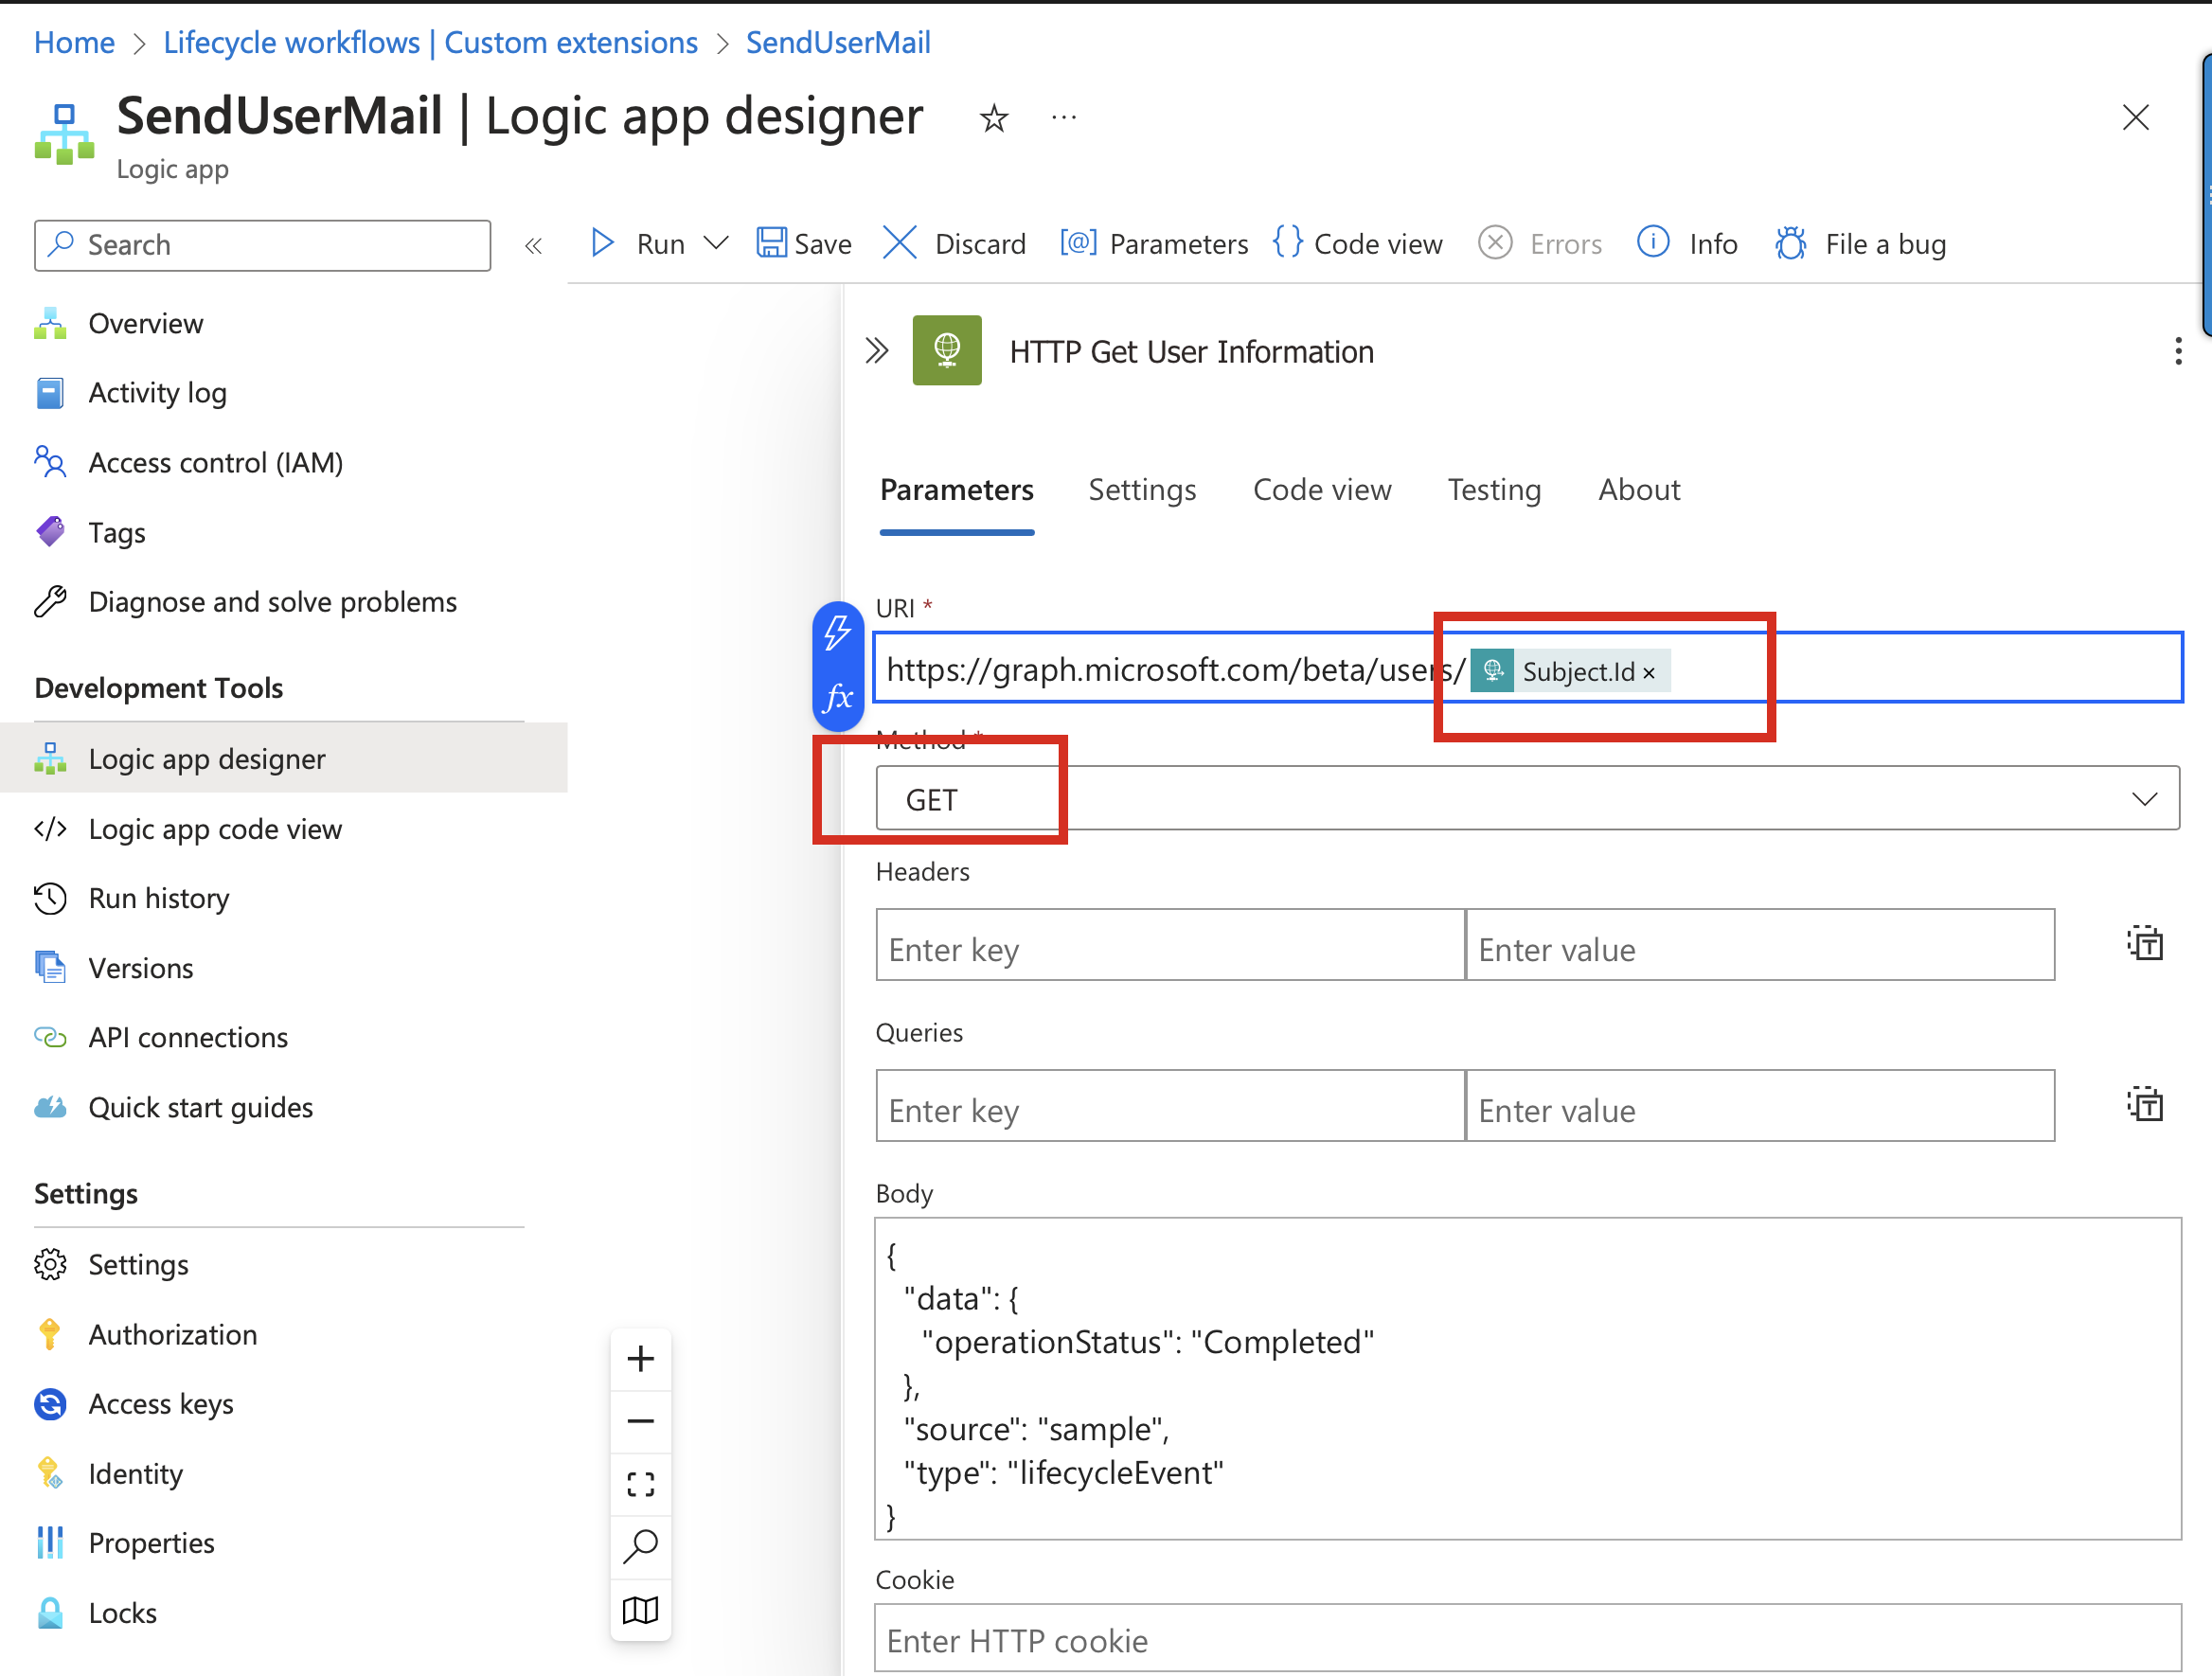 Figure 12: HTTP action will be used to get information from the specific user in our workflow via Graph API
Now it gets exciting! We now add the “Data Operation” action, which processes the result of the previously generated User Graph API call.
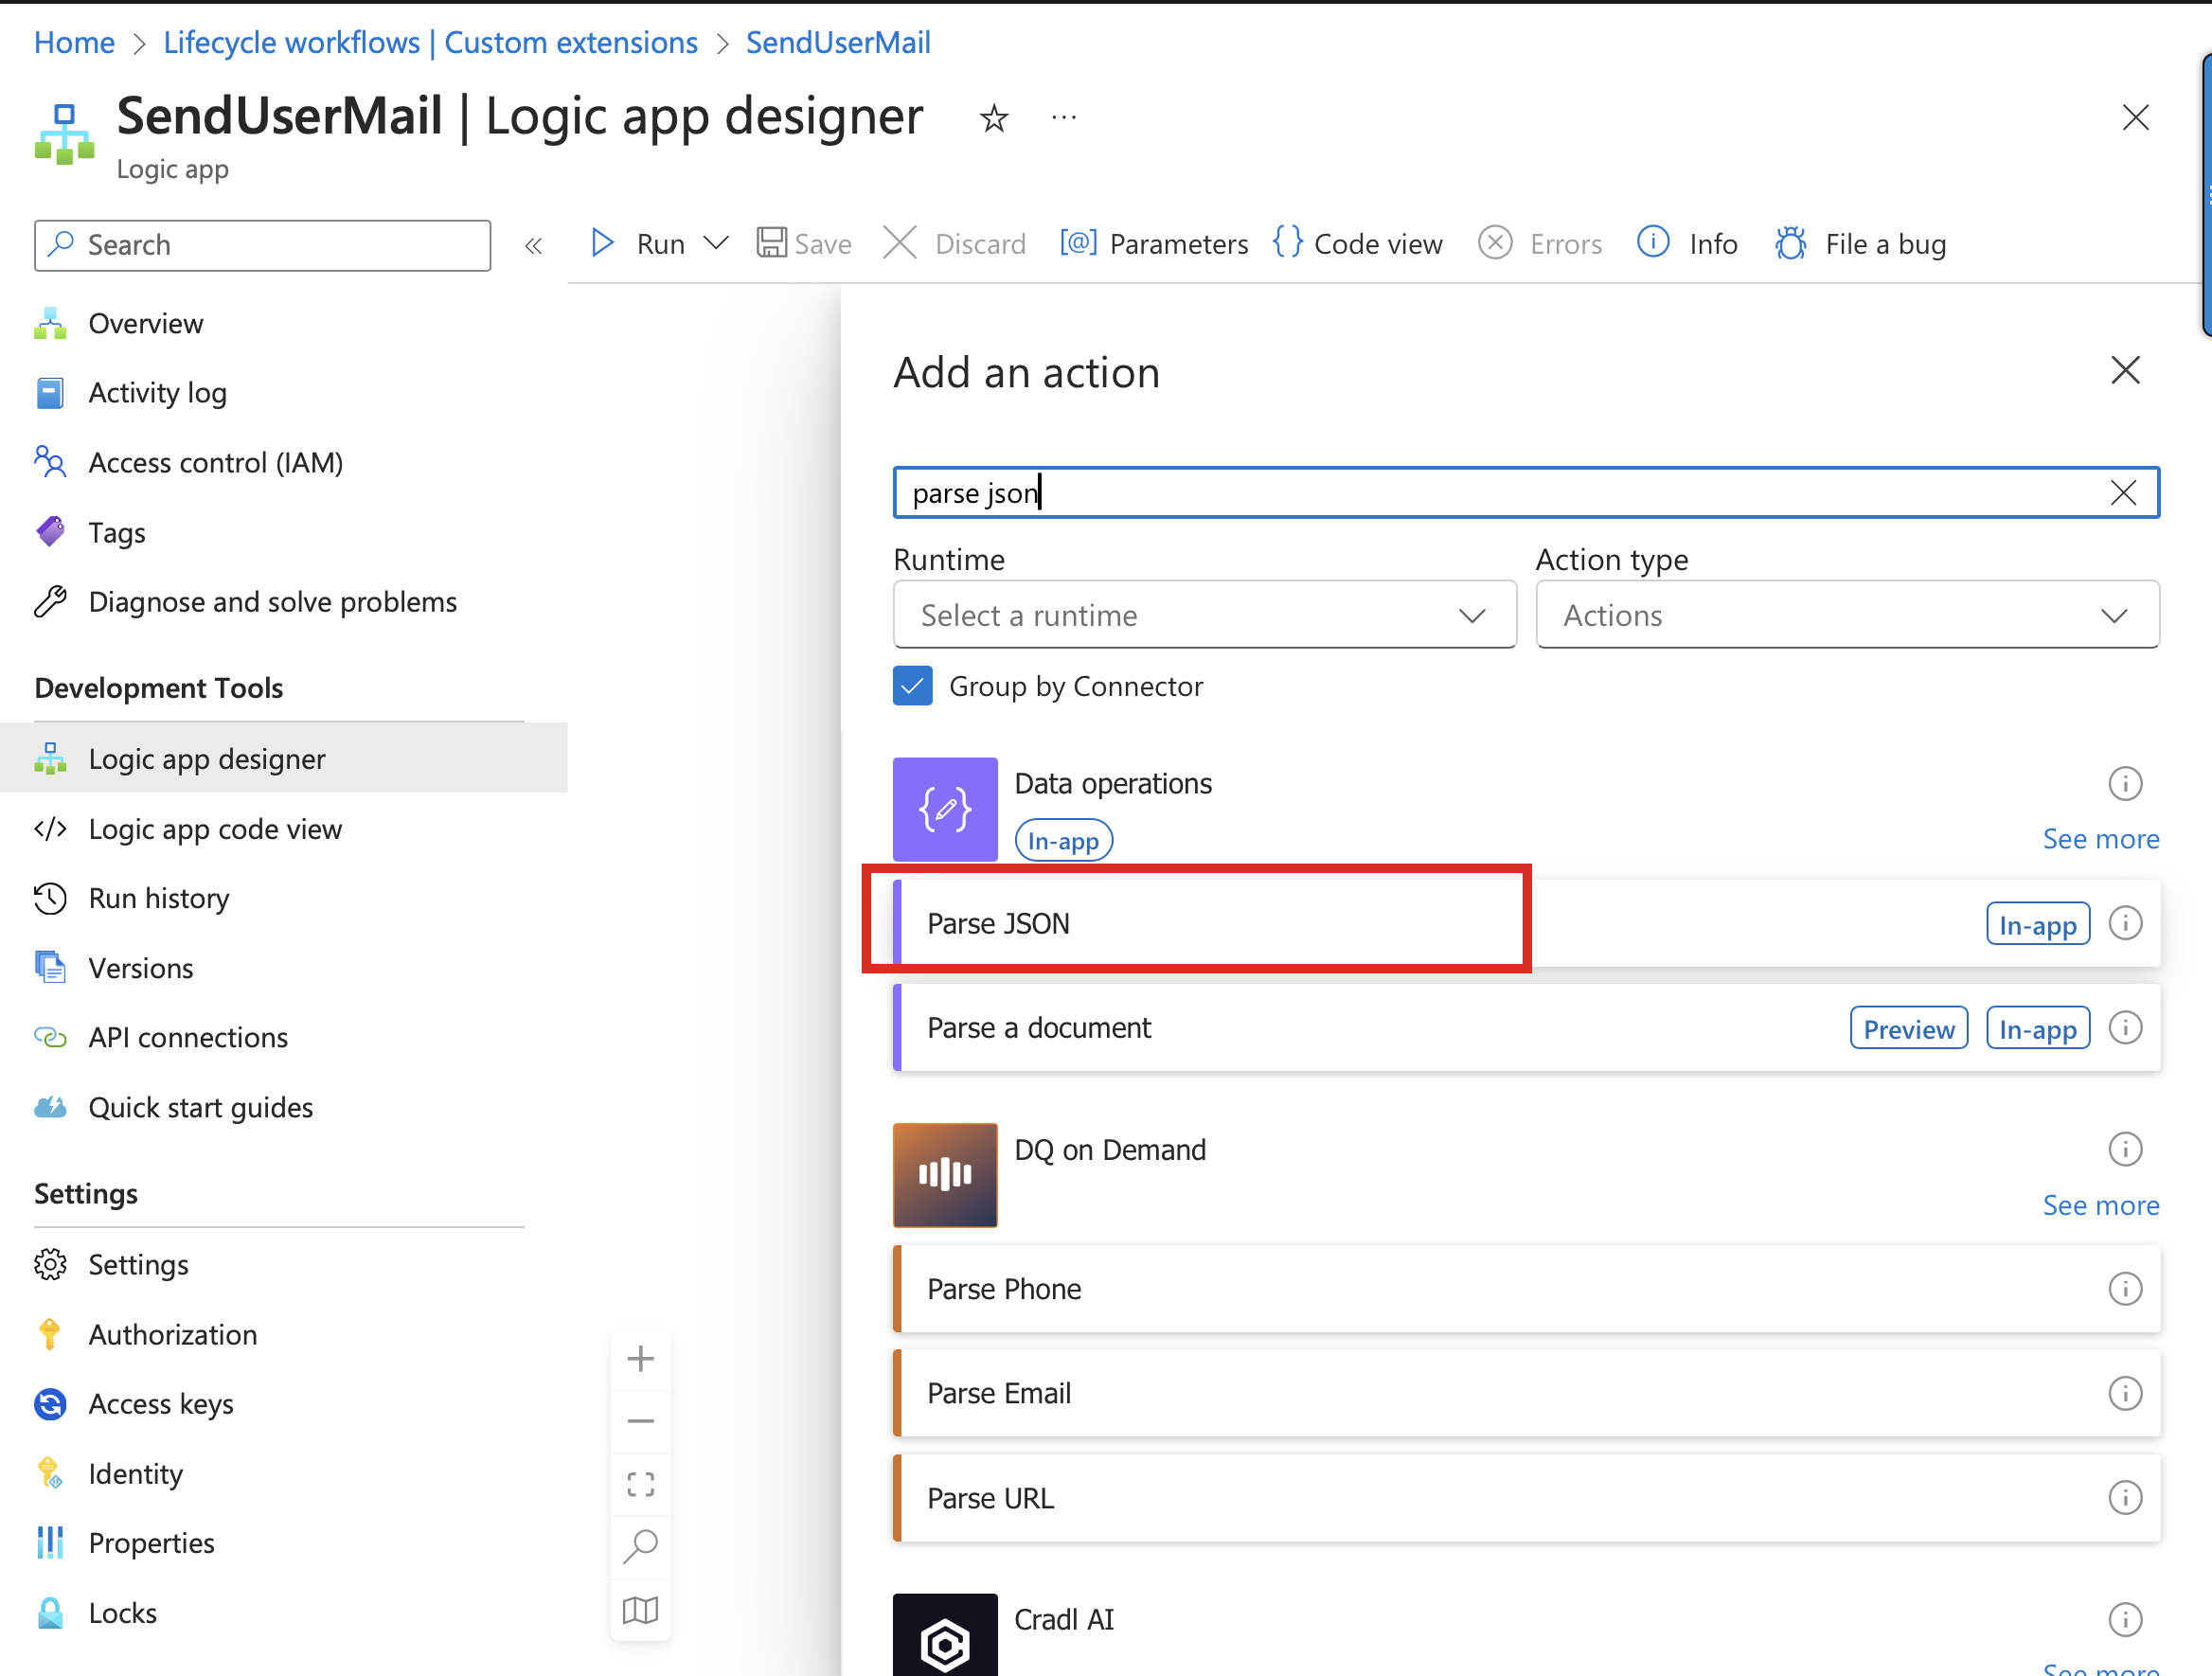 Figure 13: Data Operation action and “Parse JSON” can be used to grab information from the former API Graph Call
In “Content,” we select the previous action, “HTTP Get User Information.”
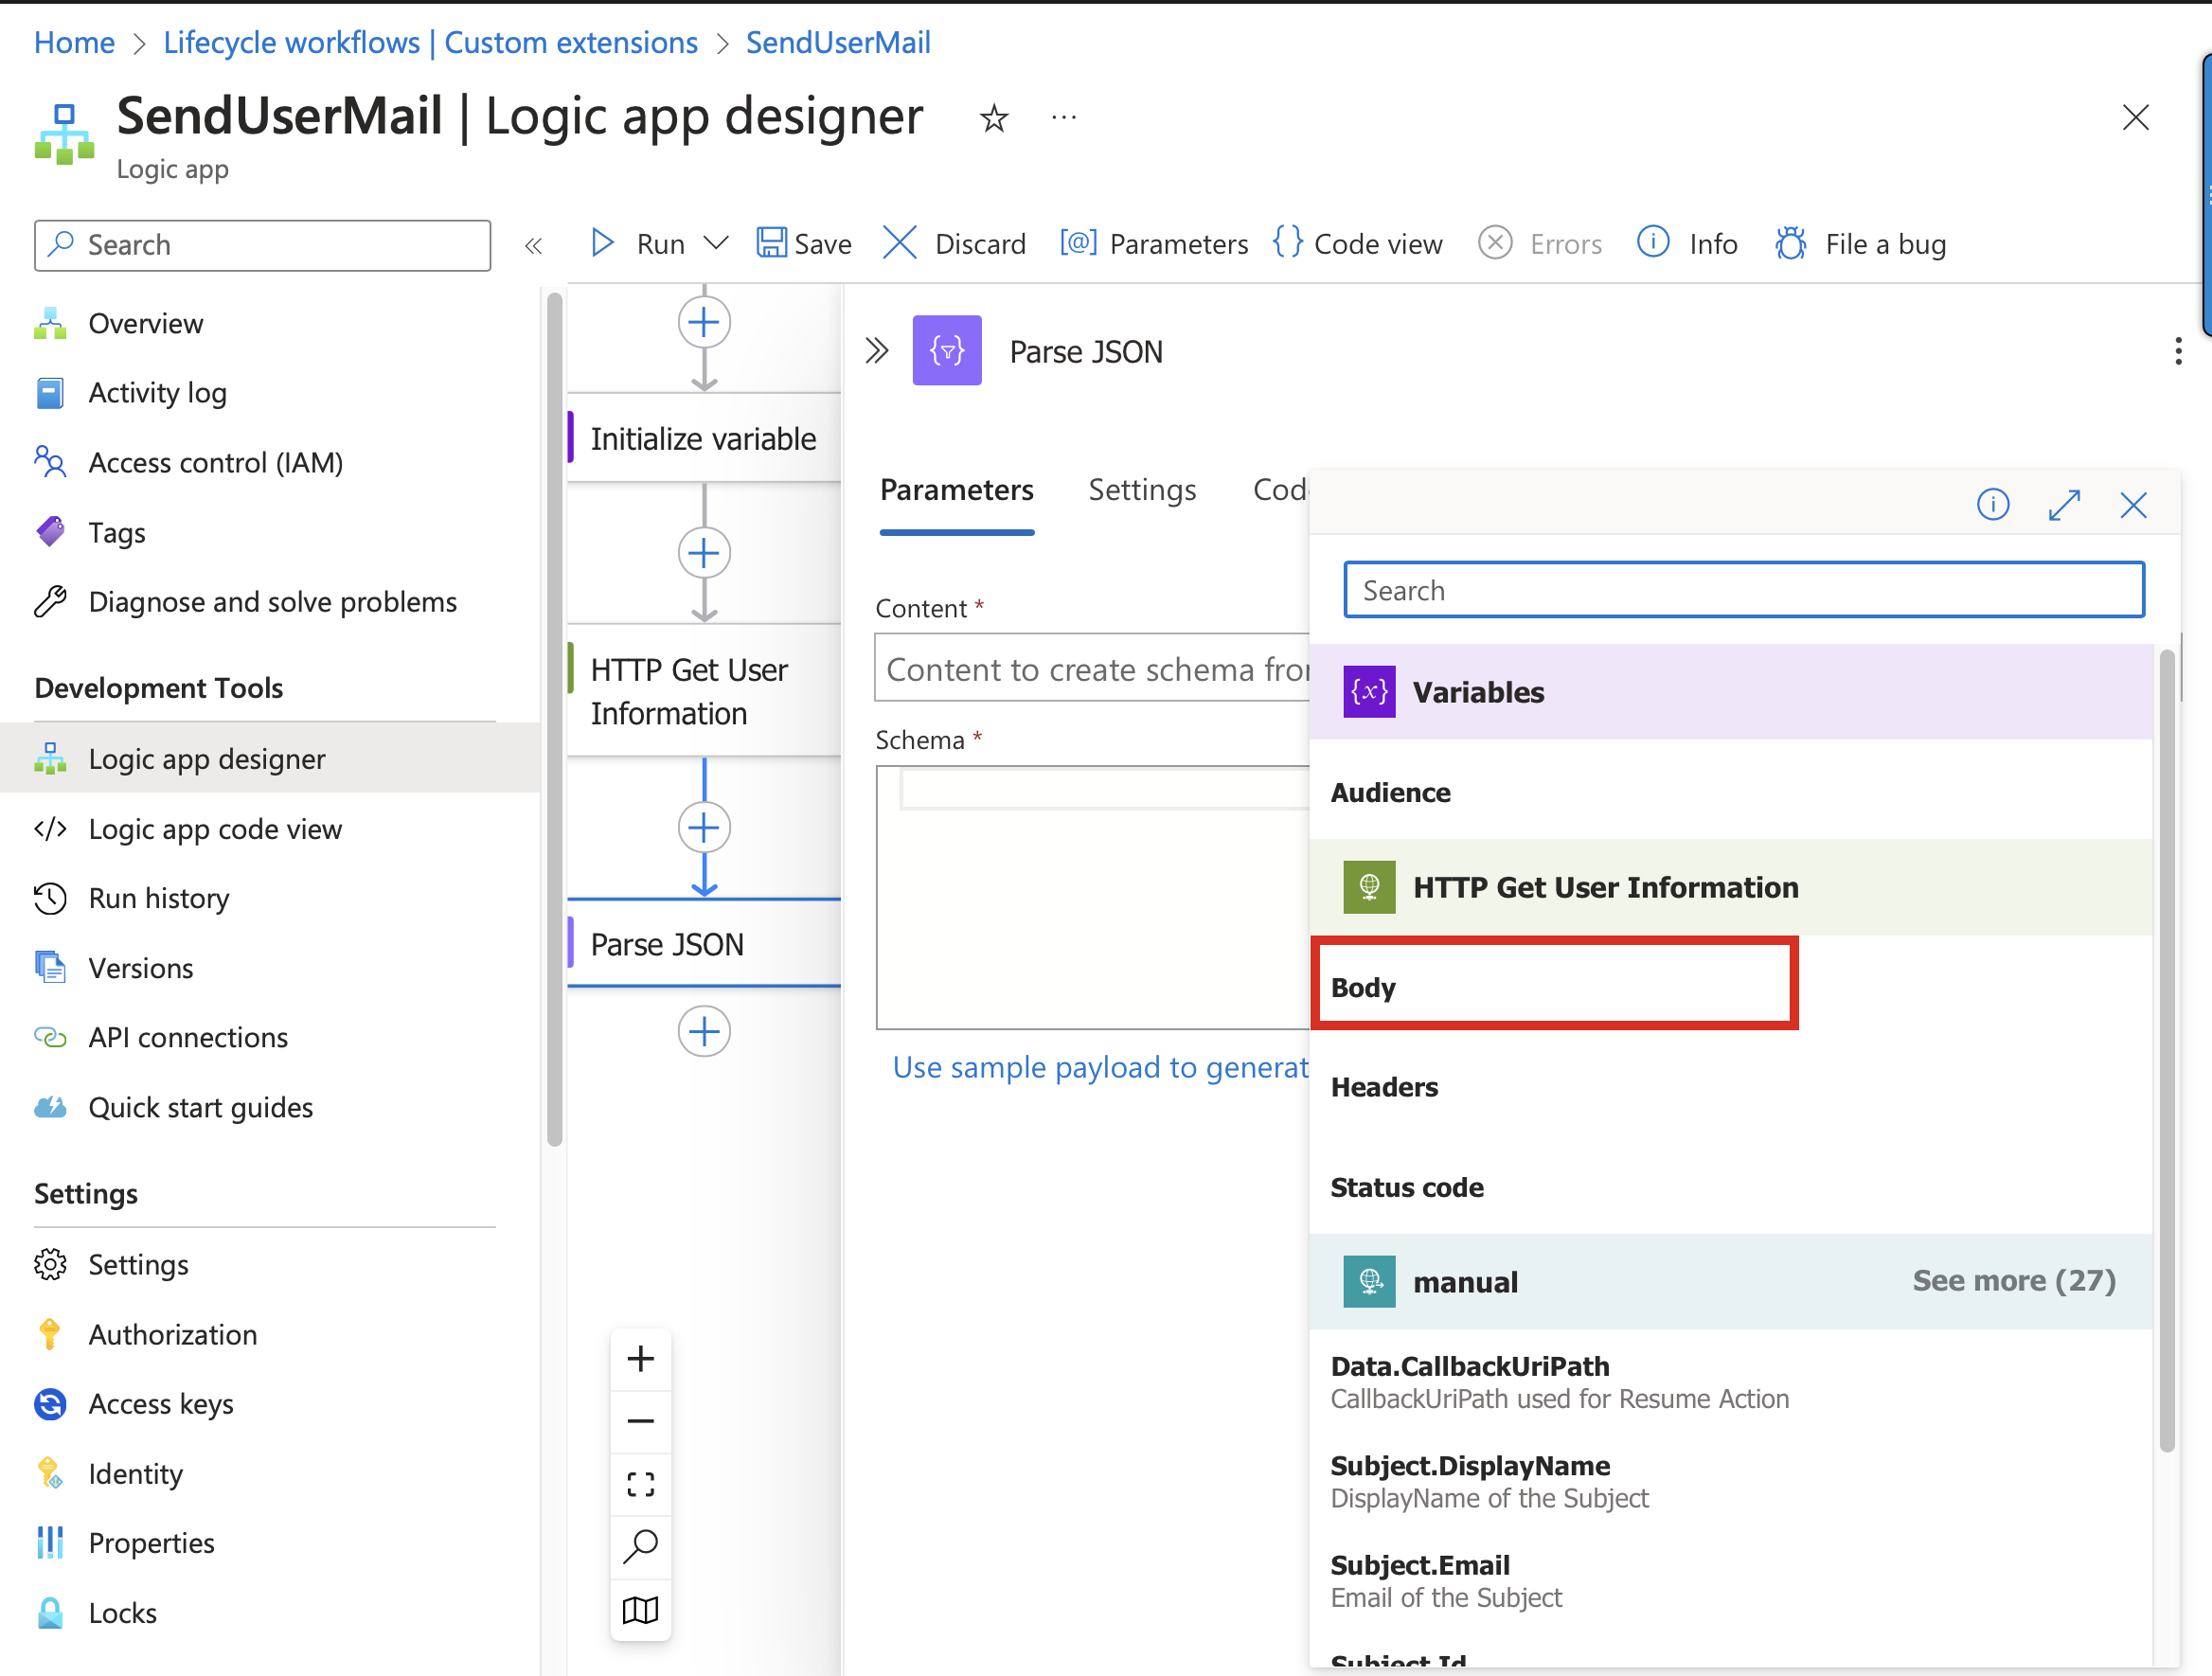 Figure 14: Additional parameters for Parse JSON functionality
At this point, a schema is required to type the provided output. To do this, we use the option to generate a schema based on an example payload.
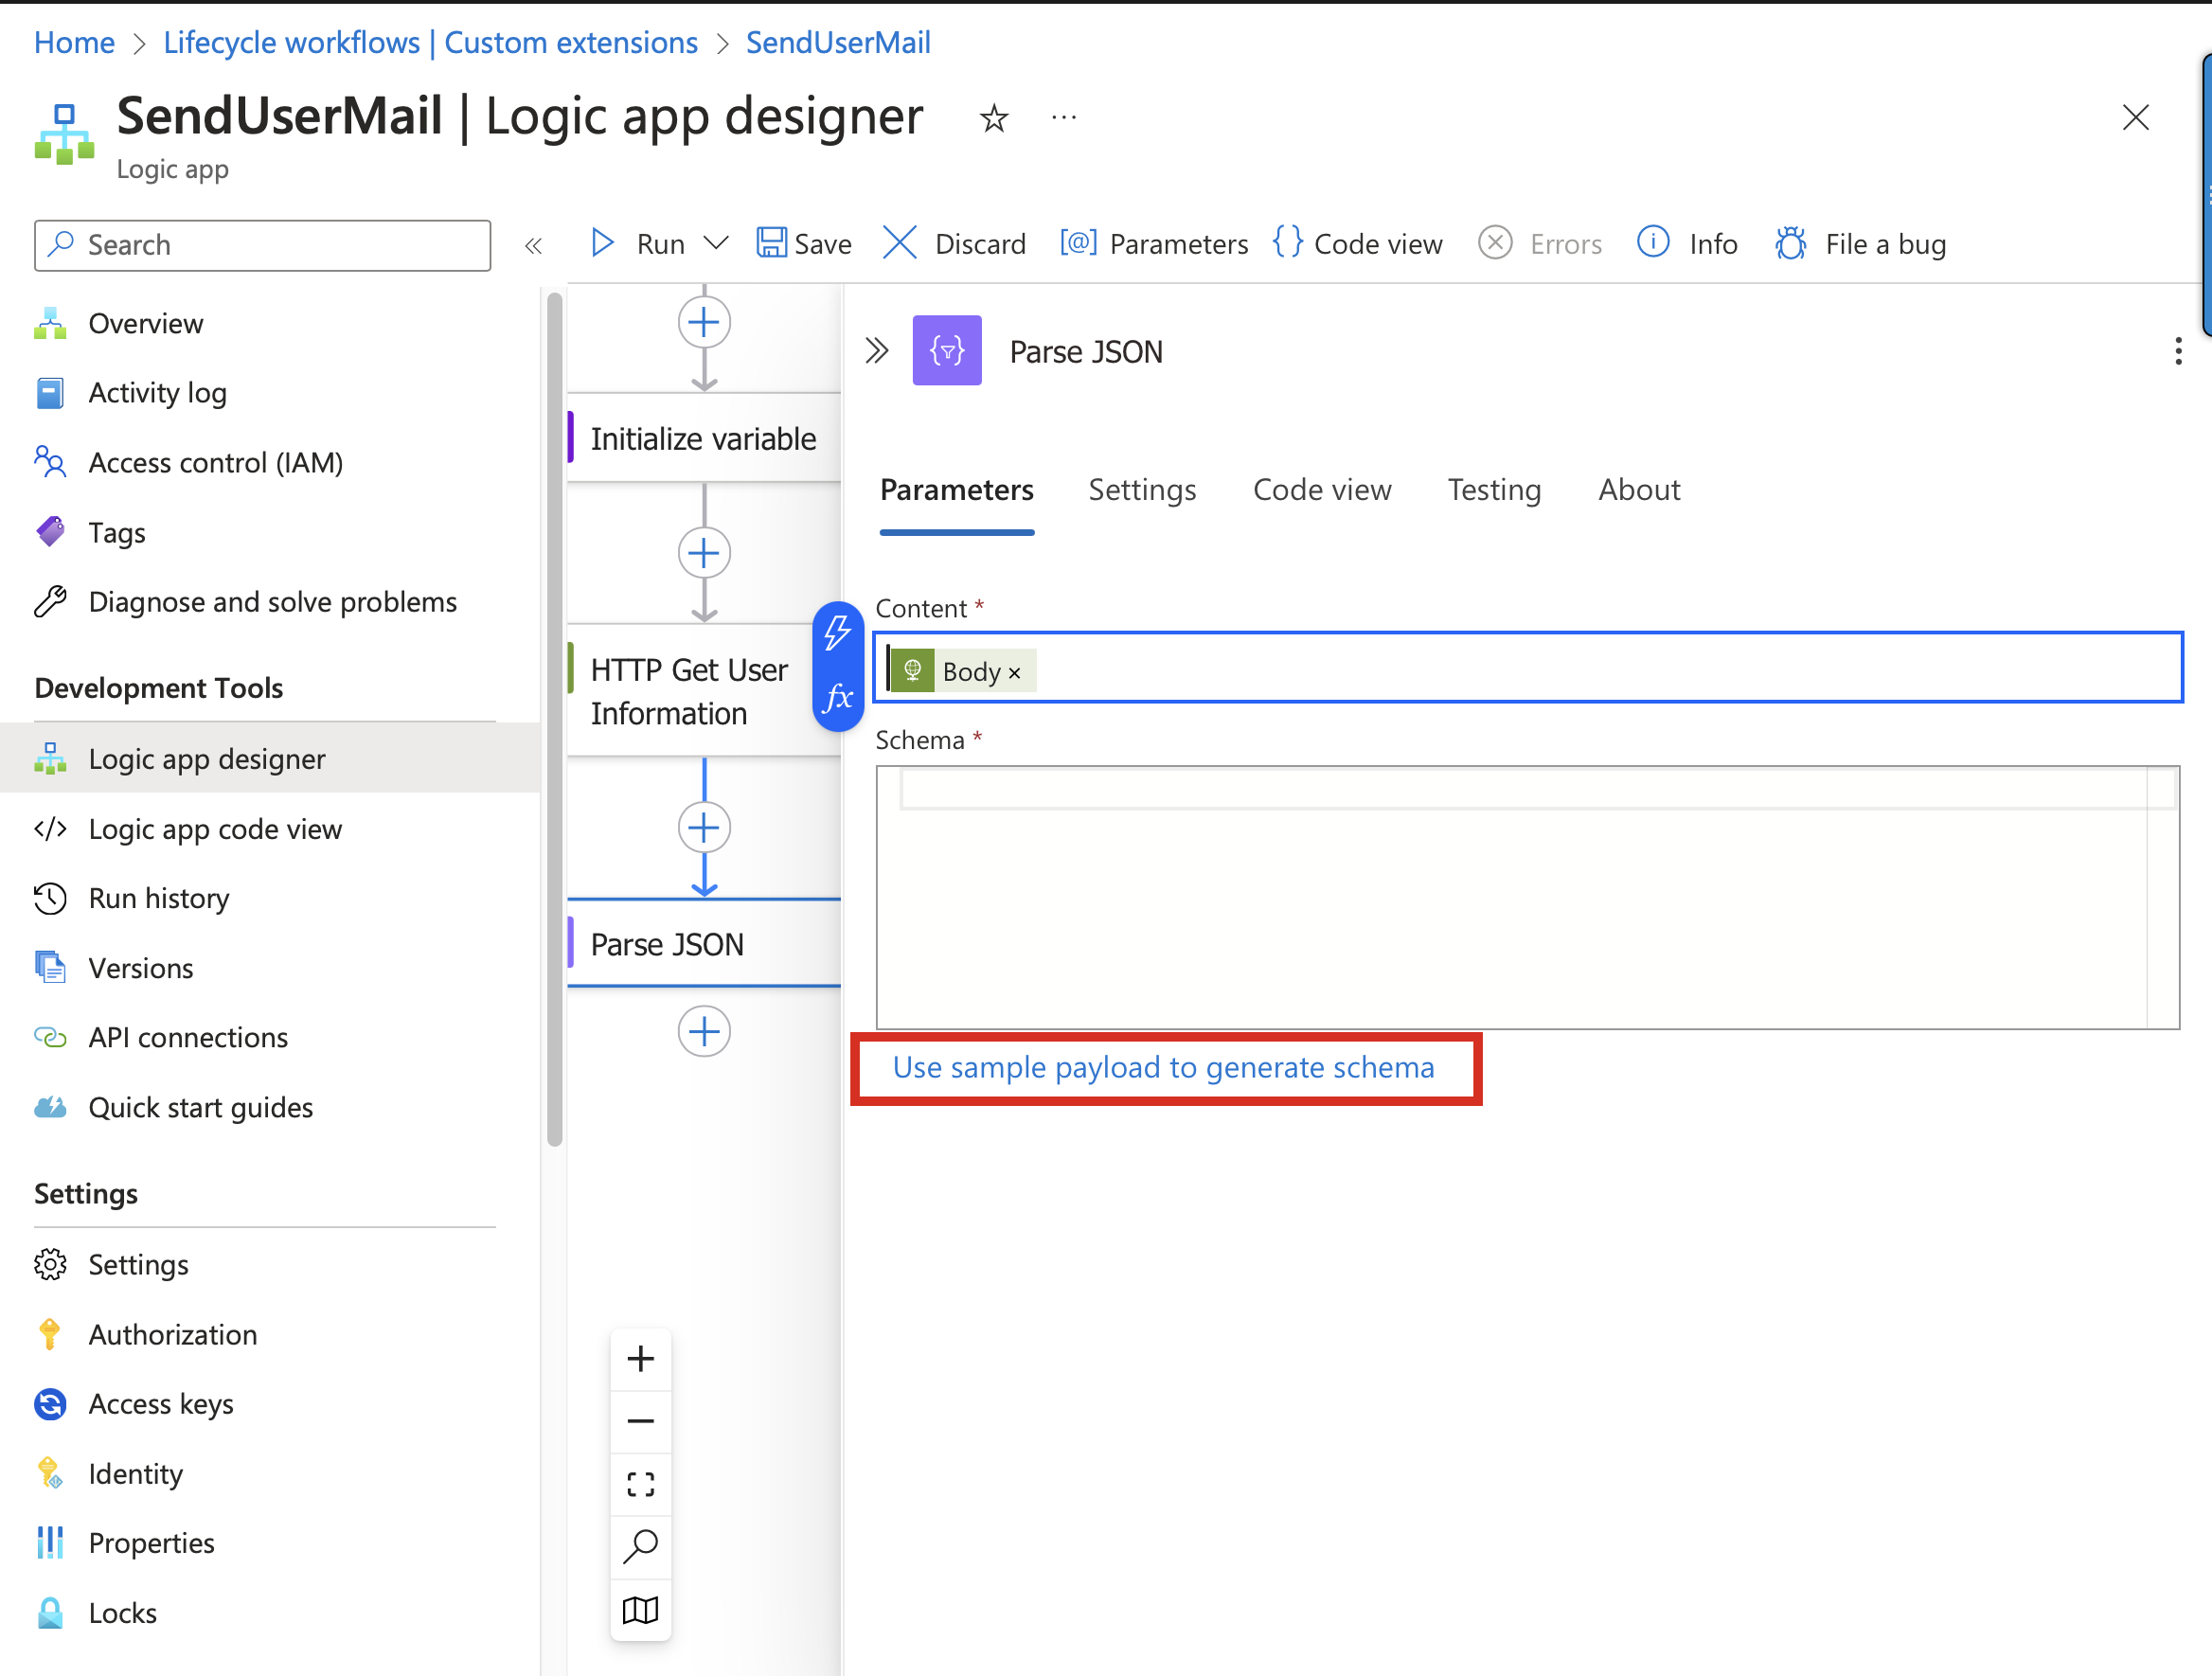 Figure 15: The Schema is an important essence in the parameter set
The necessary Sample Payload to generate a schema can be obtained in the Graph Explorer, where we use the result of a GET request for a user account. We then copy the returned result to the clipboard.
Based on this Sample Payload, the schema will be created. Subsequently, the variants and attribute names can be used in further actions, as we will see later.
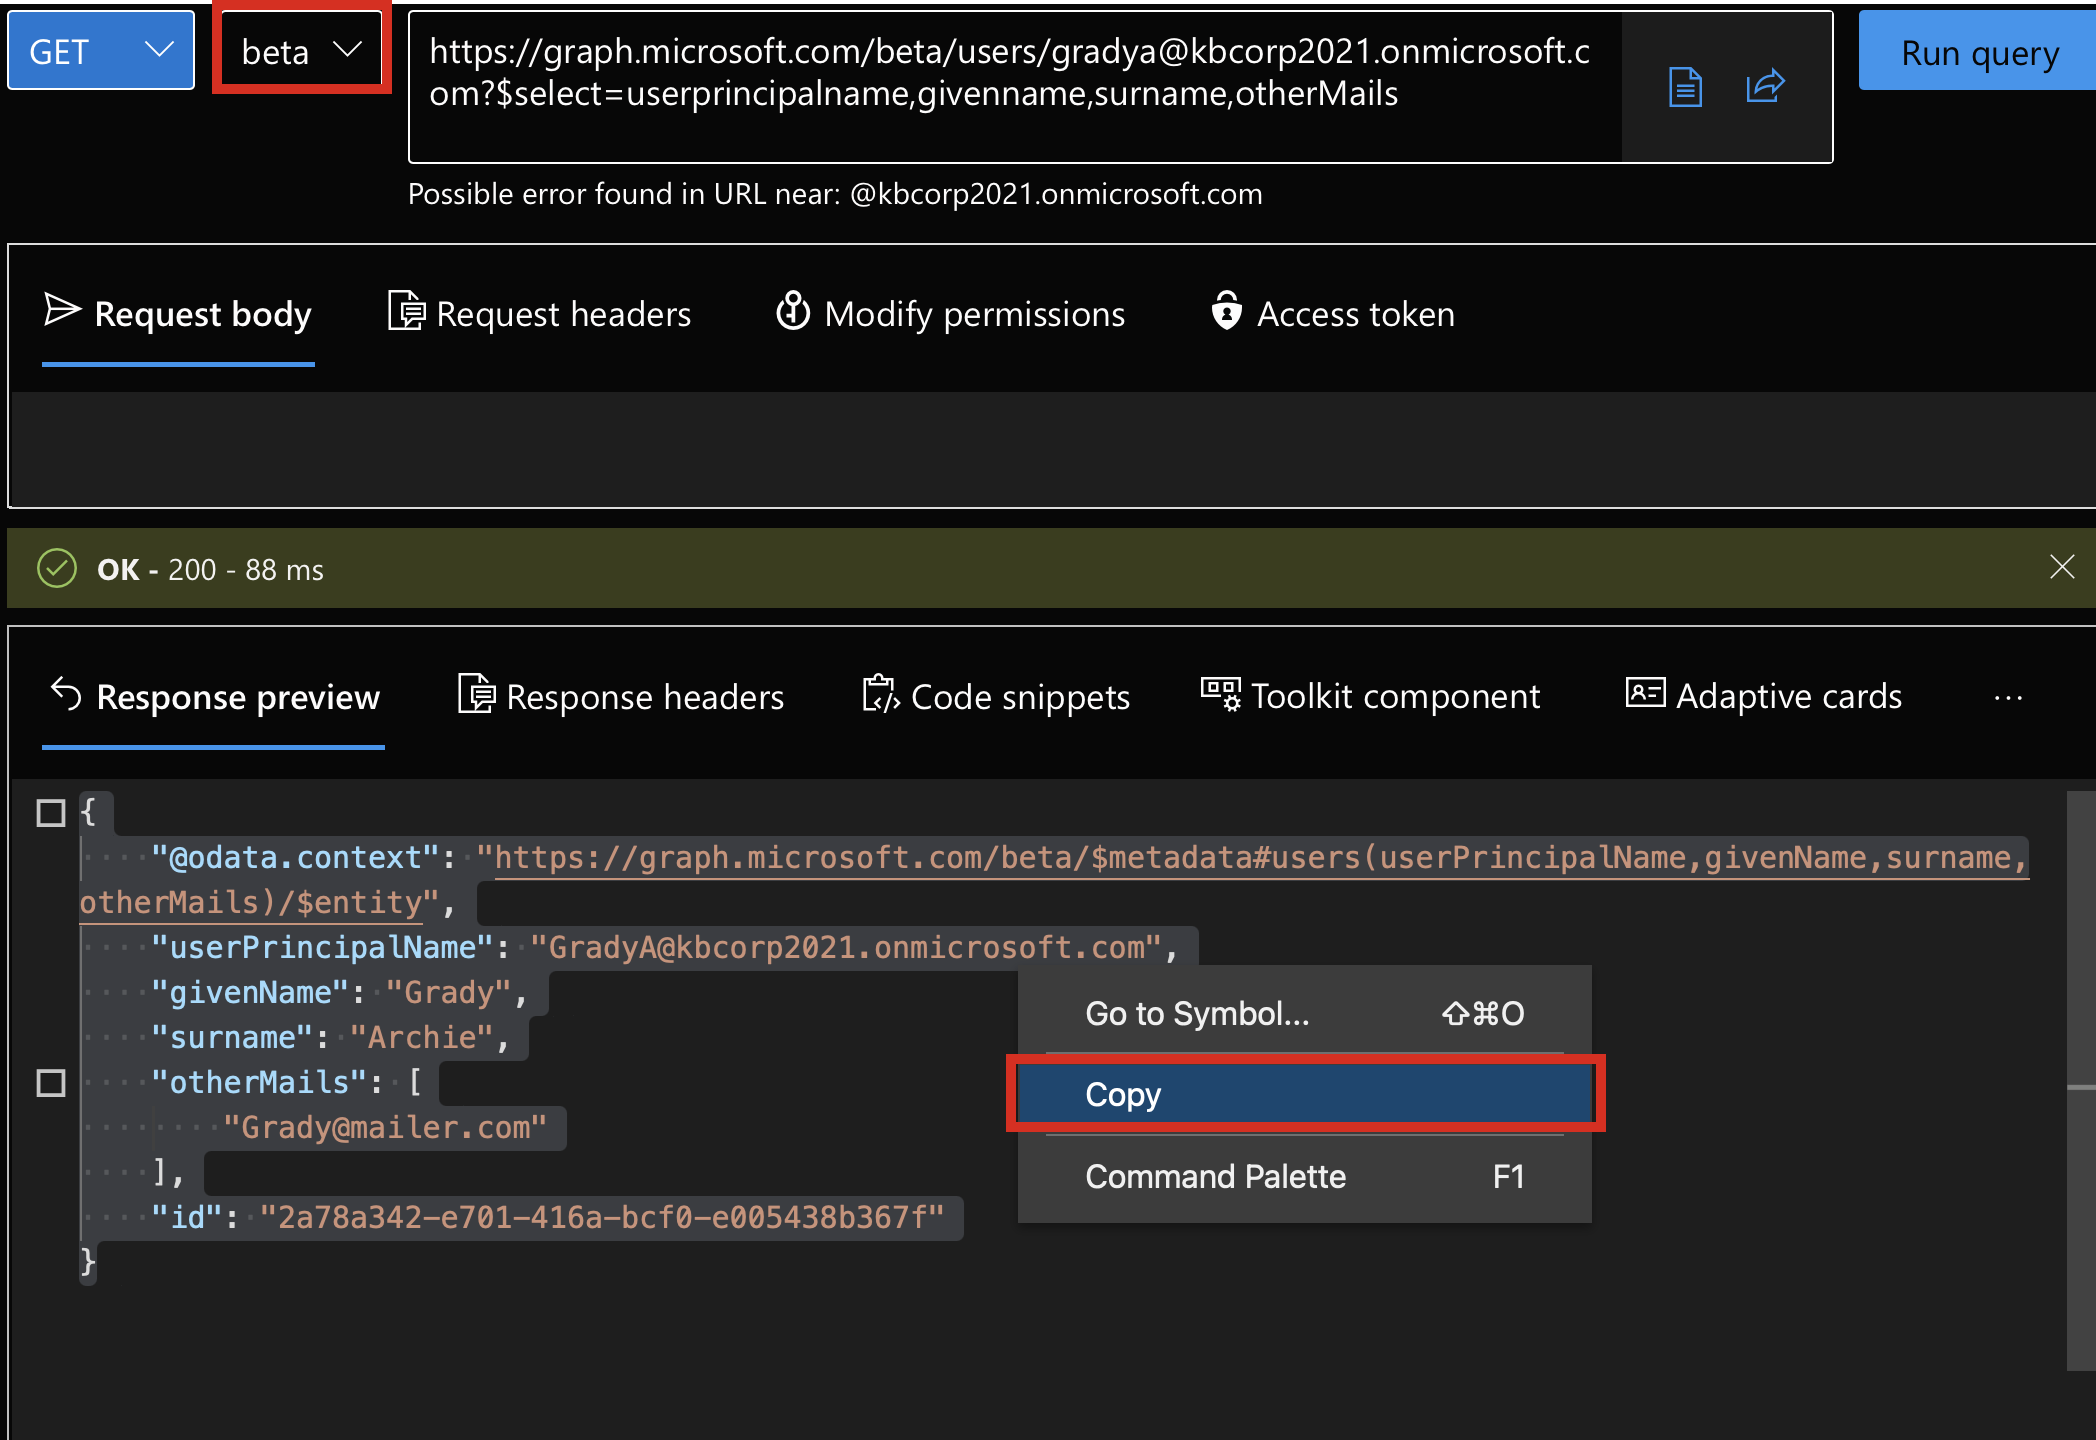 Figure 16: An example payload can be used to define the schema
Then, we switch back to the Logic App and insert the result of the query here
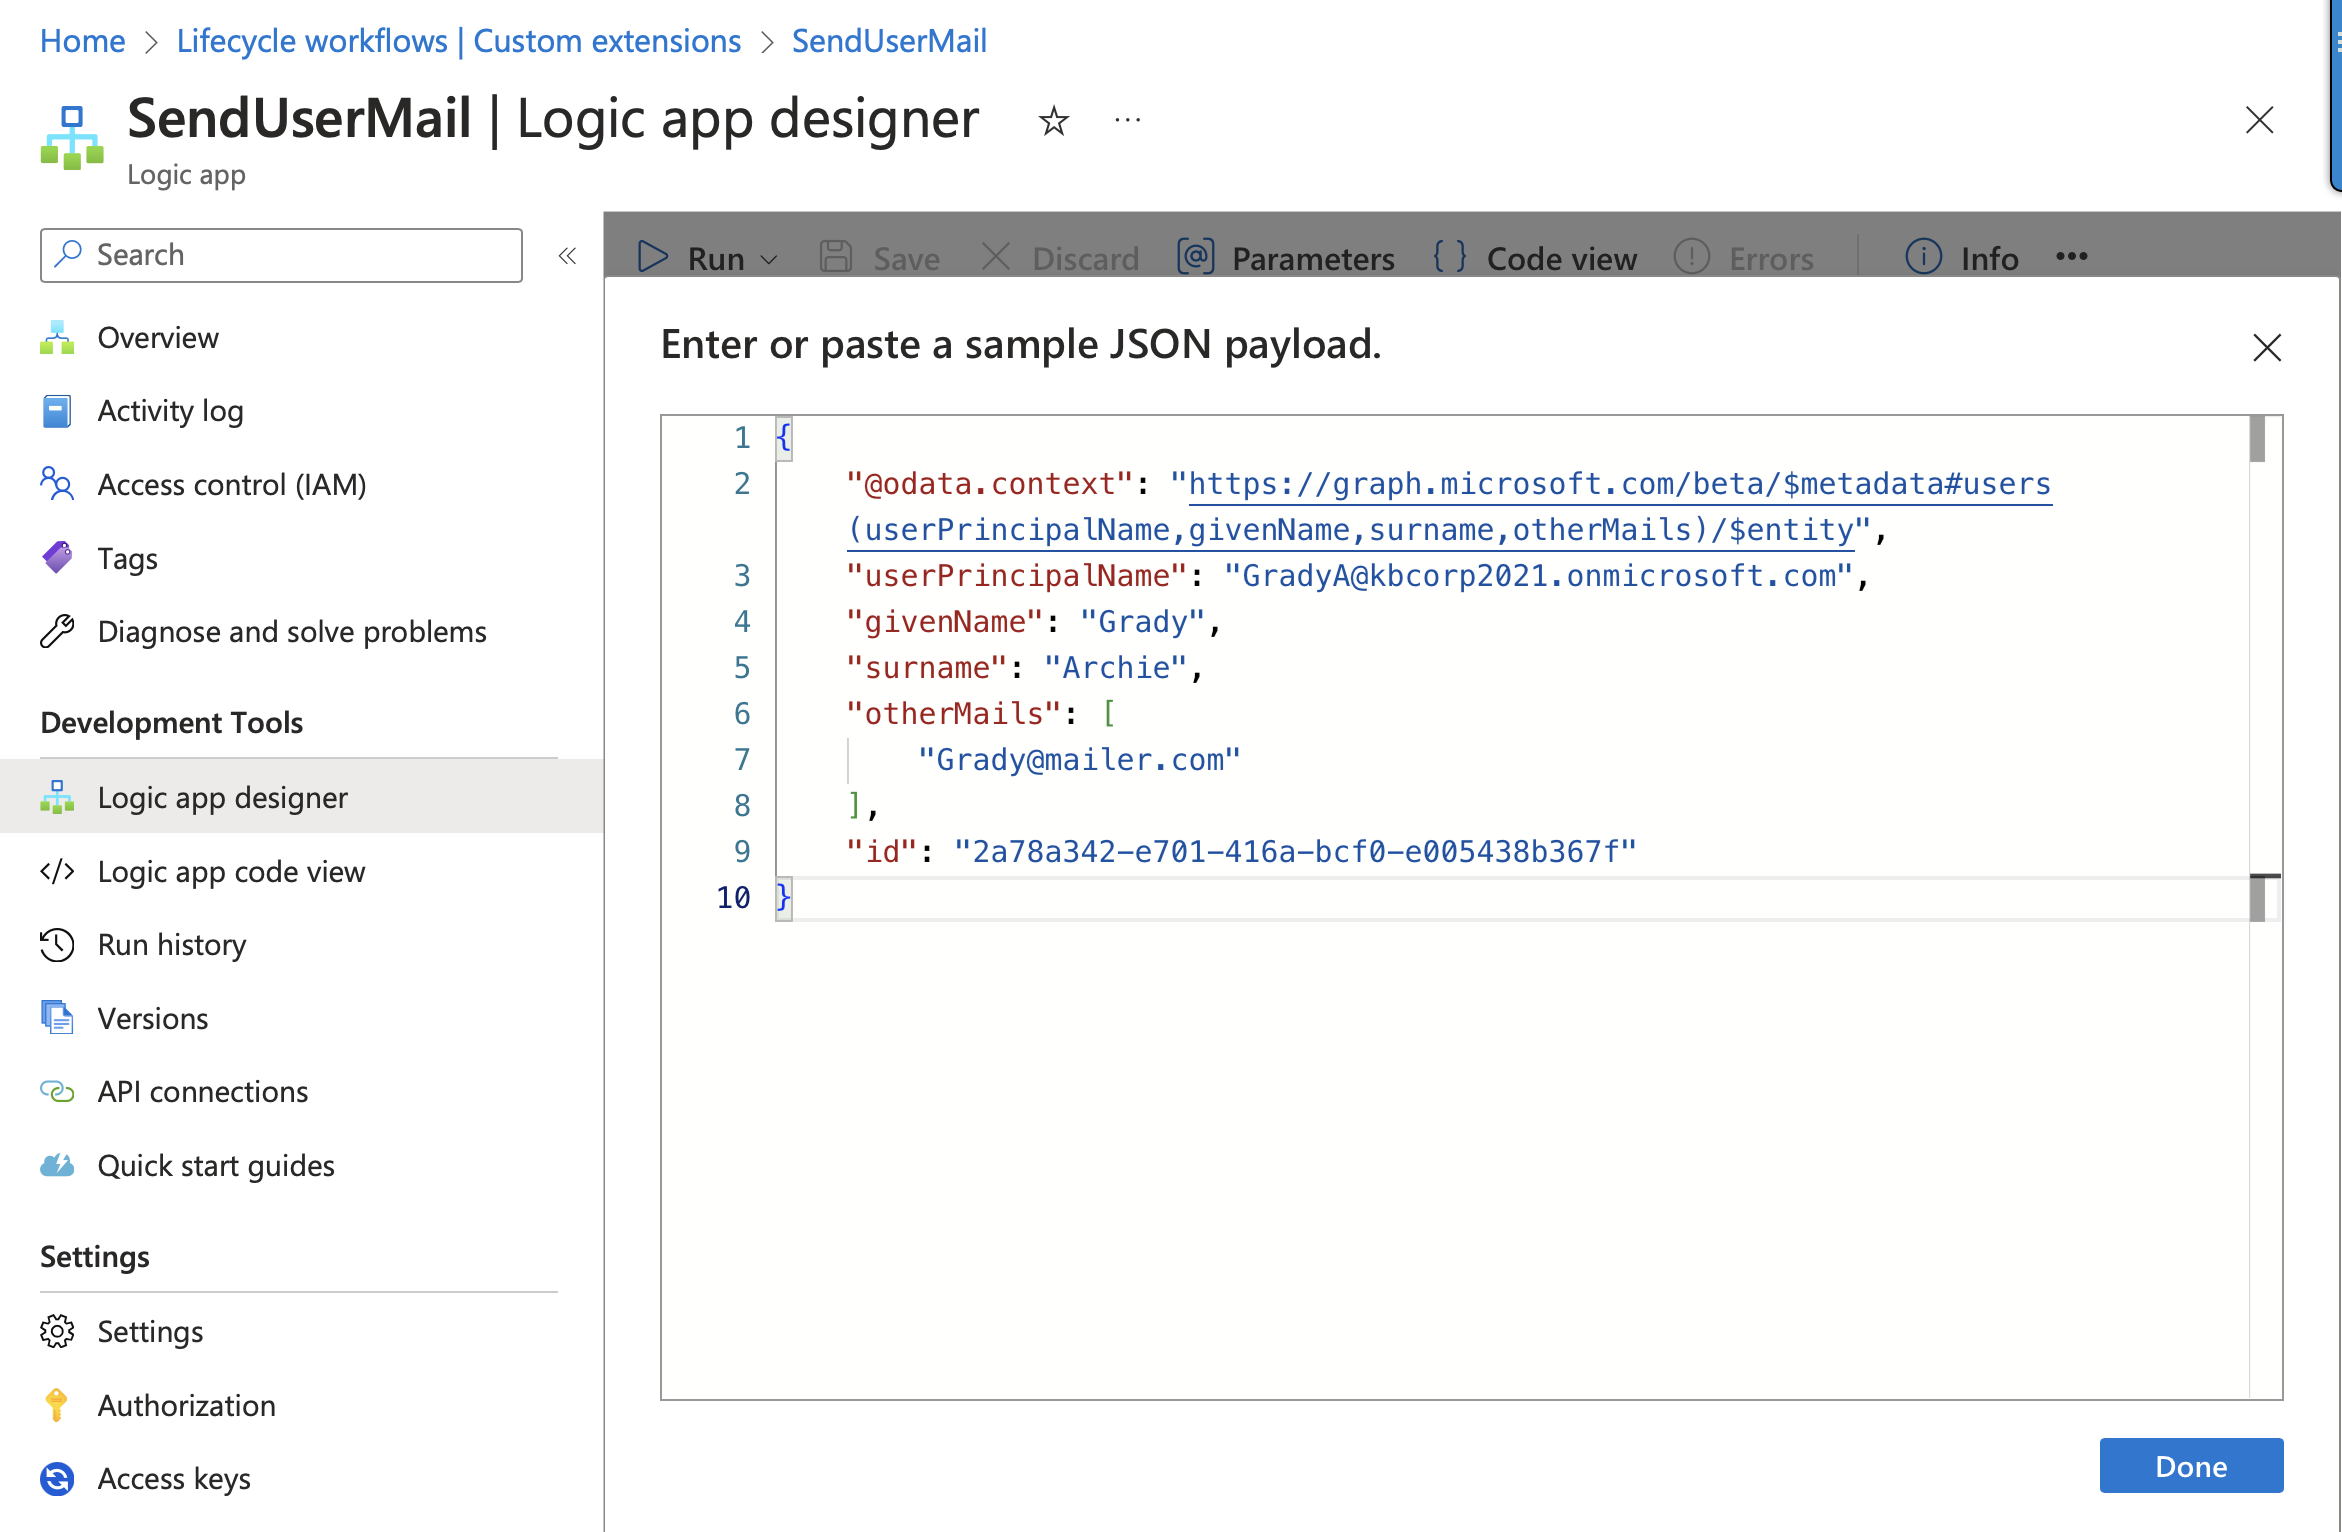 Figure 17: Well done, schema imported
After that, we have the schema generated from the payload and can save the action.
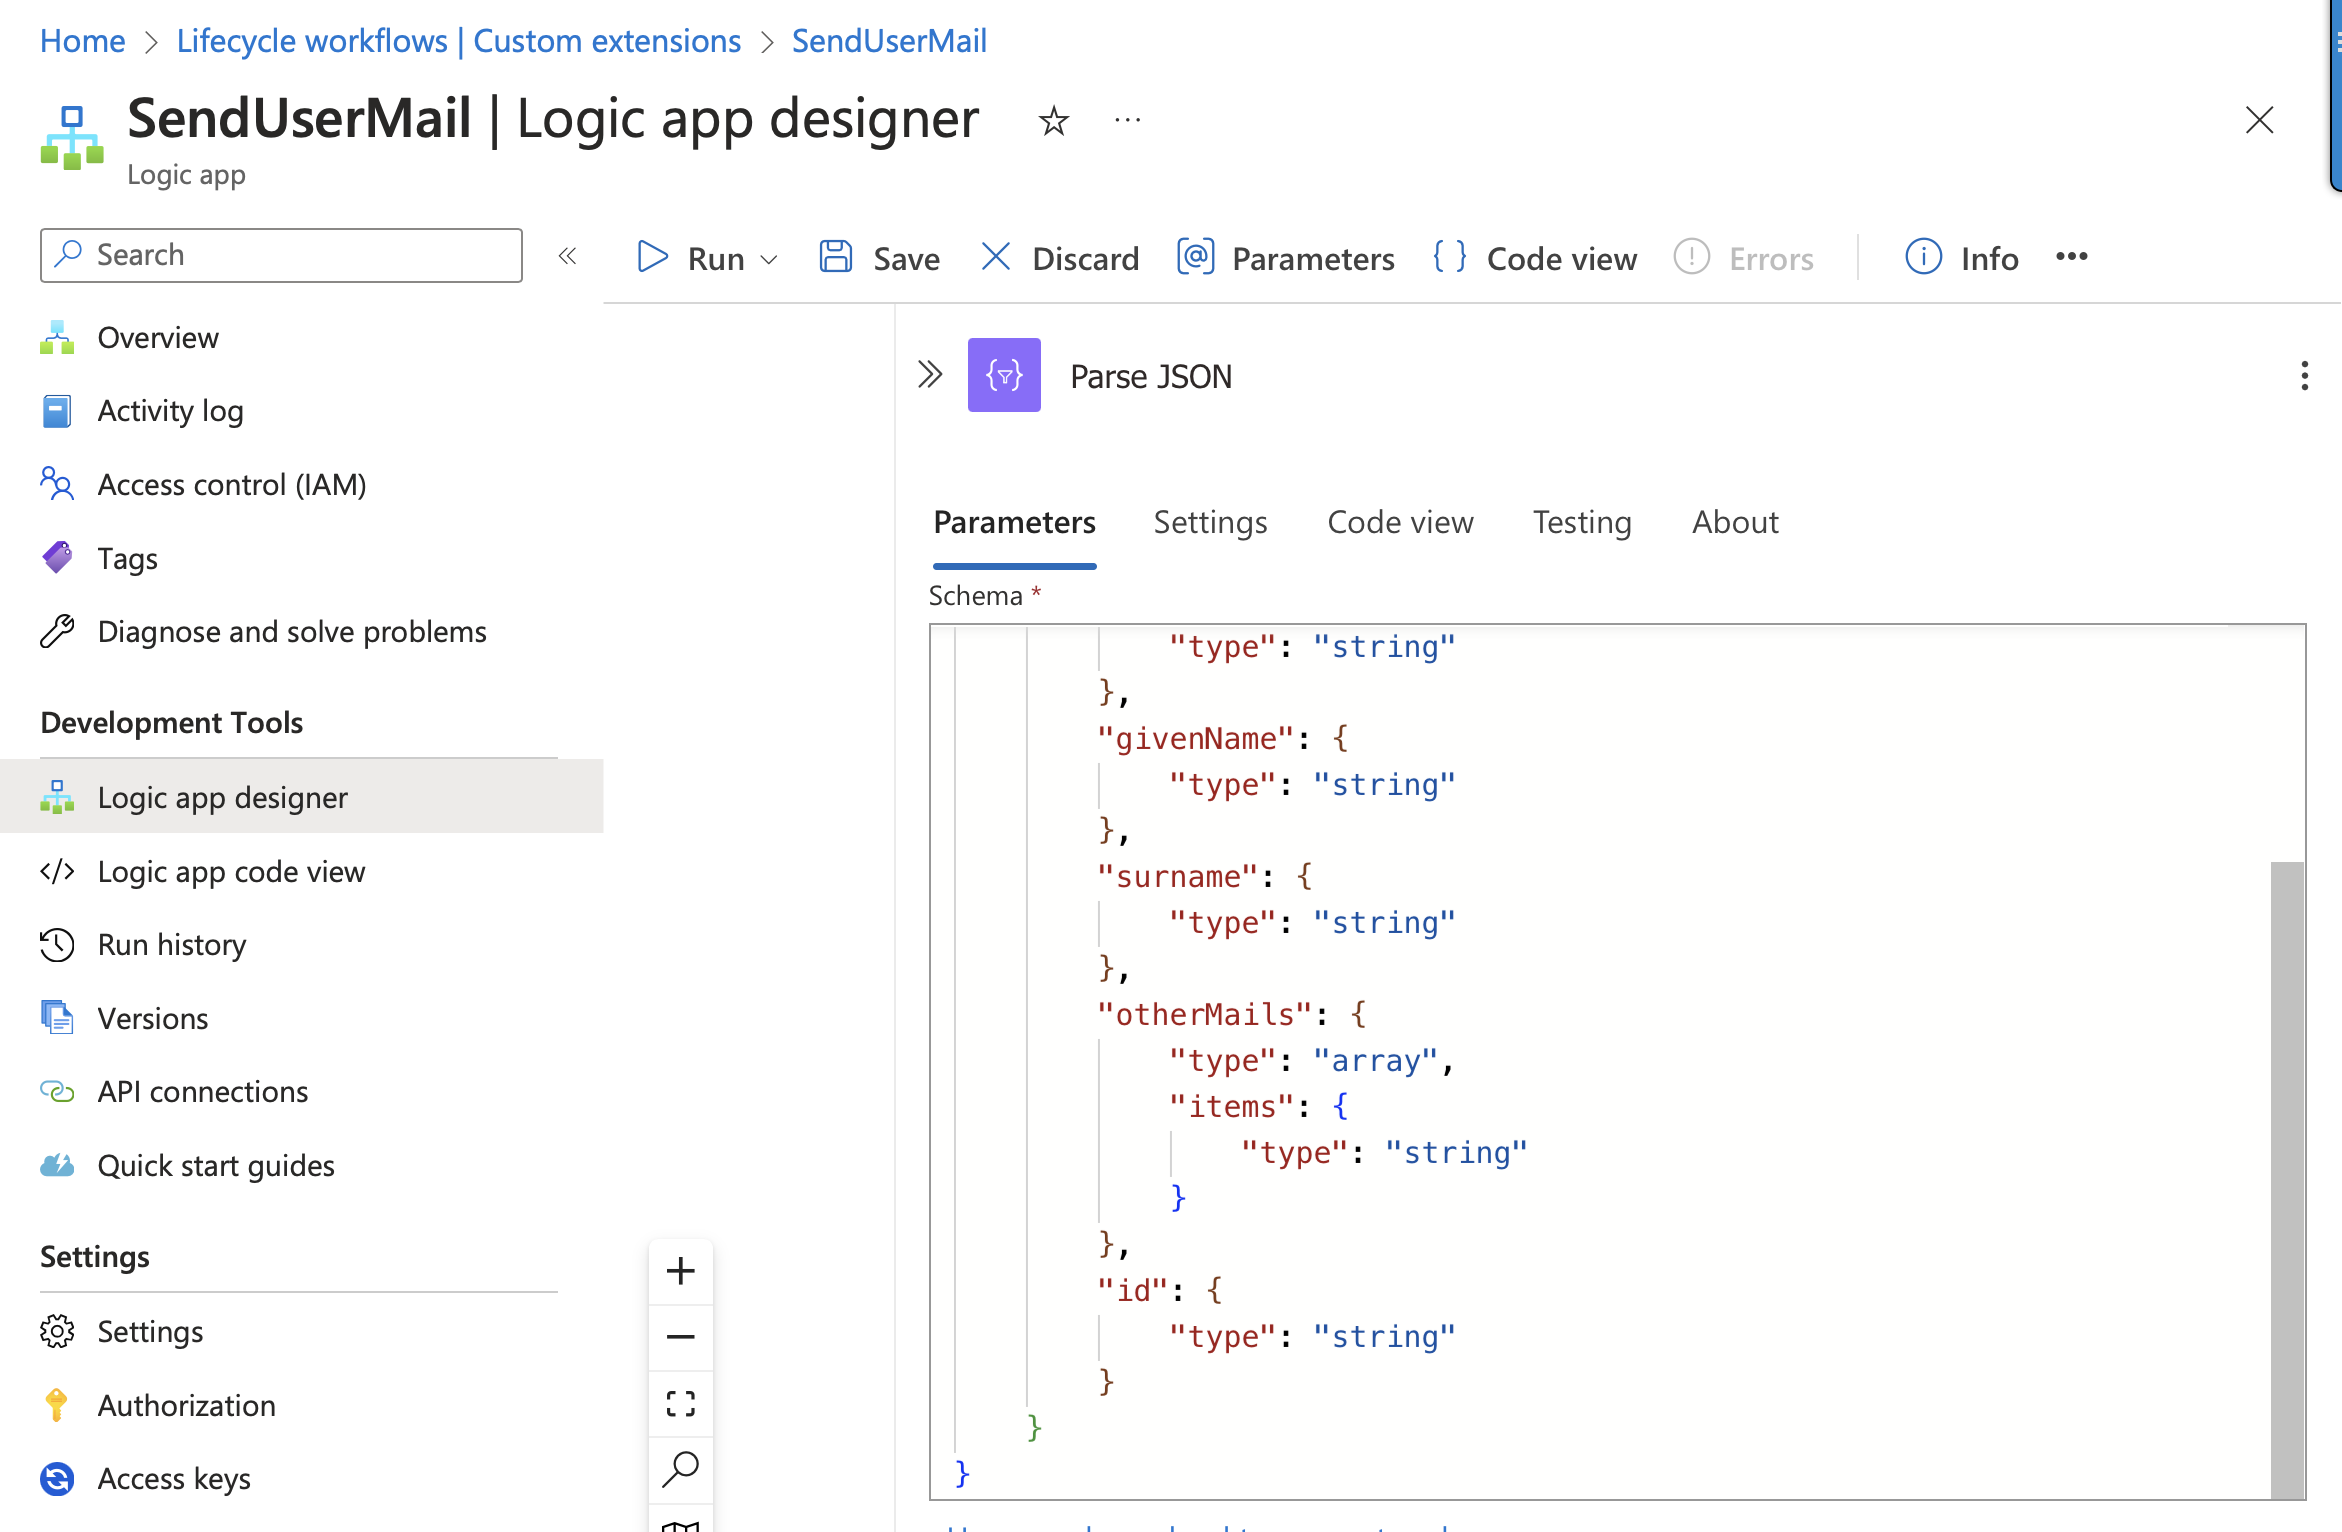 Figure 18: That’s it - the Parse JSON action is complete
In the next and final step, we create the action to send the email. An action suitable for this is “Office 365 Outlook.”
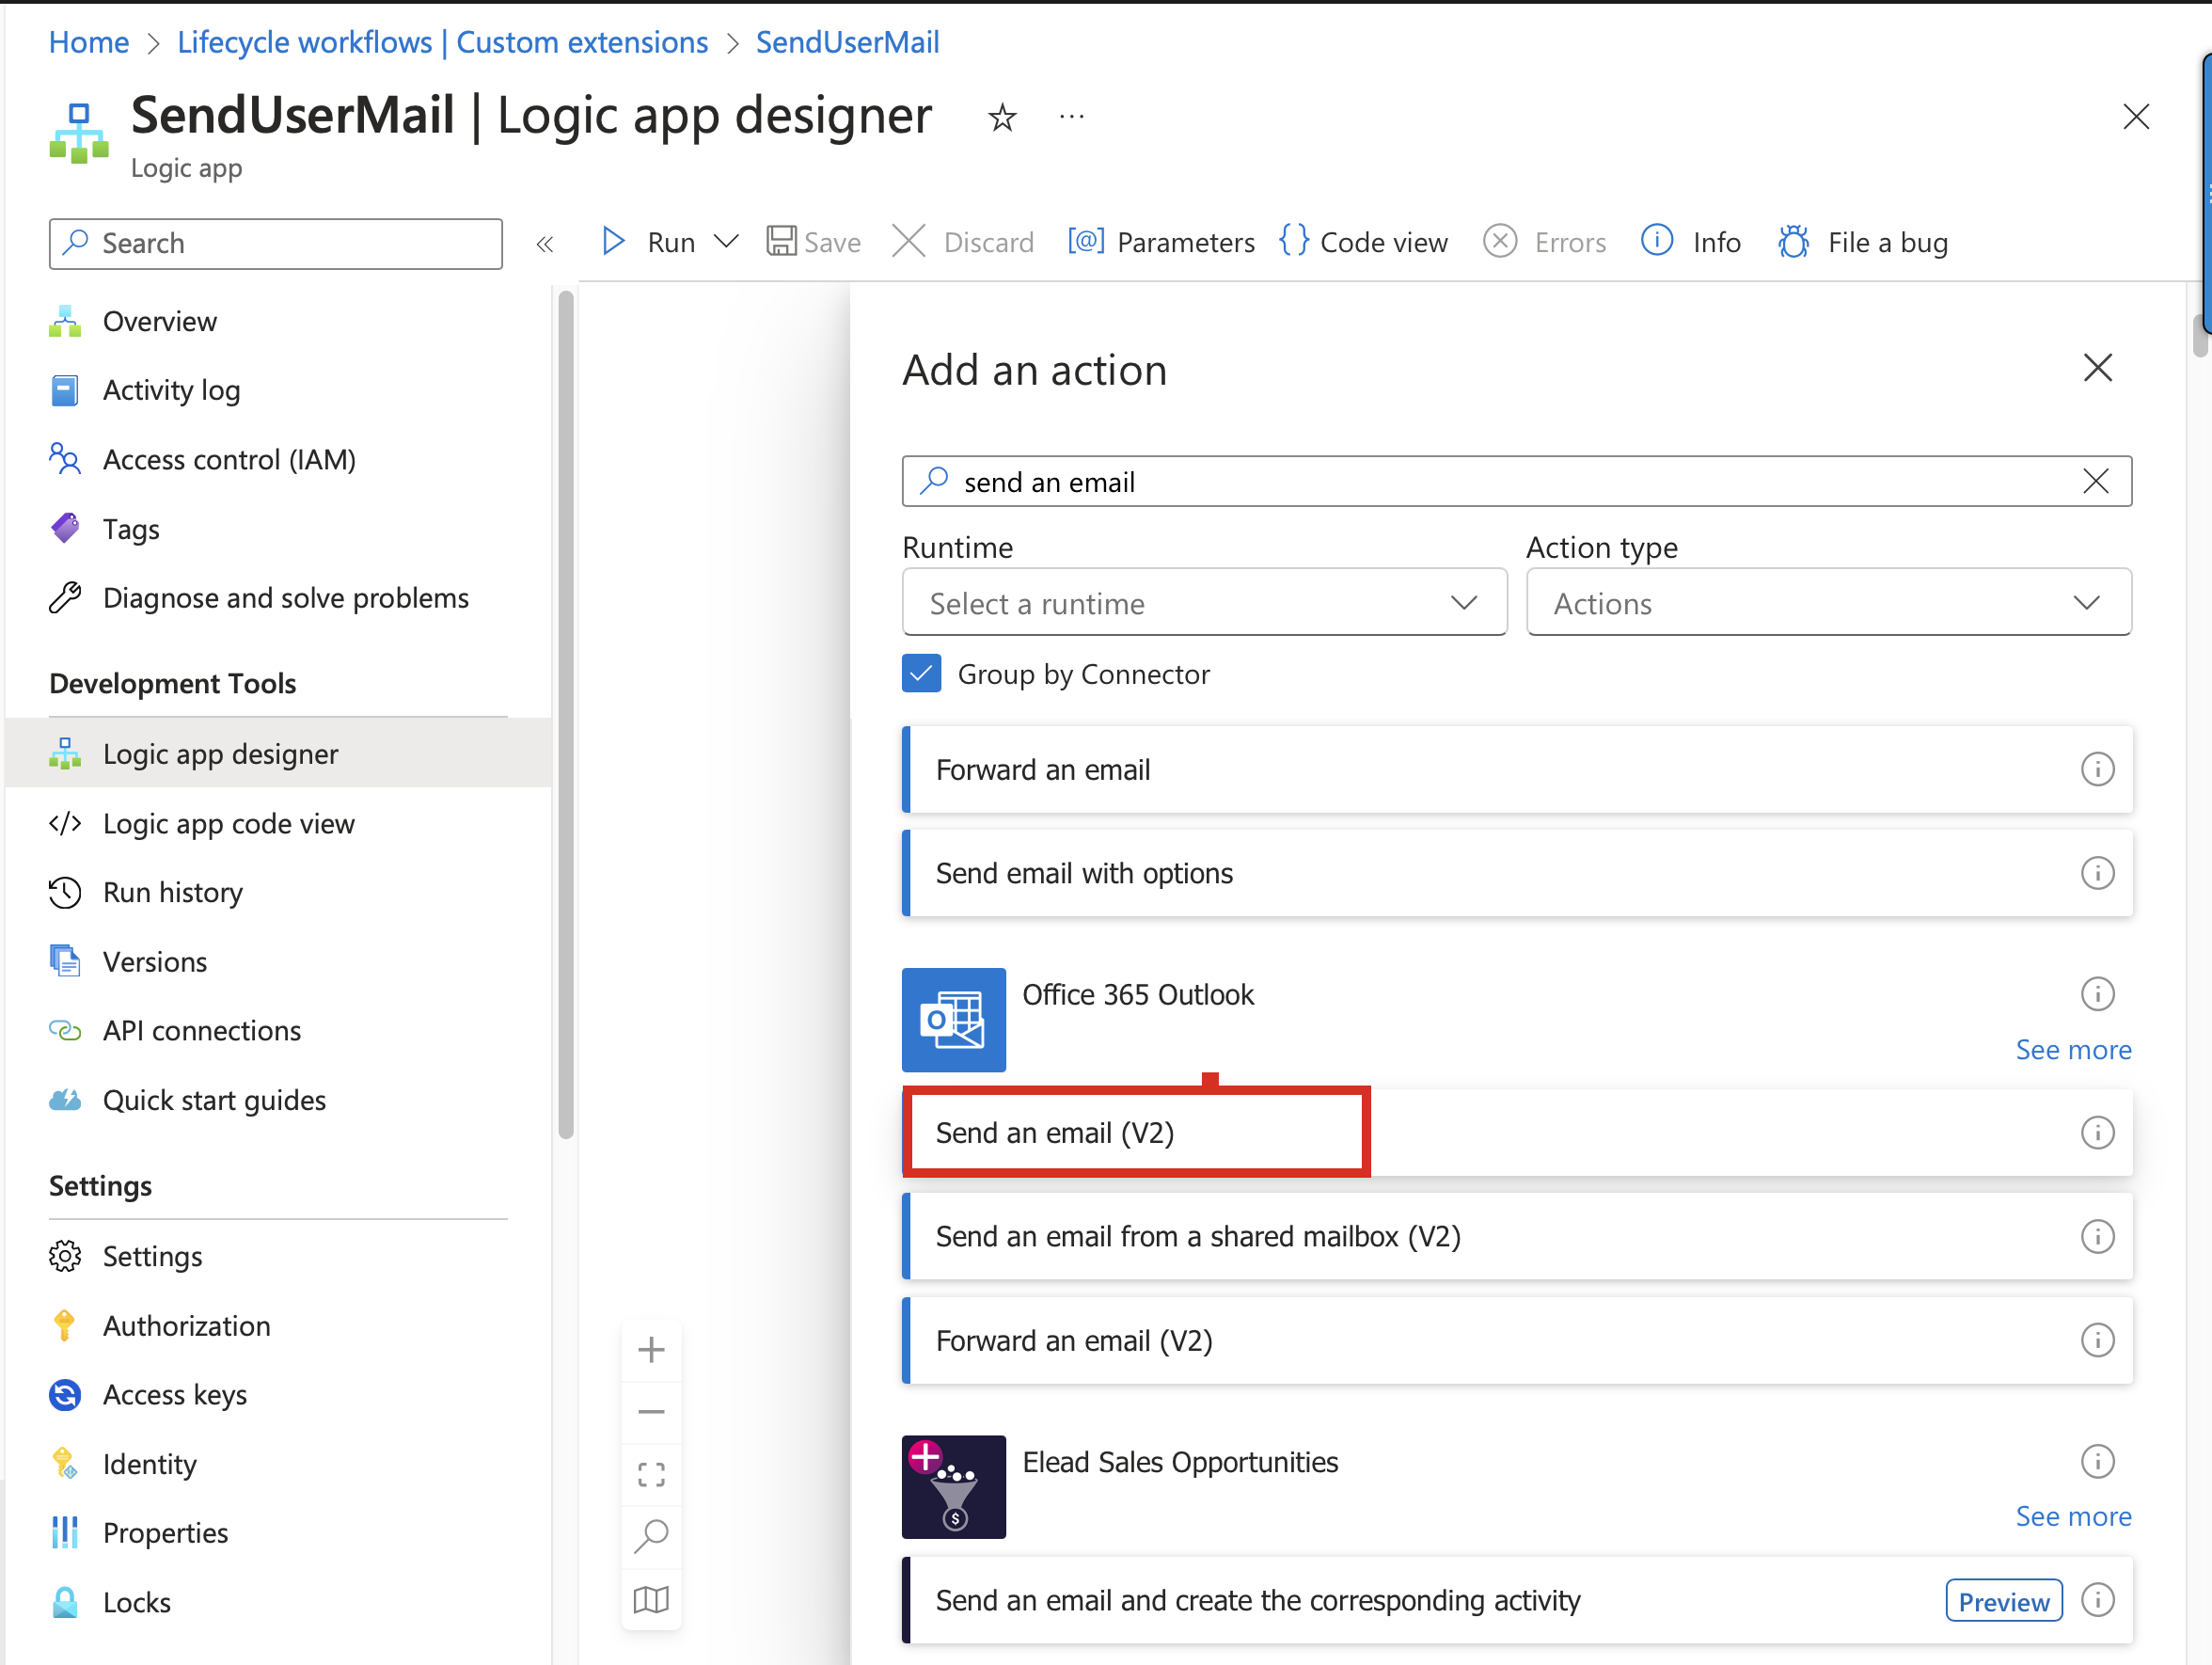 Figure 19: The heart of our Custom Extension - send an e-mail
This is where the magic happens! We populate the “Send Mail…” action with the variables and content from the Parse JSON action, which in turn is derived from the result of the Graph API call.
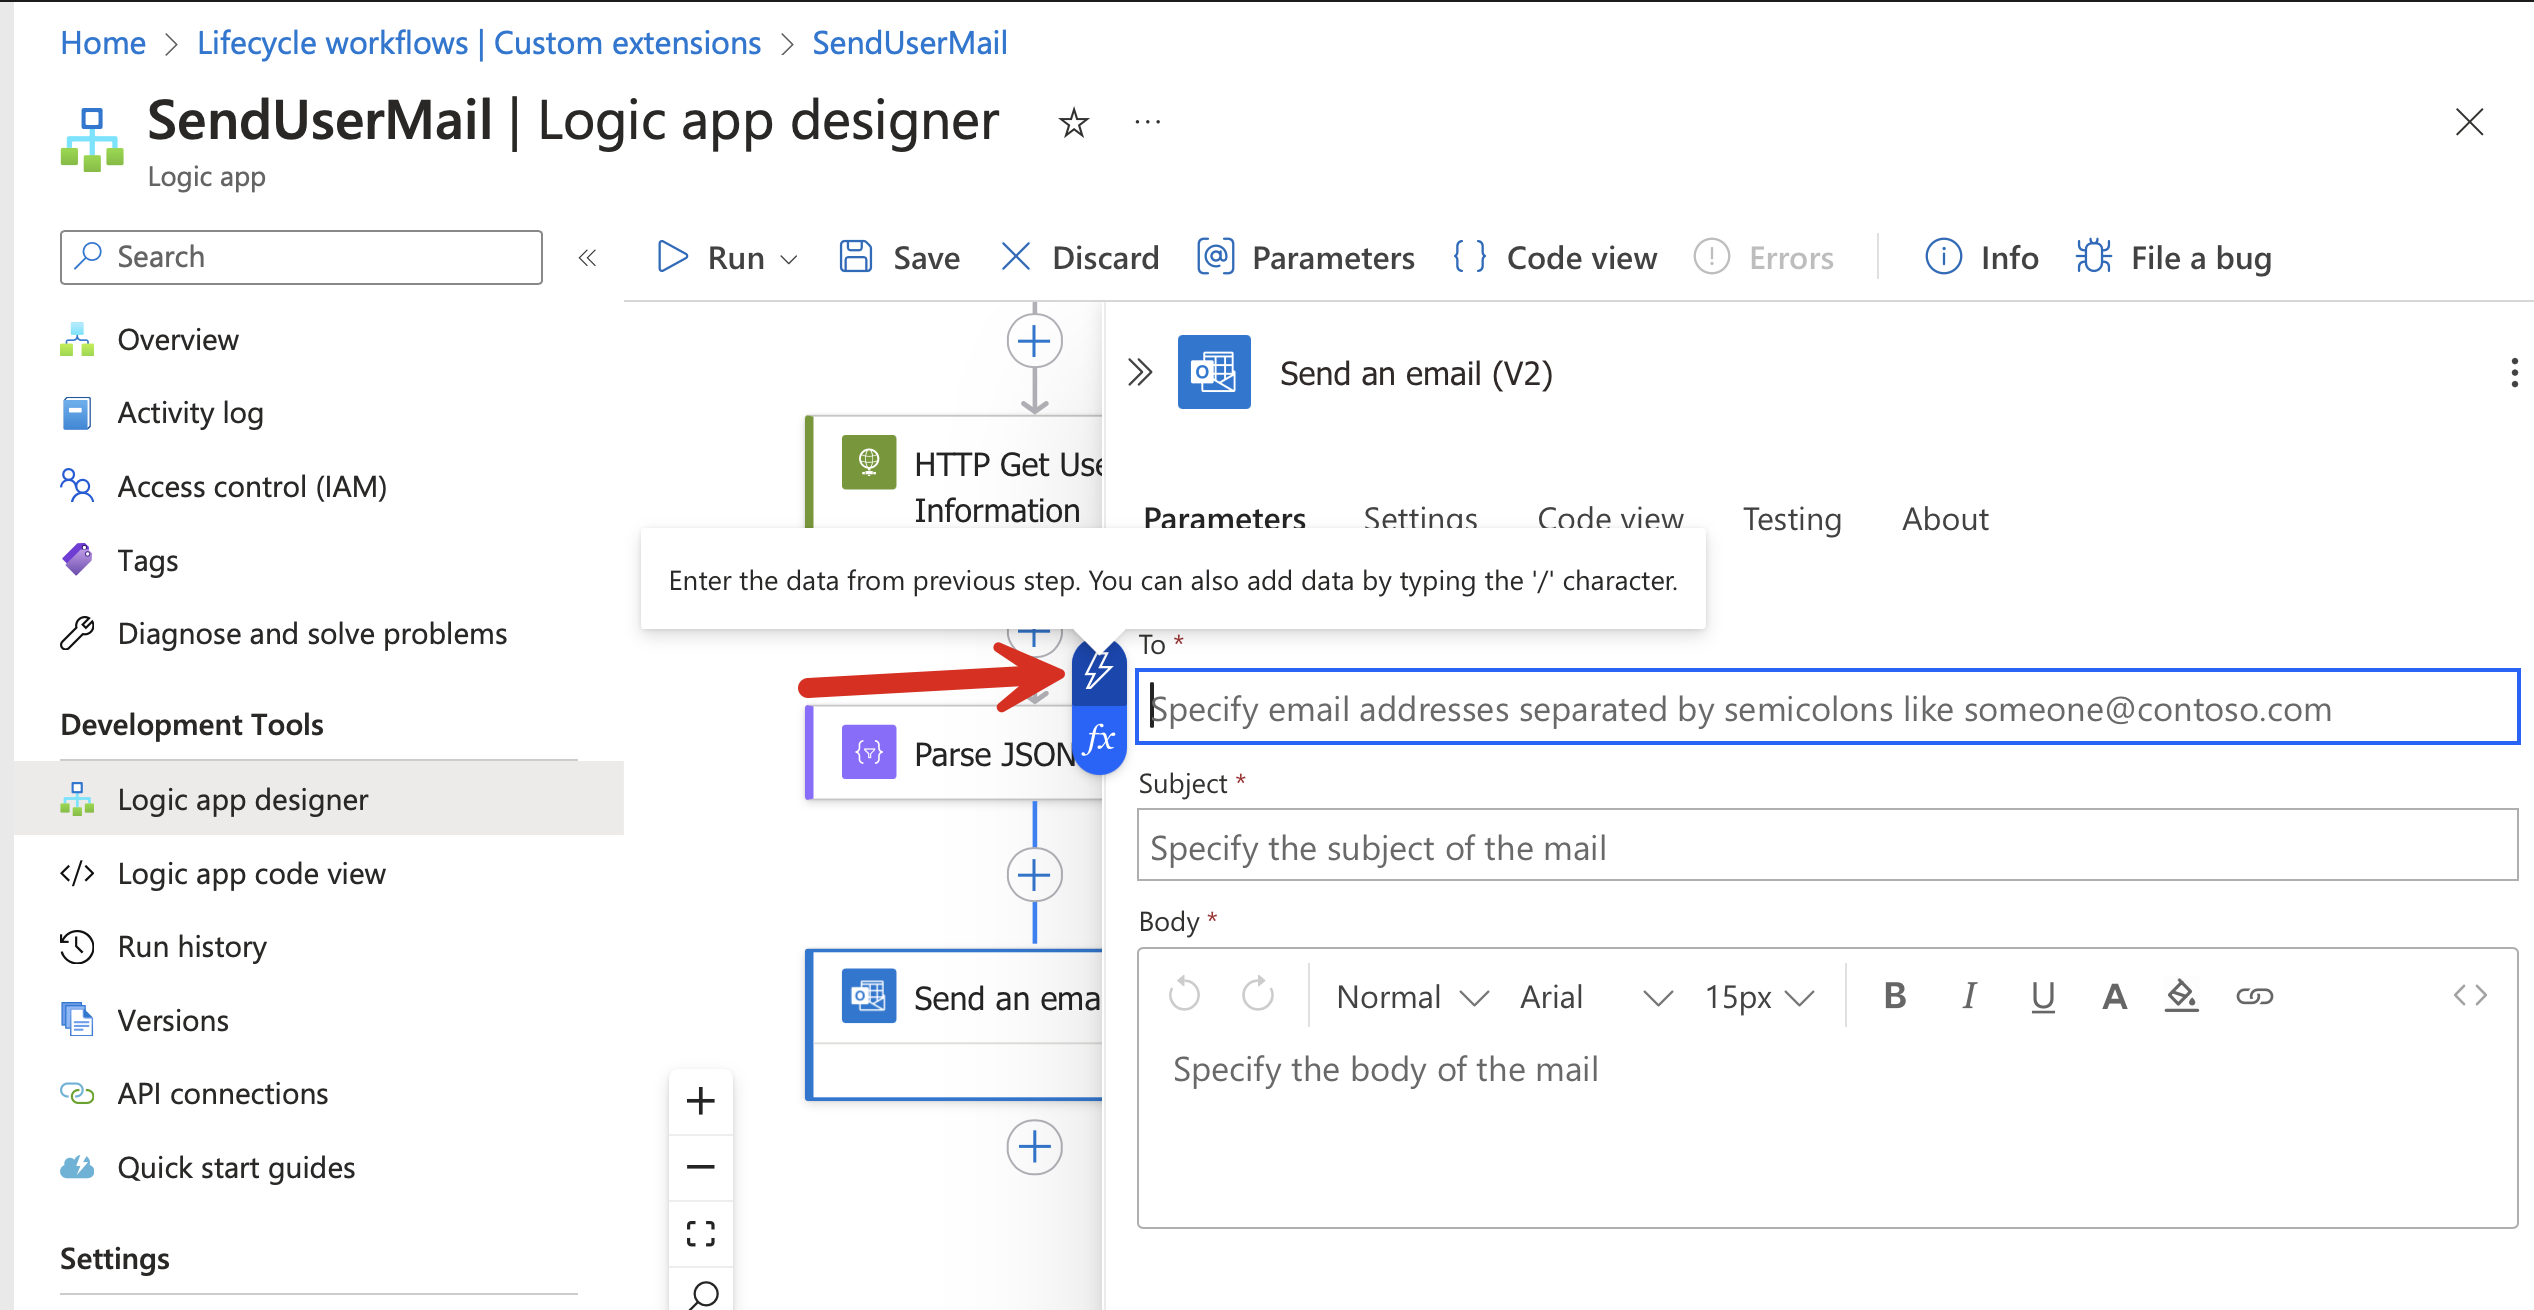 Figure 20: We use dynamic content to define the mail information for the new hire …
All the values that need to be filled can be inserted here using “Dynamic content.”
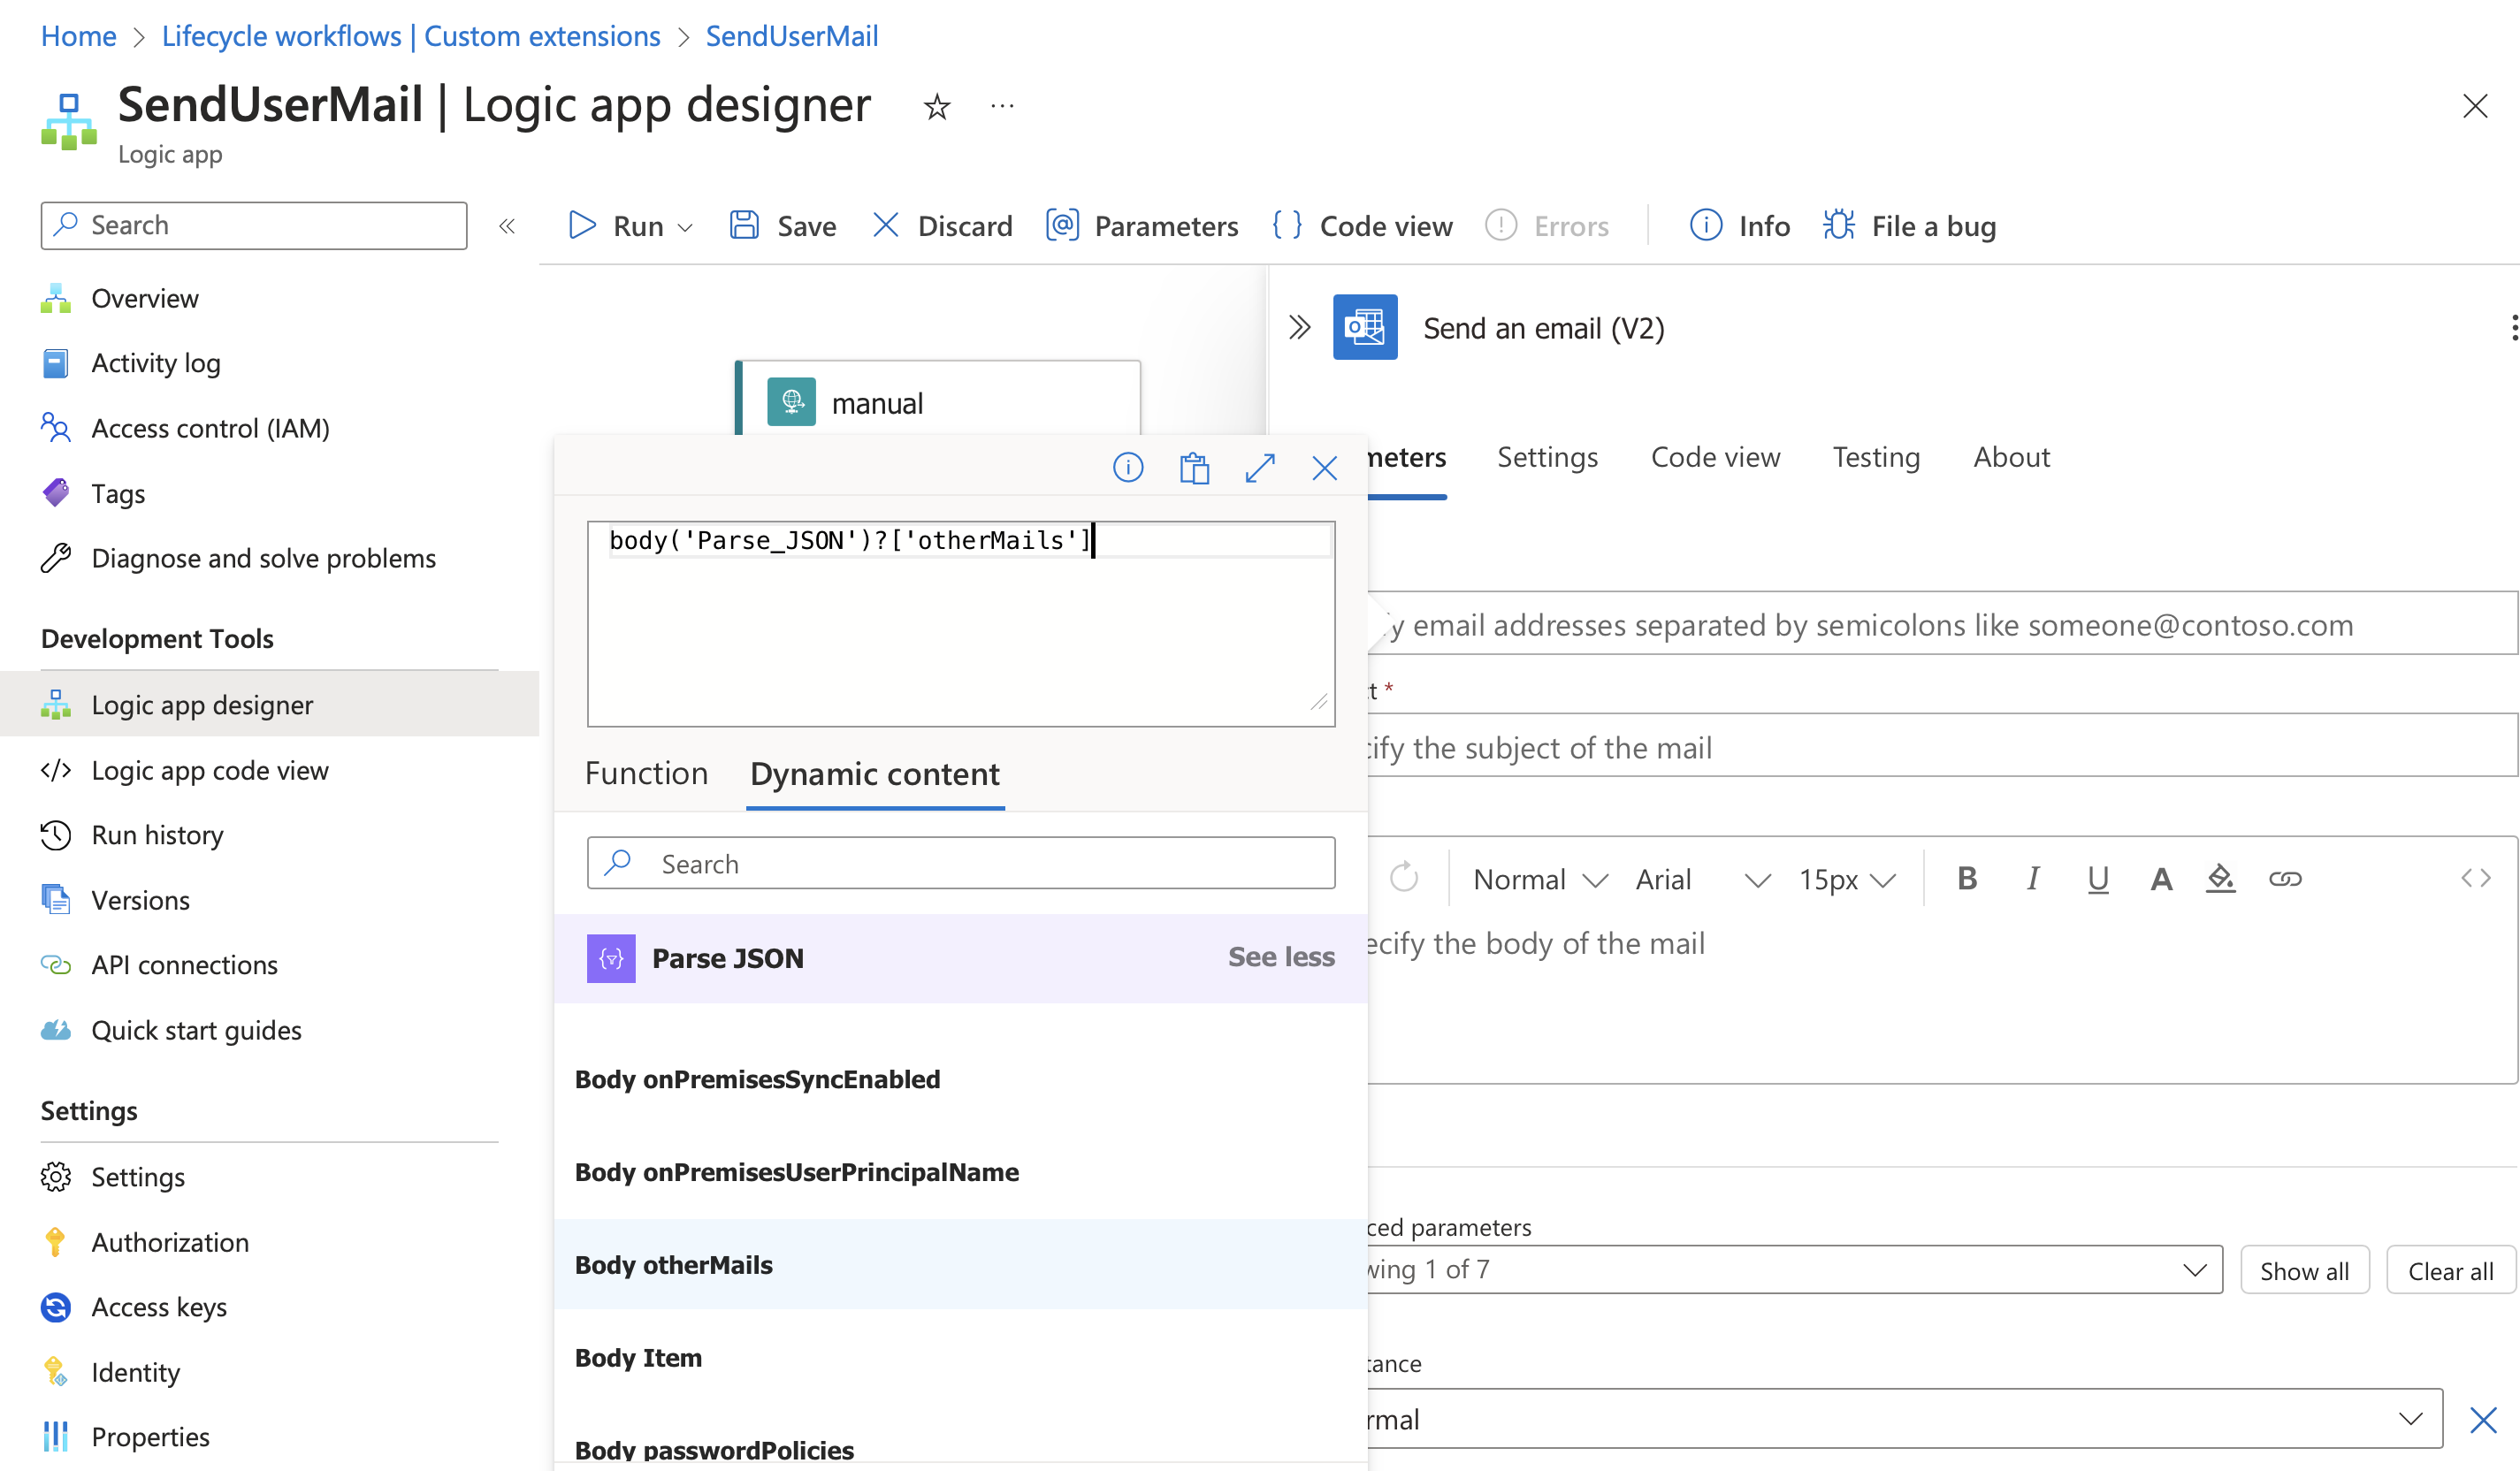 Figure 21: We get the mail-adress from the former Parse JSON
This is how we can build our email, including the body, with the desired information.
Note that through the “Dynamic Content” browser, you can select all the contents from the included actions. In our case, this is the Parse_JSON action, but you also have the option to use content from, for example, the entry element “manual” in the email, which was passed to the Logic App via the Lifecycle Workflow, depending on what you need.
In the image below, for example, you can see the Manager—this wasn’t obtained from the Graph API call, but was provided by the Lifecycle Workflow.
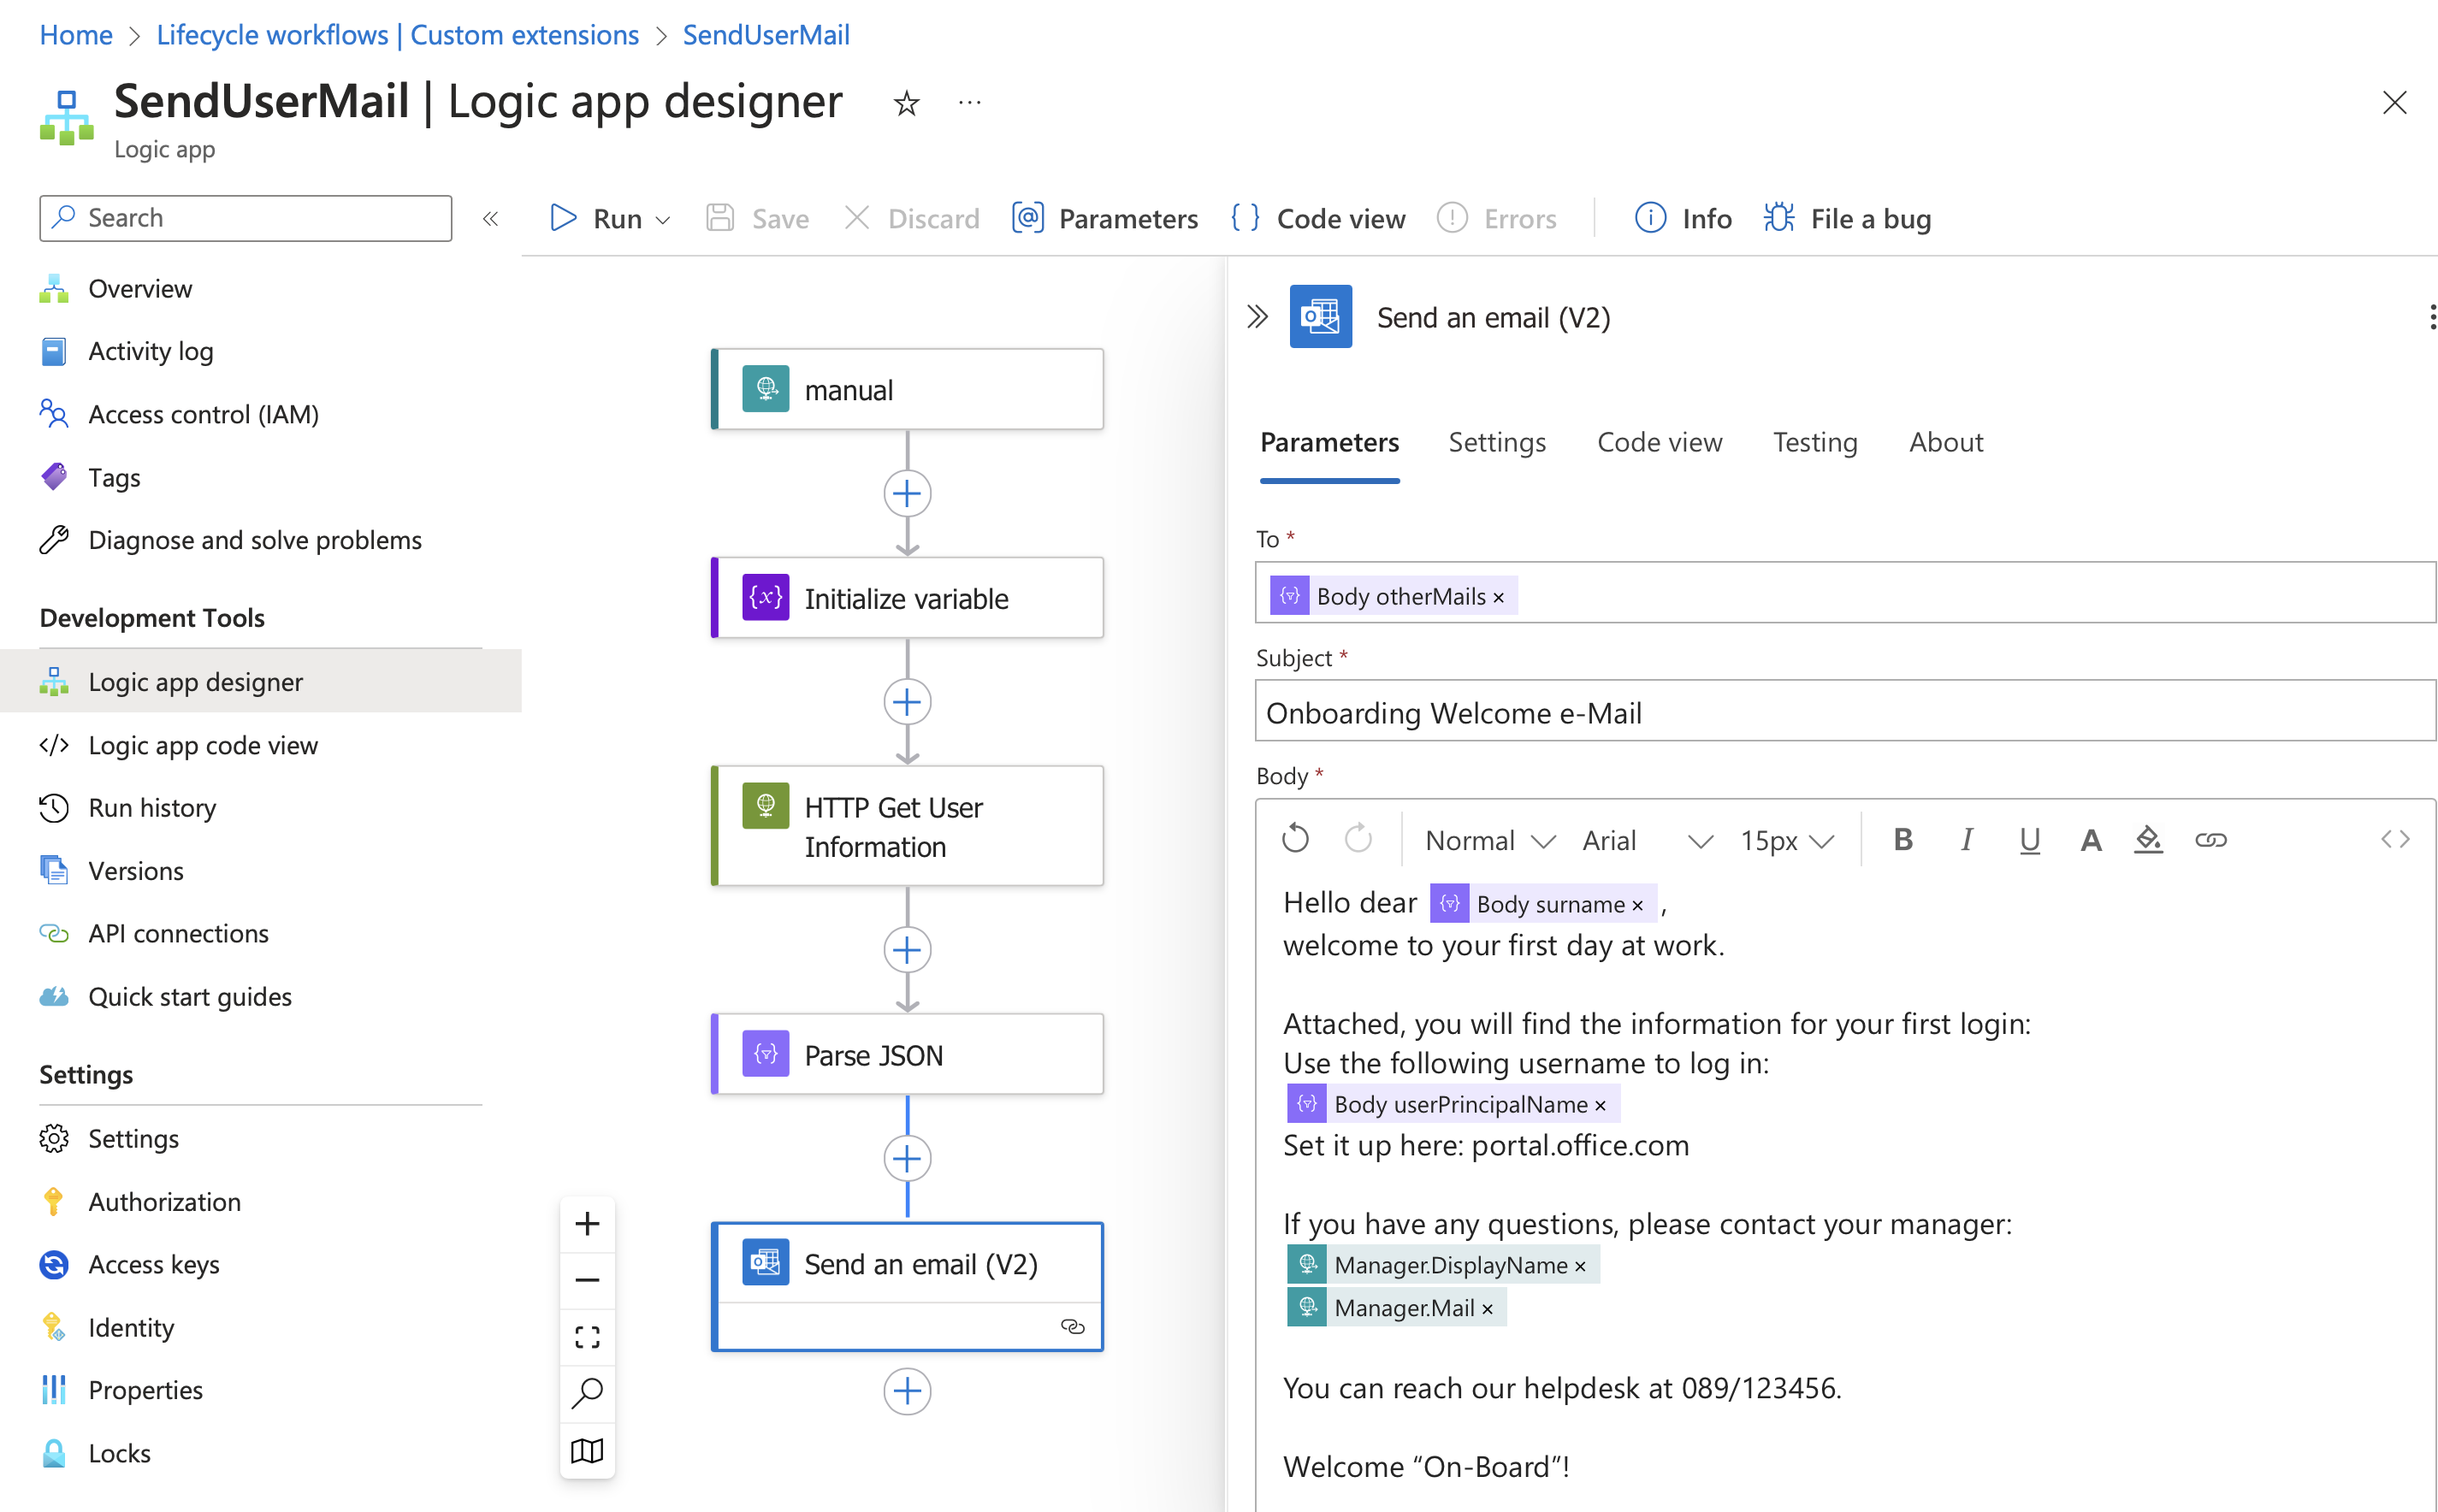 Figure 22: Our e-mail body is ready now
Finally, we provide a callback back to the calling Lifecycle Workflow. Without this action, a timeout occurs with the error message: “Callback not received within the timeout duration,” and the workflow will have a failure status, even though the email was sent correctly.
Admittedly, here we statically return “OK”, which lacks any programming logic. Ideally, you’d differentiate between success and failure, and return the respective status to the Lifecycle Workflow. However, for the purpose of illustrating our example, this approach should suffice.
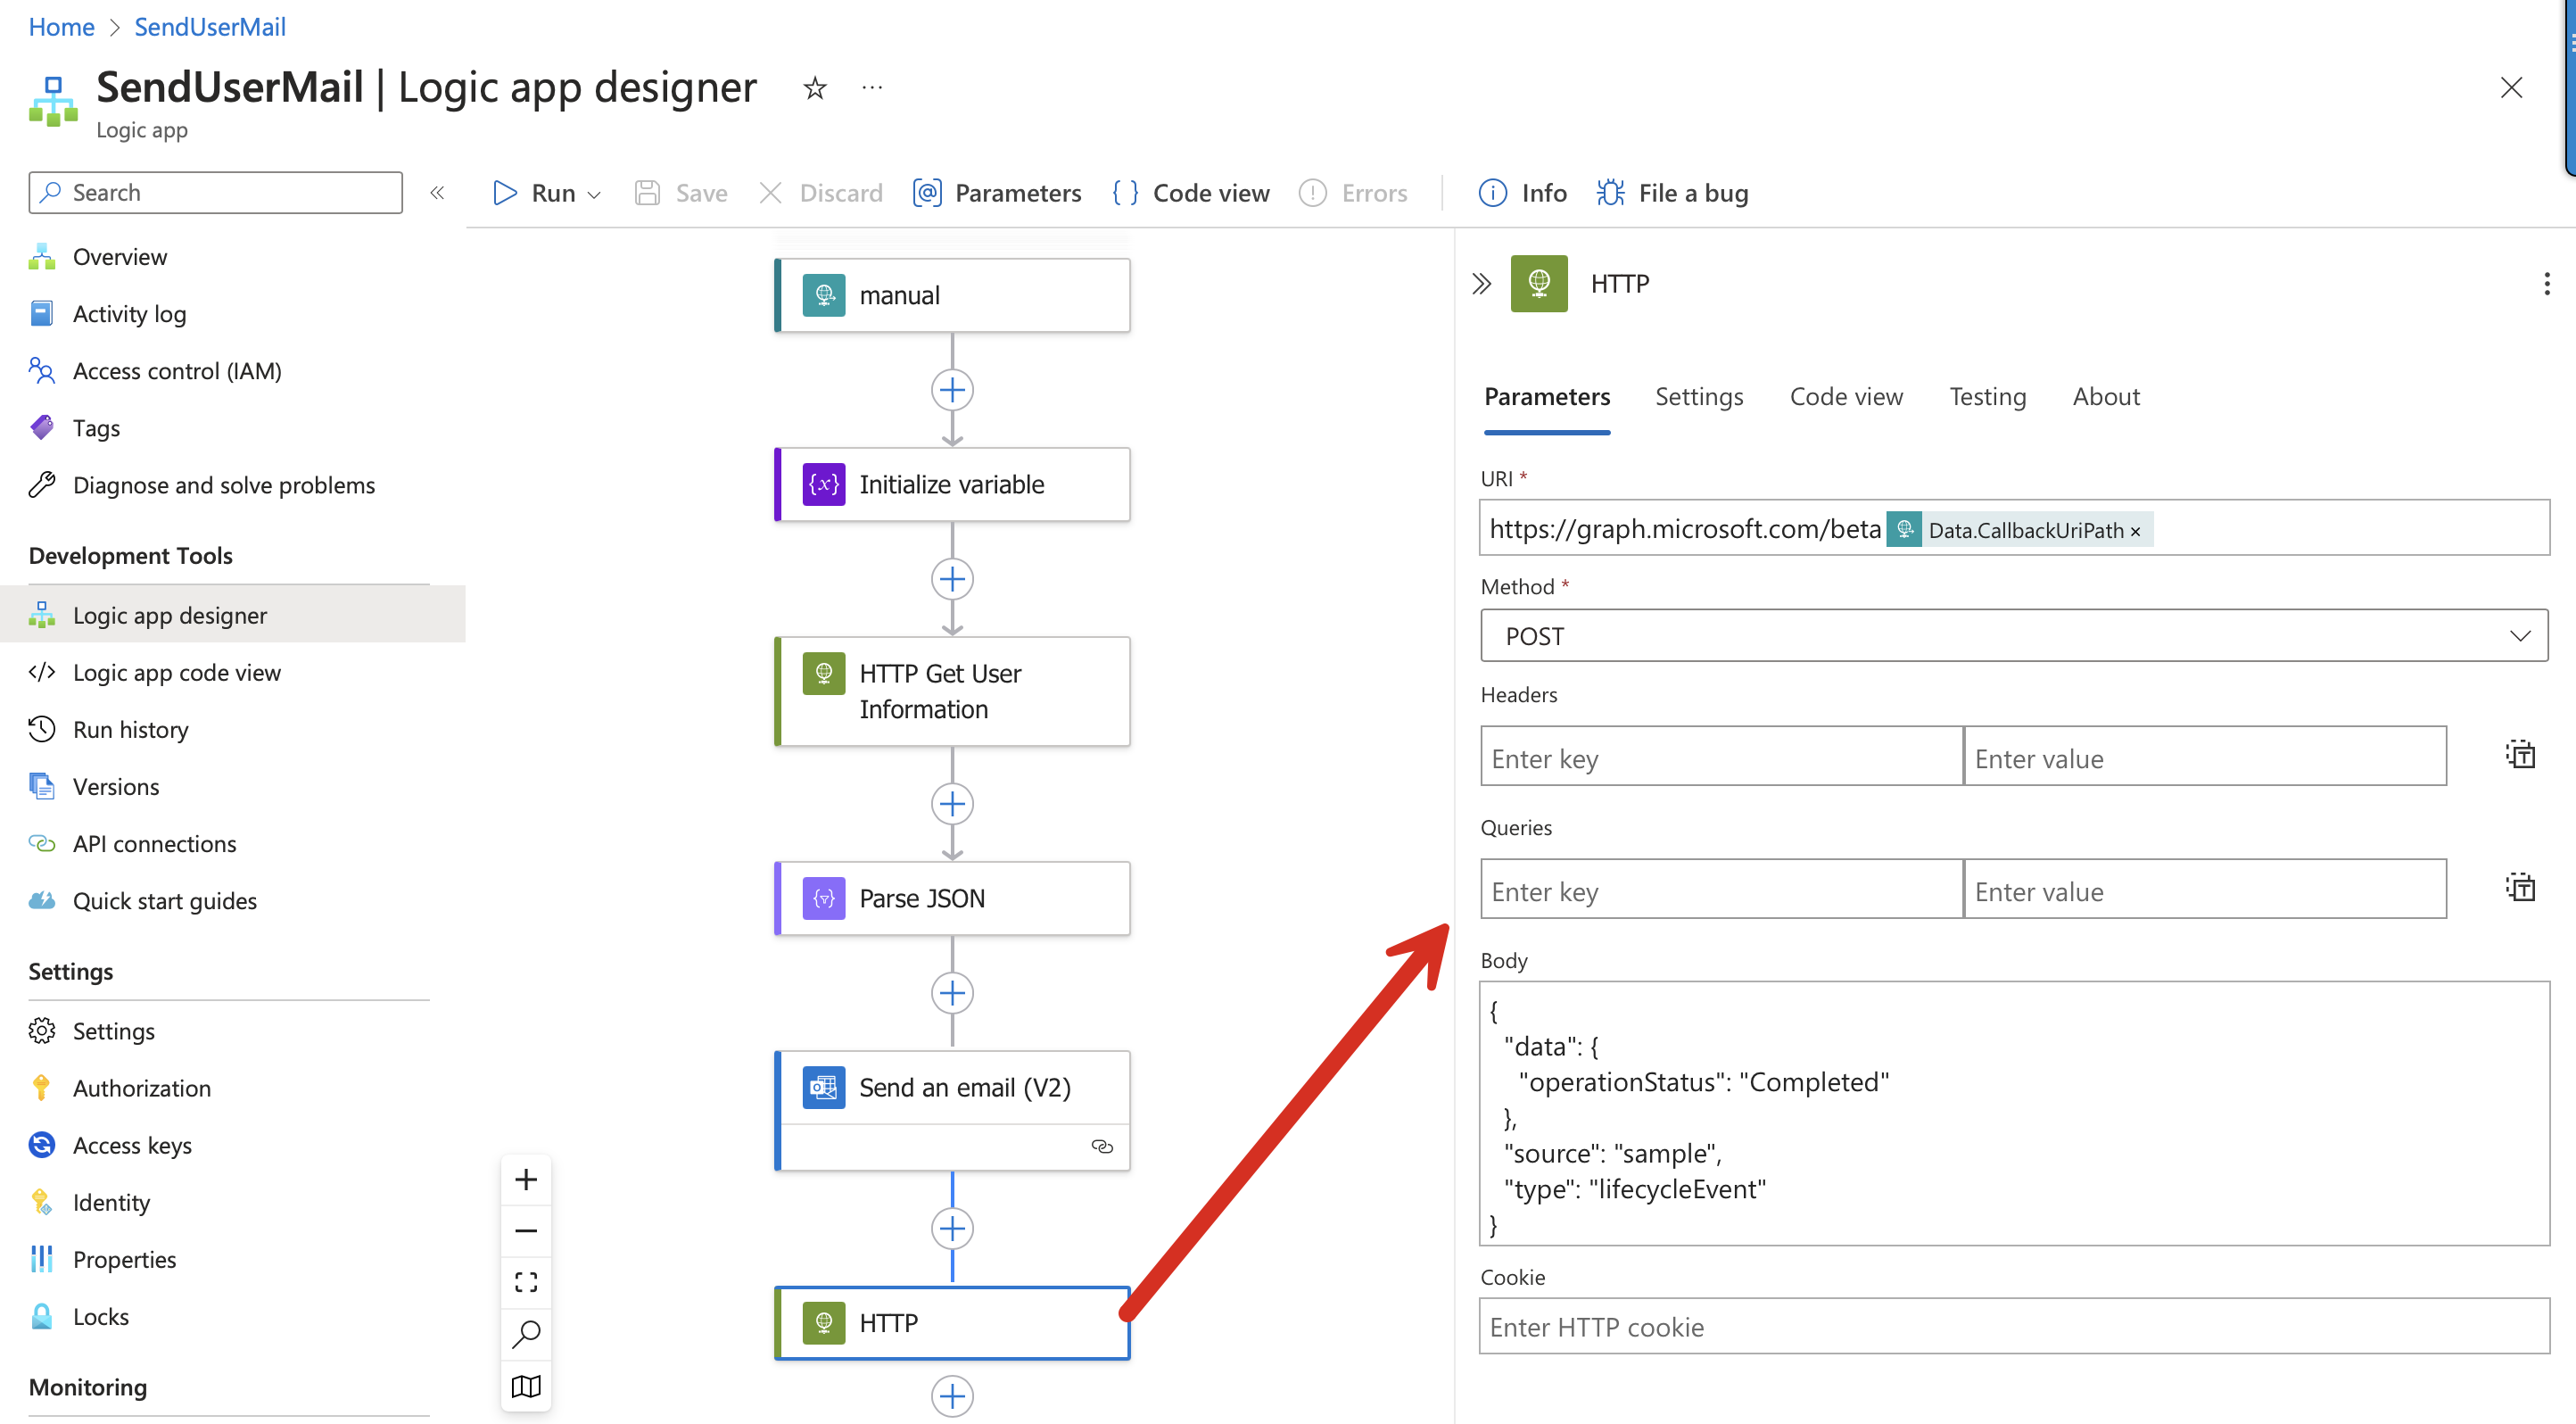 Figure 23: Last but not least - we must send back the information to the Workflow, that we are done with the task
That’s it for now. Our Custom Extension can now be used within your Lifecycle Workflows, just like any other tasks.
Additional information: This setup is like a Lego set – it can be expanded and customized as needed. Jan Bakker, in his Example (Link here), sent an SMS and included a TAP. His post was great and inspired me to build my example. Thanks for that!
But these are just ideas of what you can do with this functionality, and it is meant to inspire you to implement your own requirements using Lifecycle Workflows.
Our example email, sent to the new employee’s private email address, looks like this:

Figure 24: This is how our e-mail looks like
I hope this has helped you get a better understanding of the aspects of Lifecycle Workflows, Custom Extensions and Logic Apps.
Enjoy trying it out 😀
… and let me know, when you have hints, problems, questions, using the e-mail option below
Cover designed by vectorjuice / Freepik