Zero Trust in Azure Identity - Part 3: Conditional Access
CA - the center of Zero Trust with Identity
Conditional Access policies are a perfect functionality for best adapting logon and access to specific applications to the diverse circumstances of users. They are suitable for aggregating signals, making decisions based on them, and enforcing organizational policies. The user context is crucial for this and after evaluating the policy, access is allowed, blocked or certain criteria must be met in order for the user to reach their destination.
Unlike what you may be used to in other policies, the design of CA policies is very complex and the administrator determines the level of complexity. It starts with a string of if statements that evaluate signals mentioned earlier. These can be simple group memberships of the user up to the combination of device platforms(iOS, Windows) or a location from which the user started his access attempt. In the editor, the target for the policy is defined in the “Assignments” section. In the “Access controls” section, it is possible to describe what should happen in a positive or negative sense. It is also possible to evaluate signals from other areas of the Azure platform here, for example, the logon risk from Identity Protection can be included in the conditions. If the user’s access represents a medium or high logon risk, access to sensitive applications may no longer be permitted or only by using MFA.
Conditional access example
Let’s look at an example to illustrate the power of the policy. Let’s say you want to allow access to Azure Portal for administrators only when they are accessing from the corporate location and when the machine being used is a hybrid device mounted in Azure AD. Navigate to the conditional access policies section. You can find the CA policies in the Azure Active directory dashboard and there in the “Manage” and “Security” section. If you want to make it quick, you can also search for “Conditional Access” in the resources search box at the top of the Azure portal and you’ll get right to it. You may well have Baseline Policies in your policy list, which are a legacy feature from the early days of policies. Make sure that these are not activated, they will be removed from the portal “soon”. Below that, all defined policies are displayed, with an indication if they are active. Here it becomes quickly apparent that especially with the configuration variety an overview of the contents of the policies is desirable. Who wants to open each policy to see what its purpose is. For this purpose, a well thought-out naming concept is helpful, with which you can recognize the purpose in the list on the basis of the names. Microsoft has some design recommendations ready, among other things how the name concept can look like, so that you can keep the overview (https://docs.microsoft.com/de-de/azure/active-directory/conditional-access/plan-conditional-access). Since we are referring to familiar sites with our policy, they must exist. Named locations can be edited in the editor in the administration area on the left. No matter if locations are used within the guidelines, it is recommended to store due subnets of the known location. This way you always have everything ready for all cases.
Policy parameters
In our example the policy is named: “CA03-AzurePortal: Block for all Security Roles when Admin not On-Prem AND hybrid Client”. Which actually says everything without the administrator having to look at the policy. Creating the policy is self-explanatory in the editor. In the assignments we leave users and groups blank and select all the roles we want for the scenario, “Global Administrator”, “Security Administrator”, etc. At this point it is especially important that in the “Exclude” tab of the users and groups we leave the Break Glass accounts mentioned above, as these must be excluded. Next, we go to “Cloud apps …” and select Azure Portal from the list of registered apps. For the conditions, we focus on the sites and here it is important to select “All sites” under “Include” and for “Exclude” we select “All trusted sites”. Since our policy denies access, we exclude trusted location from the policy. The policy can be further refined and in the conditions these can be extended with the criterion device status and “hybrid device”.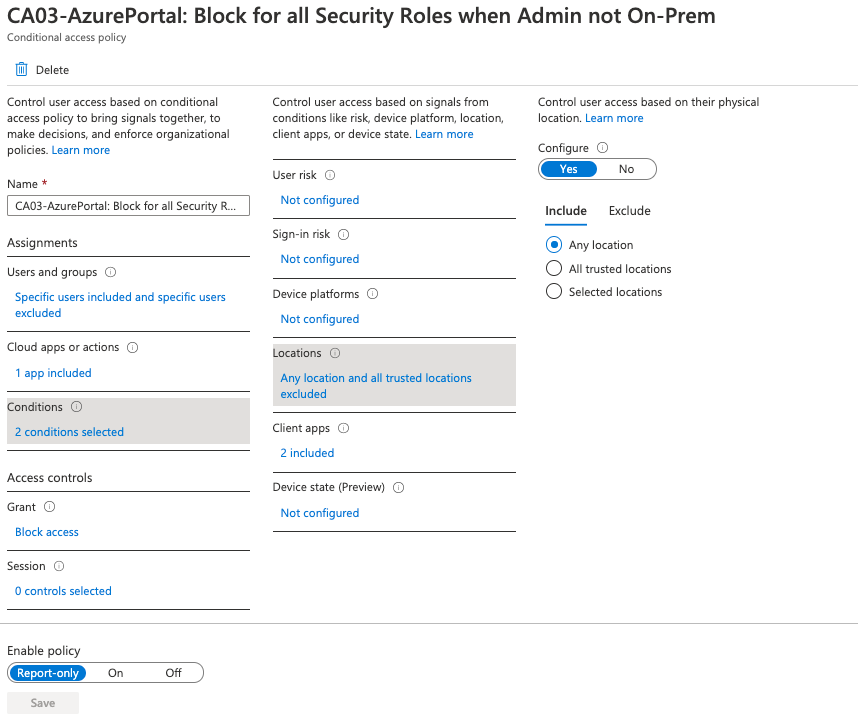
Test before deploy
Not every administrator has a test environment ready to test the impact of the policies. Or often the labs are not as close to production to develop the policies there. Since working on policies is open-heart surgery in production, there are some tools to help with the startup. For example, when activating the policy, the “Report Only” option is useful. This means that the policy does nothing more than write an entry in the login log. So the policy is armed in production, but does not do anything except the log entry.
Furthermore the function “What If” should be pointed out. Here you have the possibility to simulate a login or an access. In a list the applied policies and their result are shown.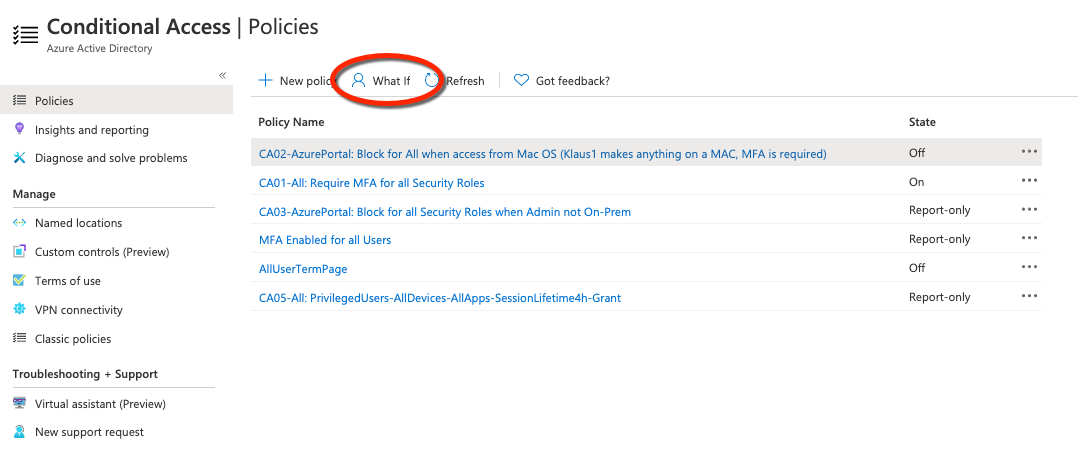
These tools help to avoid that the administrator locks out. If this should happen nevertheless times, there is the possibility to log in with a Break Glass account, provided it is deposited with the guidelines in the “Excludes”.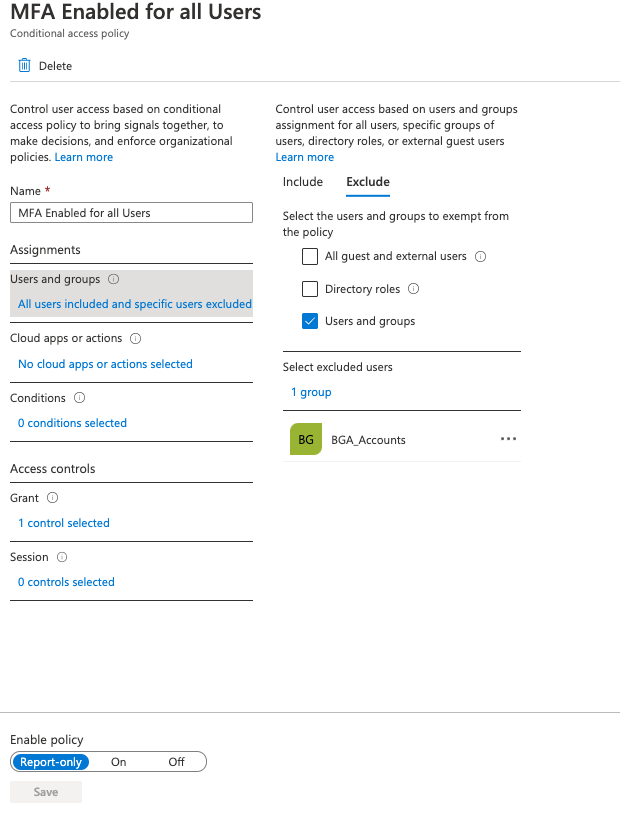
Cover image by Gerd Altmann from Pixabay